
Issues are tasks or problems tracked in Paramify. They form the basis of your POA&M (Plan of Action and Milestones, also referred to as POA&Ms). Issues are managed in the Monitoring navigation menu. To access them, navigate to Monitoring > Issues within a program.
Paramify gives you multiple ways to create and manage issues. Choose whichever fits your workflow:
- Manual — Create issues directly in the Paramify UI with full control over every field.
- Integrations — Sync issues automatically from tools like Jira so your engineering and compliance workflows stay aligned.
- Paramify API — Programmatically create, update, and close issues to integrate Paramify into your CI/CD pipelines, vulnerability scanners, or custom tooling.
This flexibility means you can start with manual entry and scale into automated pipelines as your program matures, without changing how your POA&M is generated.
The first step is understanding where your issues live and how they are organized. The Issues Dashboard gives you a centralized view of everything in progress.
Issues Dashboard
The Issues Dashboard shows the number of issues opened and closed, along with all of the Issues. You can see the due dates and the criticality of the Issues as well.
FedRAMP 20x has categorized Potential Impact Ratings as follows:
| N1 | Negligible | Exploitation would have almost no adverse effect on the agency. |
| N2 | Limited | Exploitation would have a minor or limited adverse effect. |
| N3 | Significant | Exploitation would have a serious adverse effect on operations or assets. |
| N4 | Severe | Exploitation would have a grave or severe adverse effect. |
| N5 | Catastrophic | Exploitation would have a catastrophic effect (e.g., total data loss/loss of life). |
They are categorized in Paramify by the following Potential Impact Ratings(N1-N5) from FedRAMP 20x:
- (N1): Chill 20x
- (N2): Low
- (N3): Moderate
- (N4): High
- (N5): Critical
Now that you know how issues are displayed and categorized, the next step is creating one. Paramify supports manual issue creation directly from the UI.
Creating an Issue (Mannual)
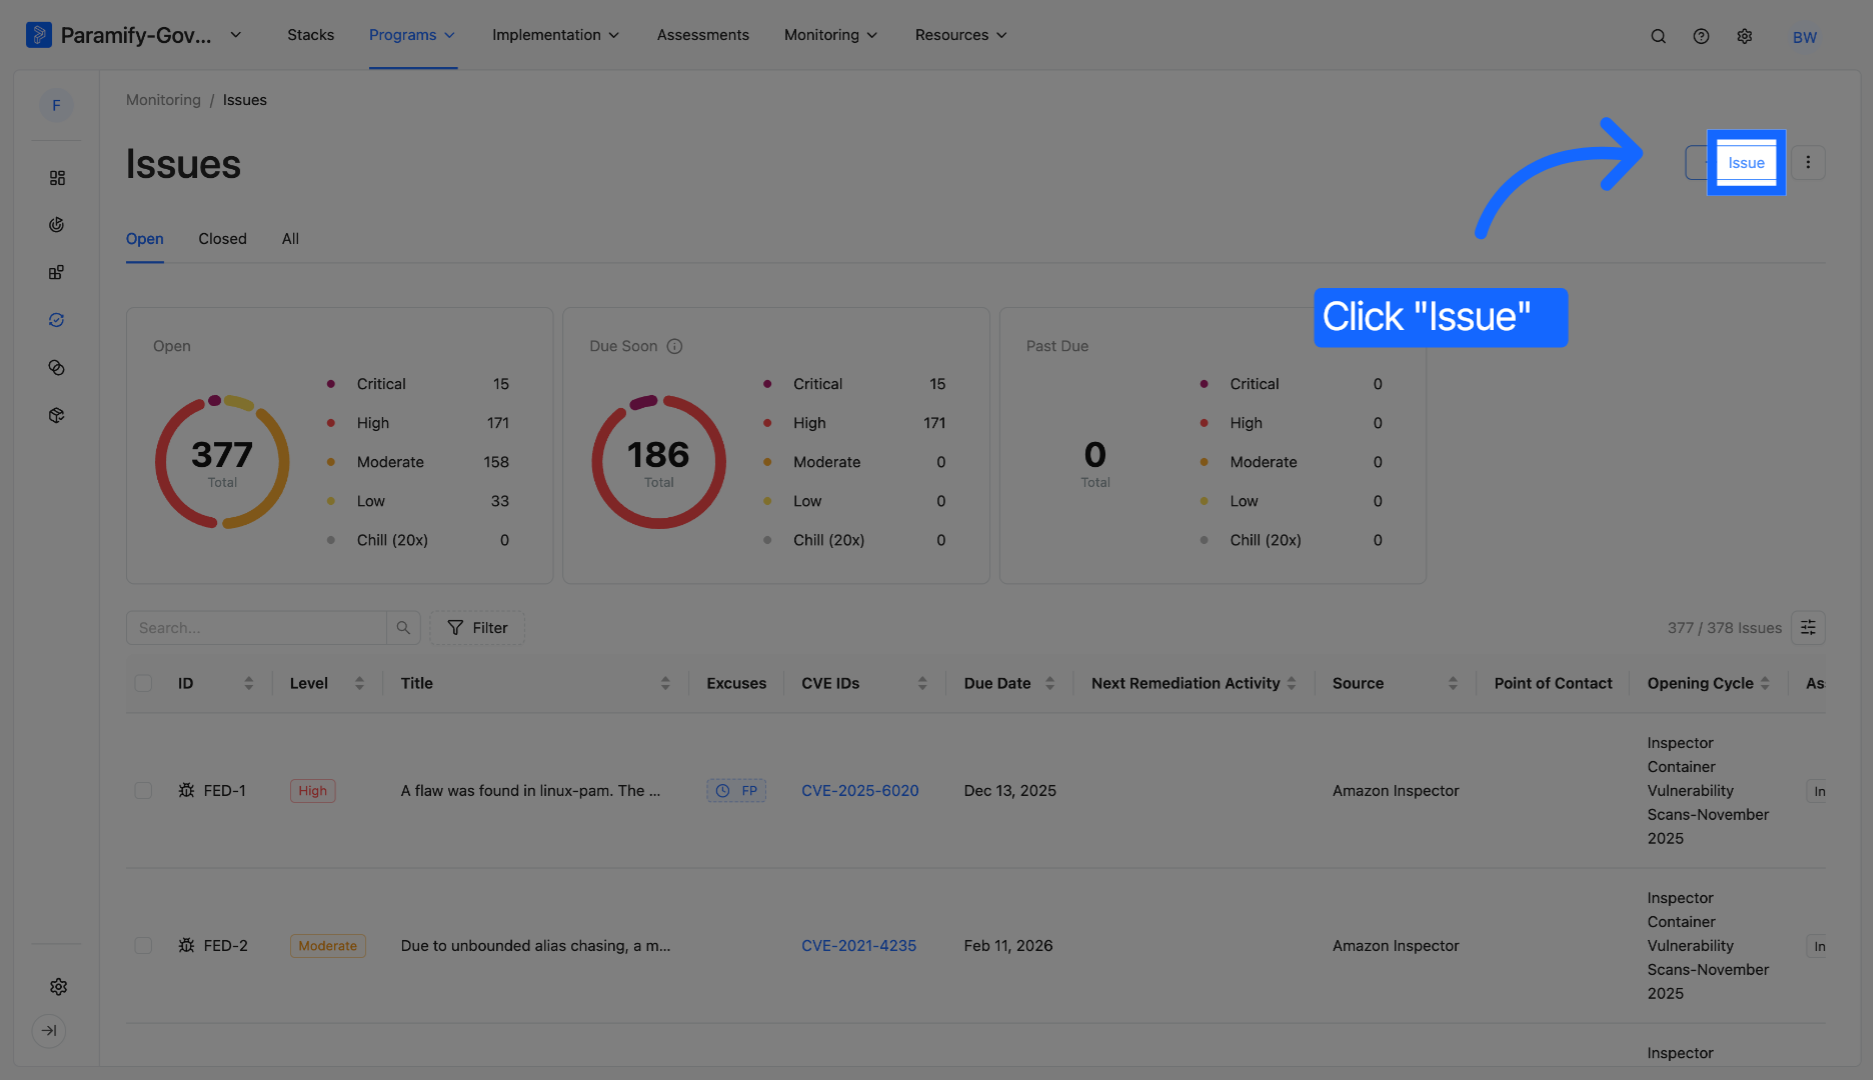
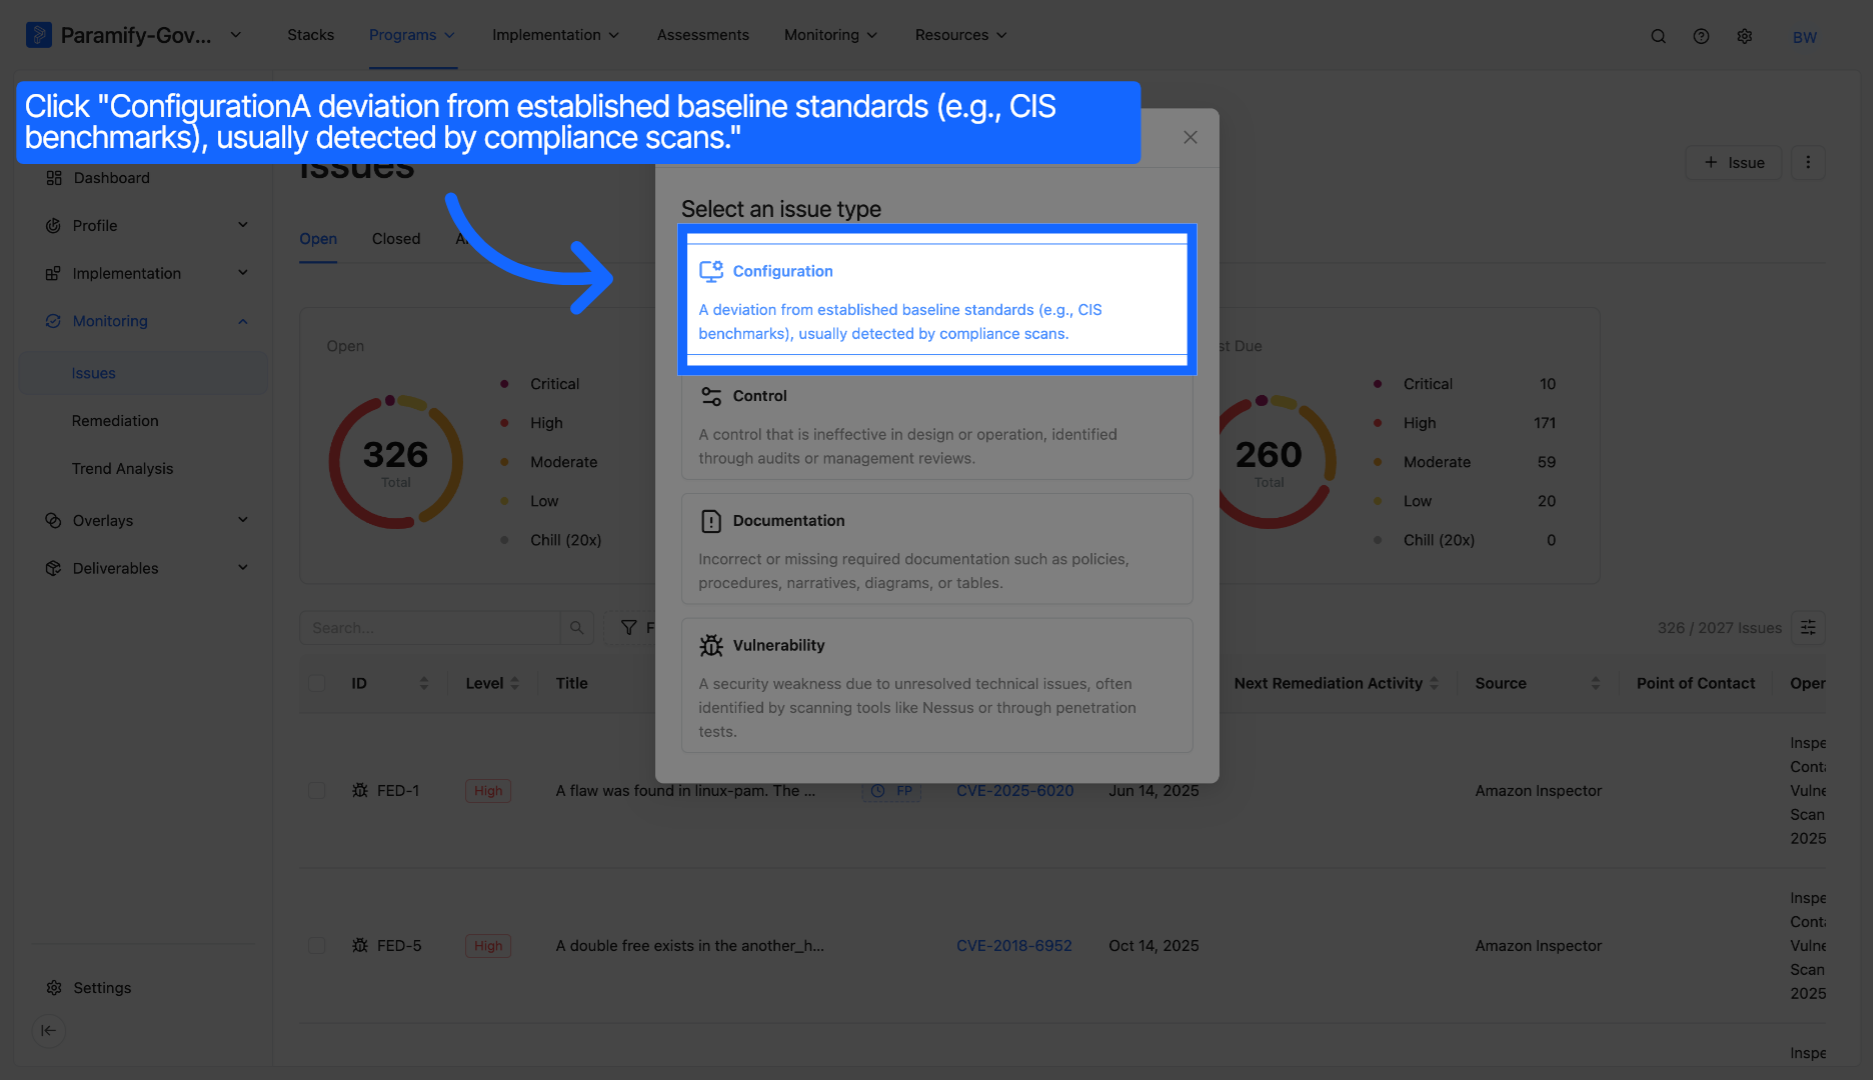
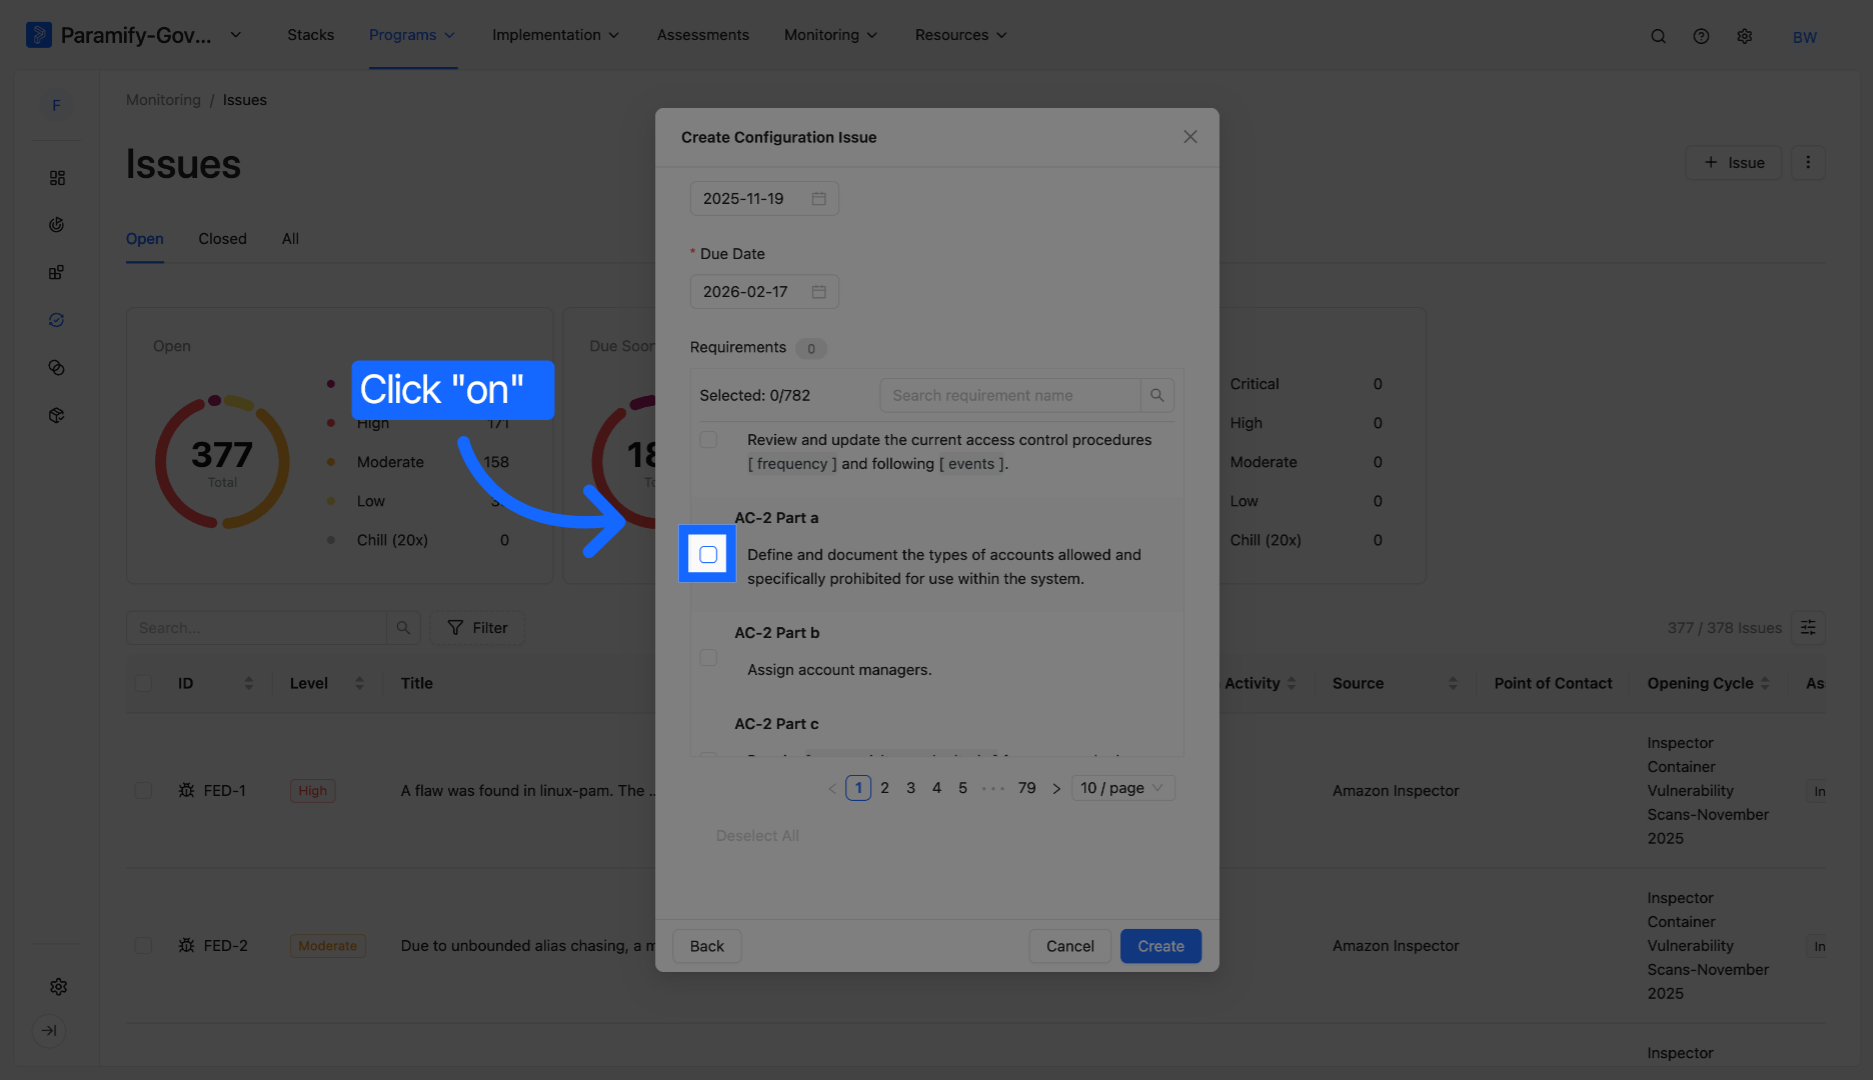
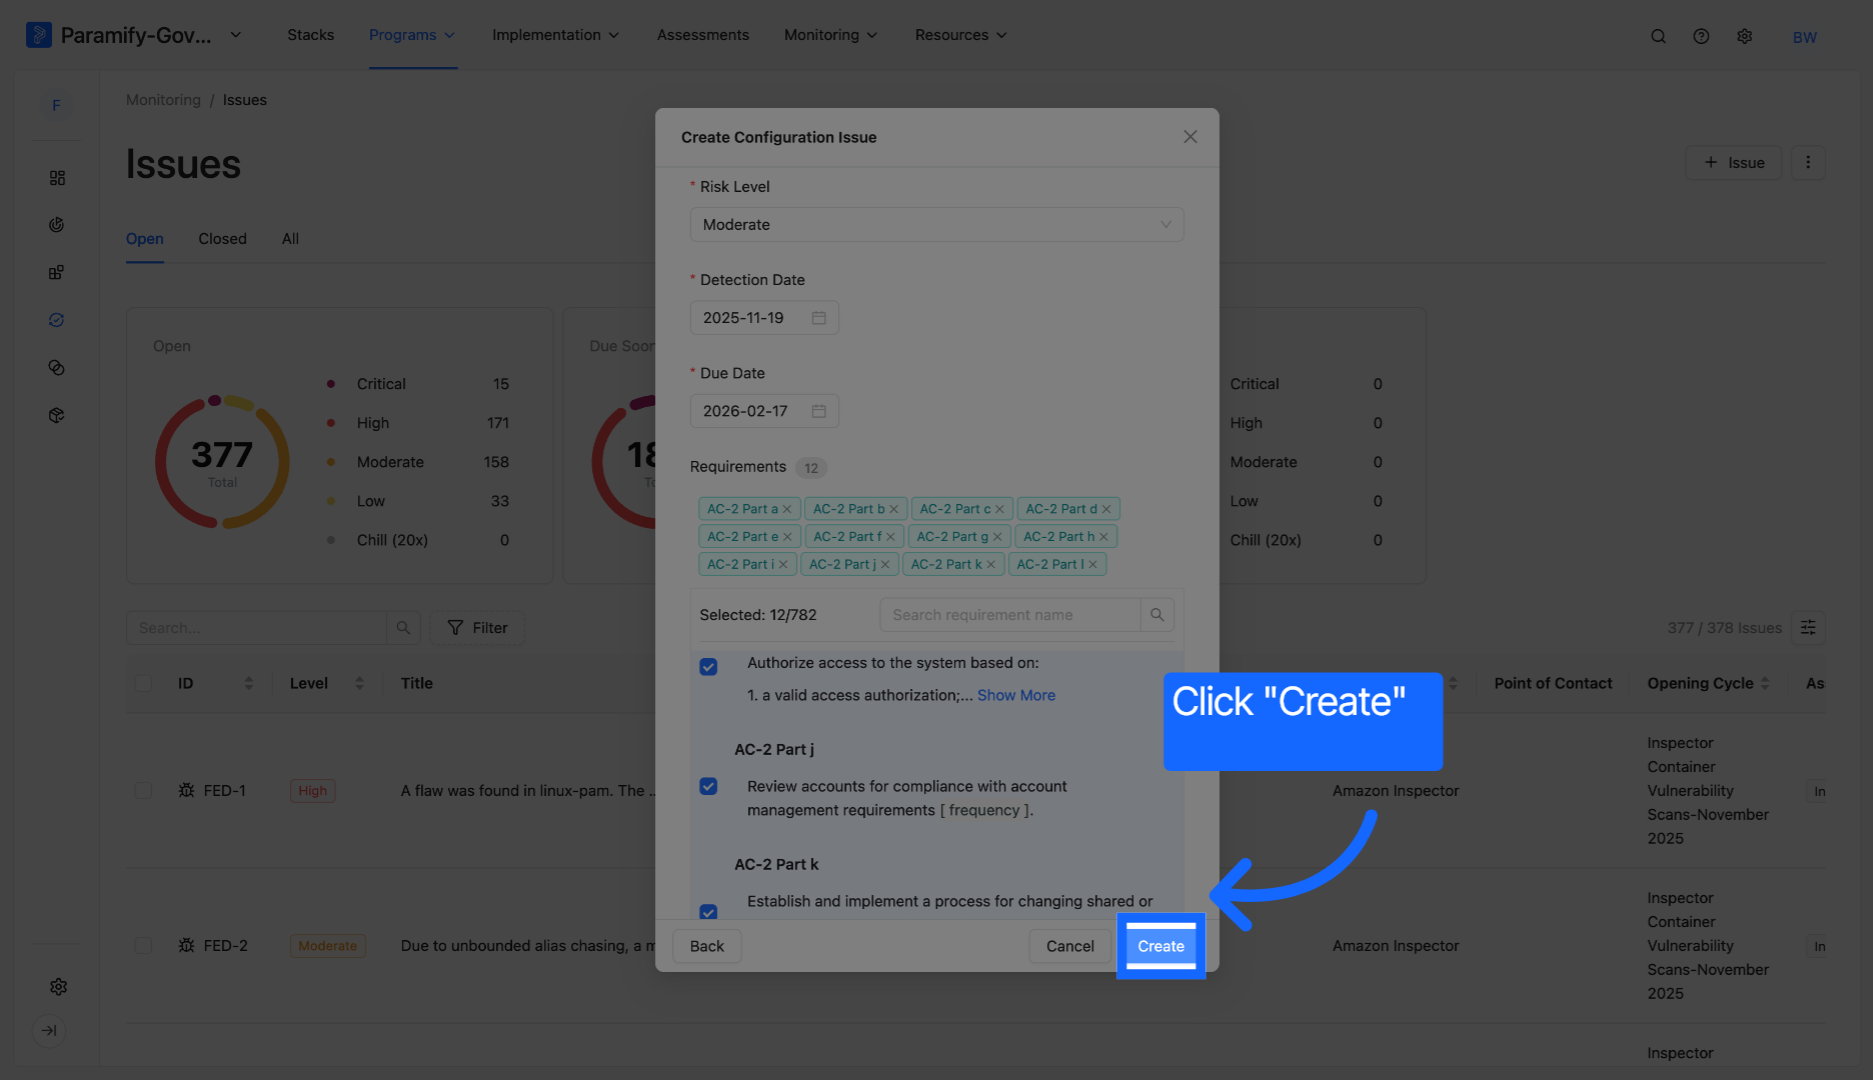
For this example, I created an Issue with the title "Okta Authentication for IAM".
Manual creation works well for individual issues, but teams managing large volumes of findings or integrating with vulnerability scanners will benefit from the Paramify API.
Creating & Managing Issues via the Paramify API
For teams that need to scale issue management beyond manual entry, the Paramify REST API provides full CRUD endpoints for issues such as, create (POST /issues), retrieve (GET /issues), update (PATCH /issues/{issueId}), and delete (DELETE /issues/{issueId}). You can also export your POA&M in OSCAL XML format via GET /issues/oscal.
The API covers far more than issues alone. Endpoints also exist for Assessments, Assessment Cycles, Recommendations, Deviations (Excuses), Milestones (Remediation Activities), Evidence, Artifacts, and Elements. Giving you programmatic access to nearly every object in Paramify.
Common use cases enabled by the API include:
-
Vulnerability scanner automation — Use the
POST /issuesendpoint to pipe findings from your scanner of choice (e.g., Tenable, Qualys, Wiz) directly into Paramify so new issues appear automatically with the correct risk level and control mappings. - CI/CD pipeline hooks — Call the API to open issues when a build fails a security gate and close them when the fix is deployed, keeping your POA&M current without manual intervention.
- Bulk operations — Script the API to import or update large numbers of issues from a spreadsheet, CMDB, or third-party GRC tool.
-
Custom dashboards & reporting — Use
GET /issuesto pull issue data into your own BI tools or executive dashboards for real-time compliance visibility. -
OSCAL export — Download your POA&M in machine-readable OSCAL XML via
GET /issues/oscalfor automated validation or submission to FedRAMP.
API ACCESS
Refer to the Paramify API documentation for full endpoint details, authentication, and request/response schemas, or contact your Paramify account team for a walkthrough.
Whether you create issues manually or via the API, every issue shares the same set of properties. Understanding these fields is essential for accurate POA&M generation.
Properties of an Issue
Each Issue has many Properties associated to add details to the Issue. Think of it as the Metadata of that creates the Issue. Below are the structure of the Properties.
Properties Structure
| Target Components | Components are technical & non-technical tools used to achieve an outcome. This is the component associated to this Issue. |
| Stack | Stacks group and assign components or teams to Risk Solutions or Elements. This is the Stack associated with this Issue. |
| Original Risk Level | Risk Level for the Issue. |
| Type | Able to define the Type for your Issue. |
| Source | Appears in the POAM document under Column E (Weakness Detector Source). |
| Source Identifier | Appears in the POAM document under Column F (Weakness Source Identifier) |
| Assessment | A structured setup where you select an assessment type, target, and program, then configure details like mechanisms and cycle frequency. It's basically a way to organize and manage evaluations or reviews for compliance, risk, or other business needs. |
| Point of Contact | Appears in the POAM document under Column H (Point of Contact) |
| Effective Date | Appears in the POAM document under Column K (Original Detection Date) |
| Status Date | Appears in the POAM document under Column O (Status Date). This date is automatically updated when a closing an Issue or Remediation Activity, creating a Remediation Update, or creating a Vendor Check-in |
| Requirements | The Controls that cover the Issue. It appears in the POAM document under Column B (Controls) |
| CVE IDs | Appears in the POAM document under Column AD (CVE) |
| Impacted Inventory | Appears in the POAM document under Column G (Asset Identifier) |
| Applicable Products | Appears in the POAM document under Column AE (Service Name) |
The table above defines each property. The following walk-through shows you where to find and configure these properties in the Paramify UI.
Walk-Through of Issue Properties
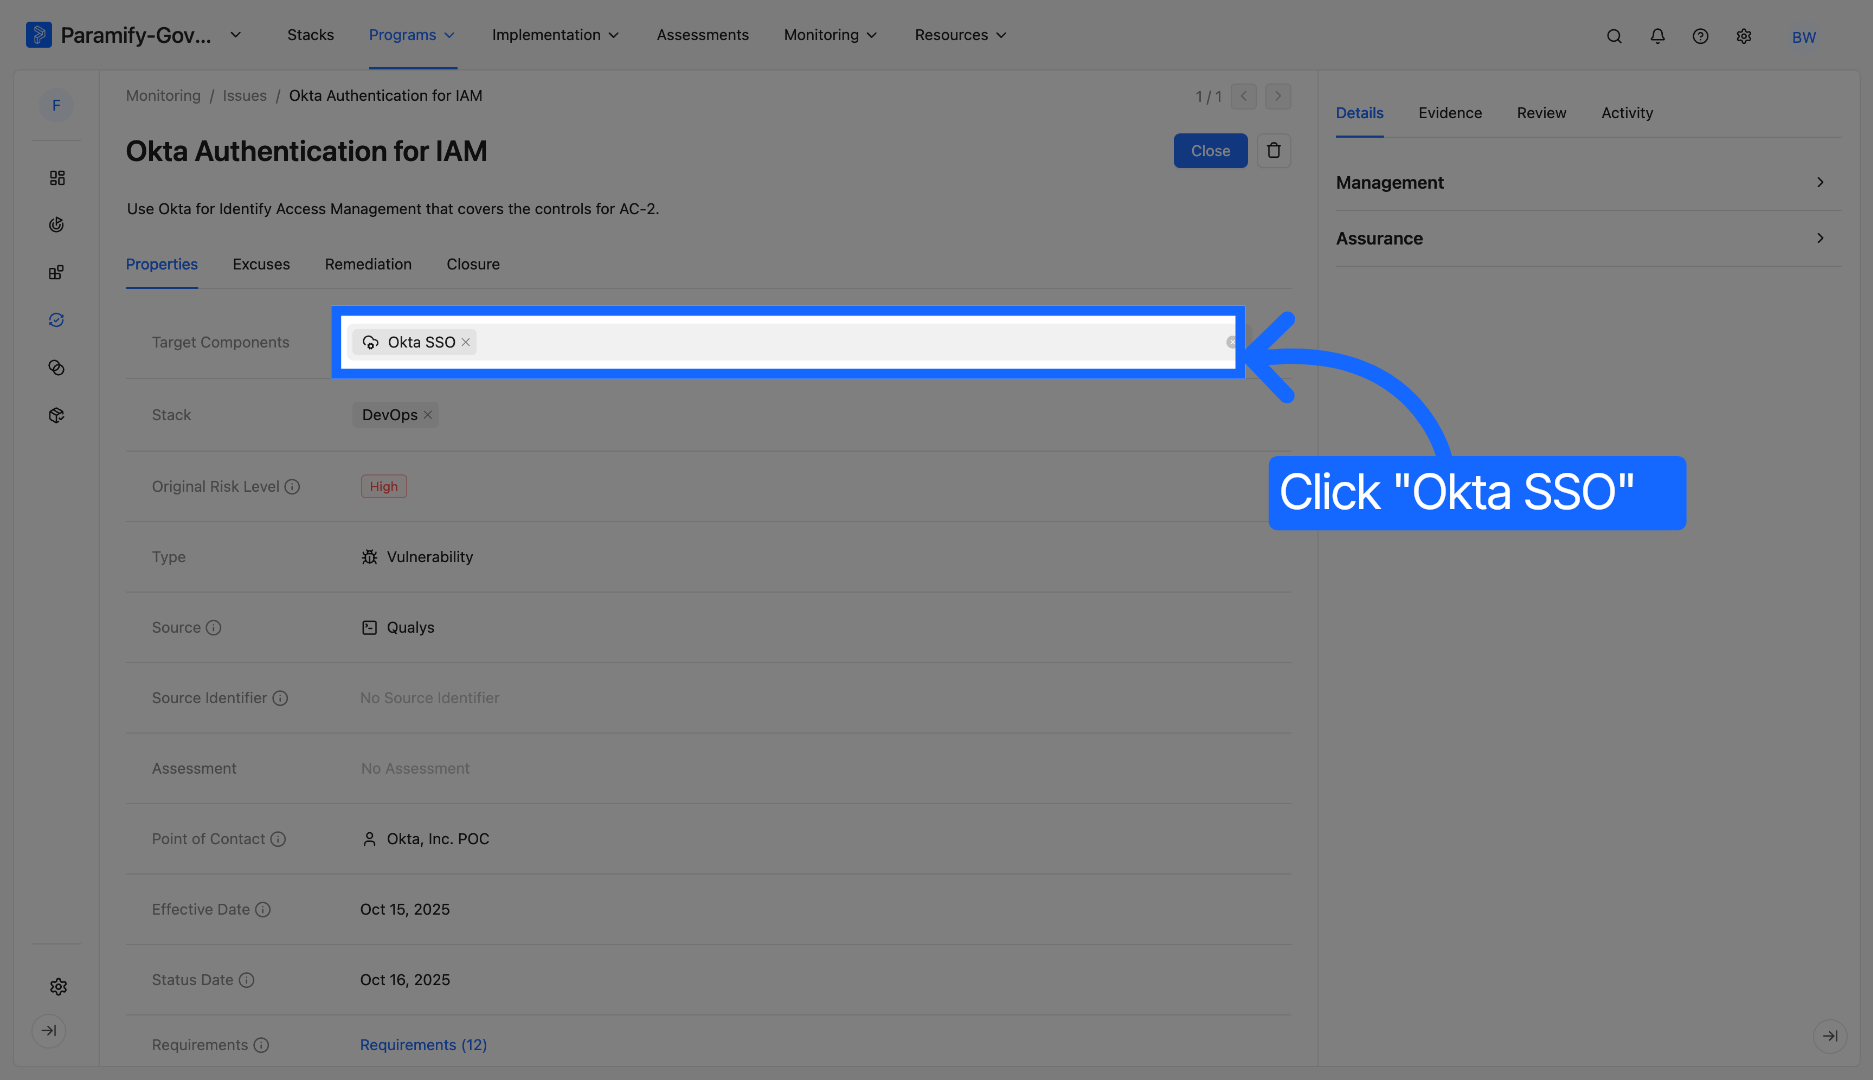
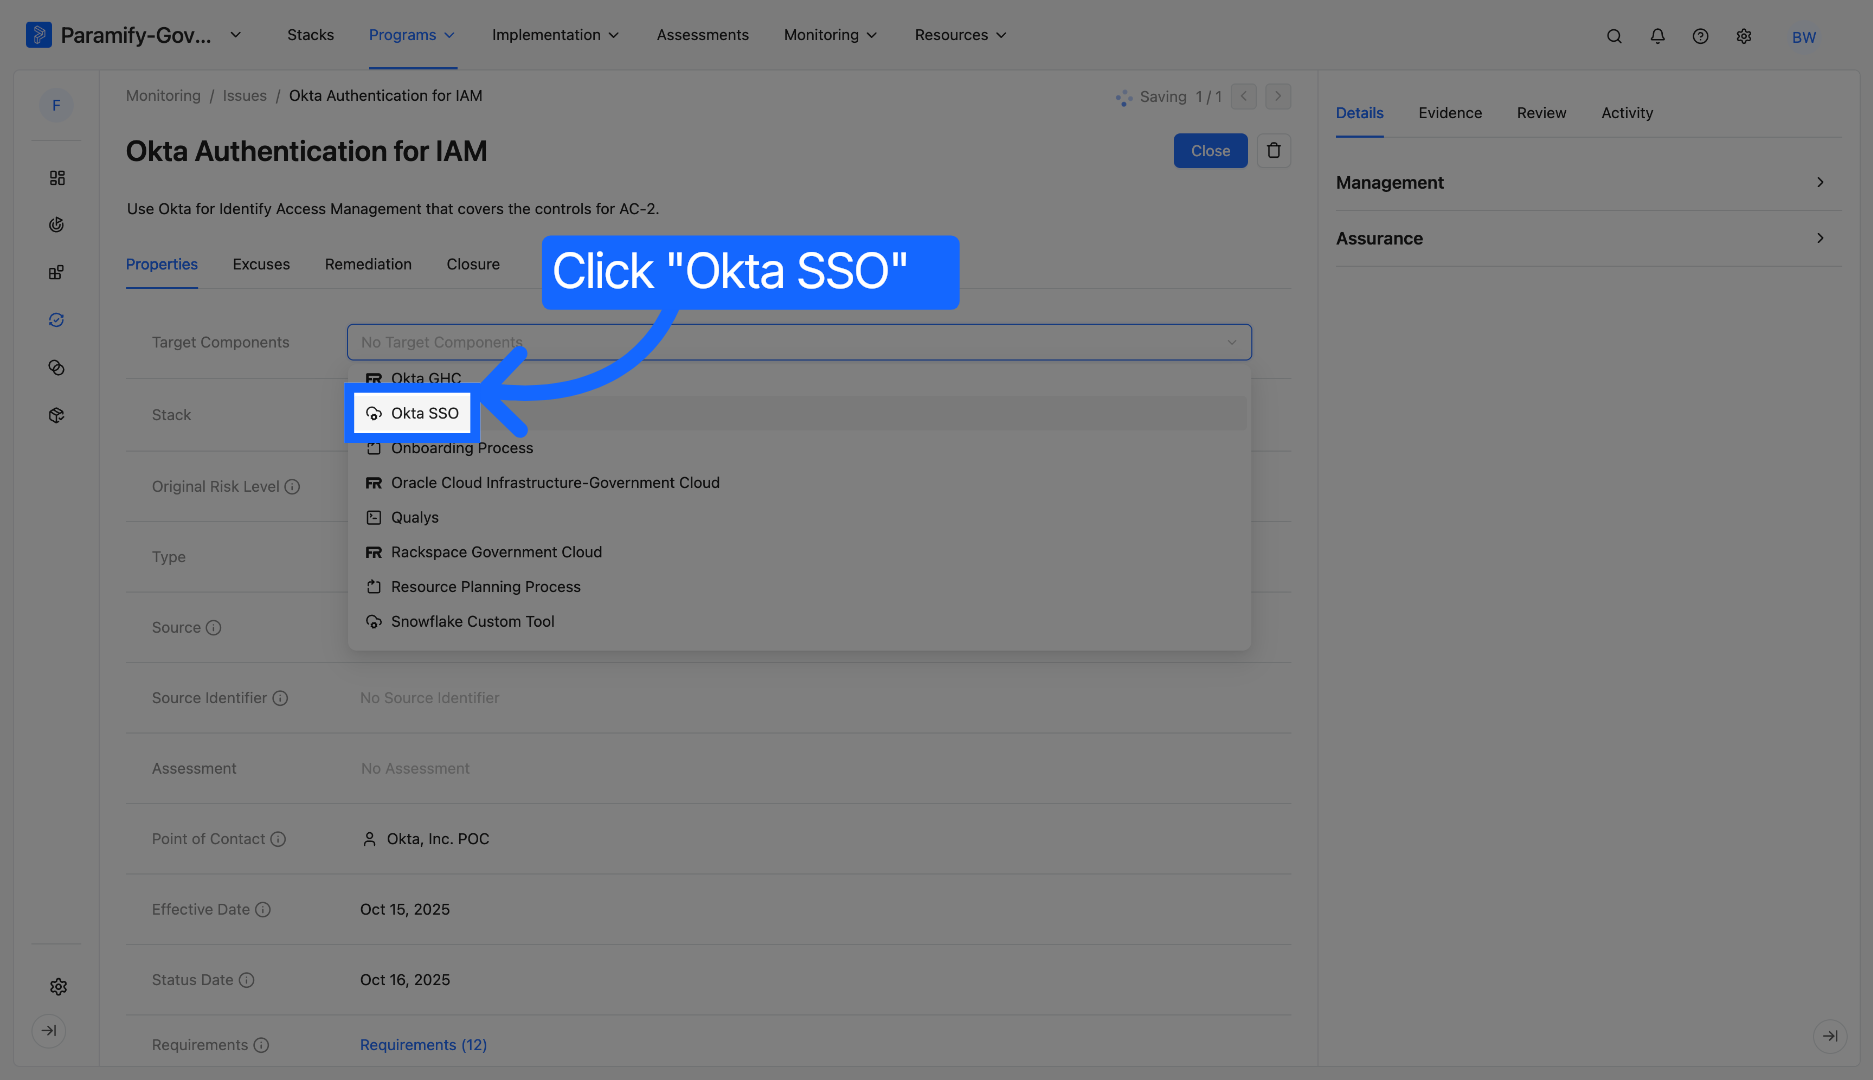
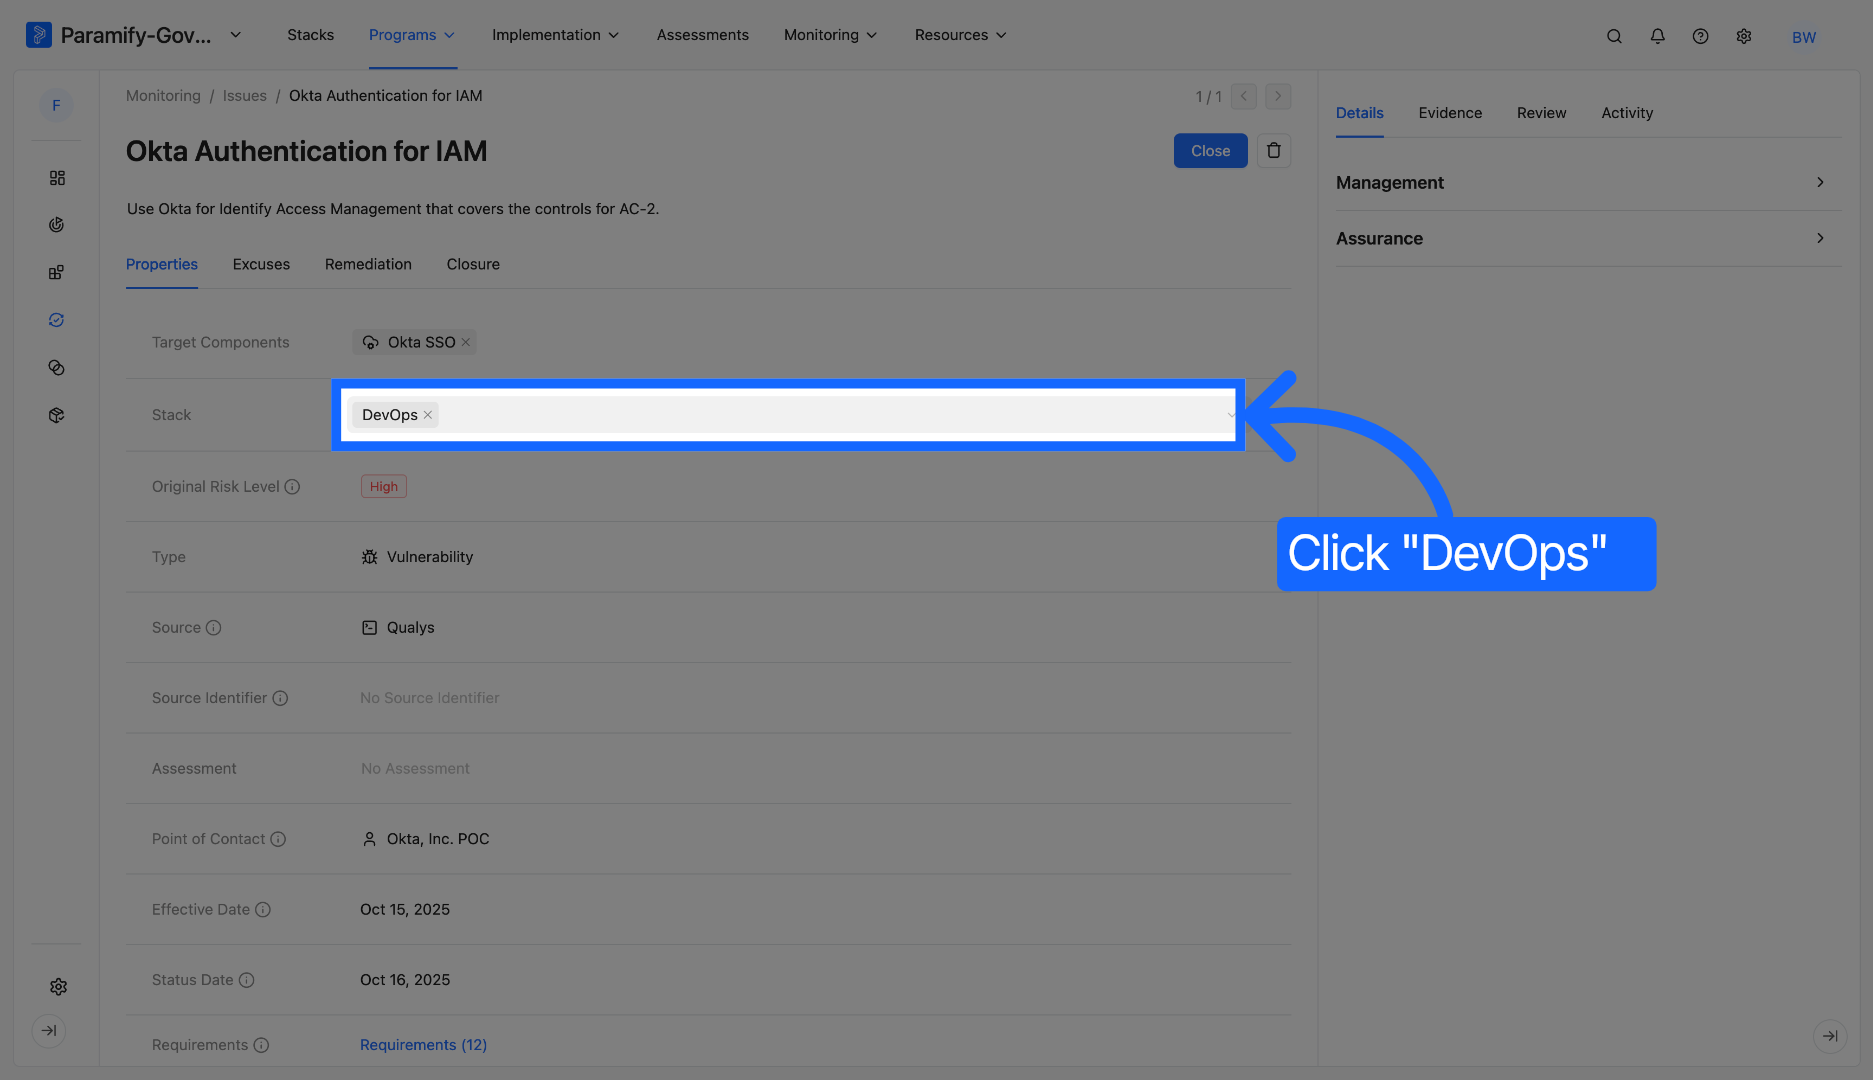
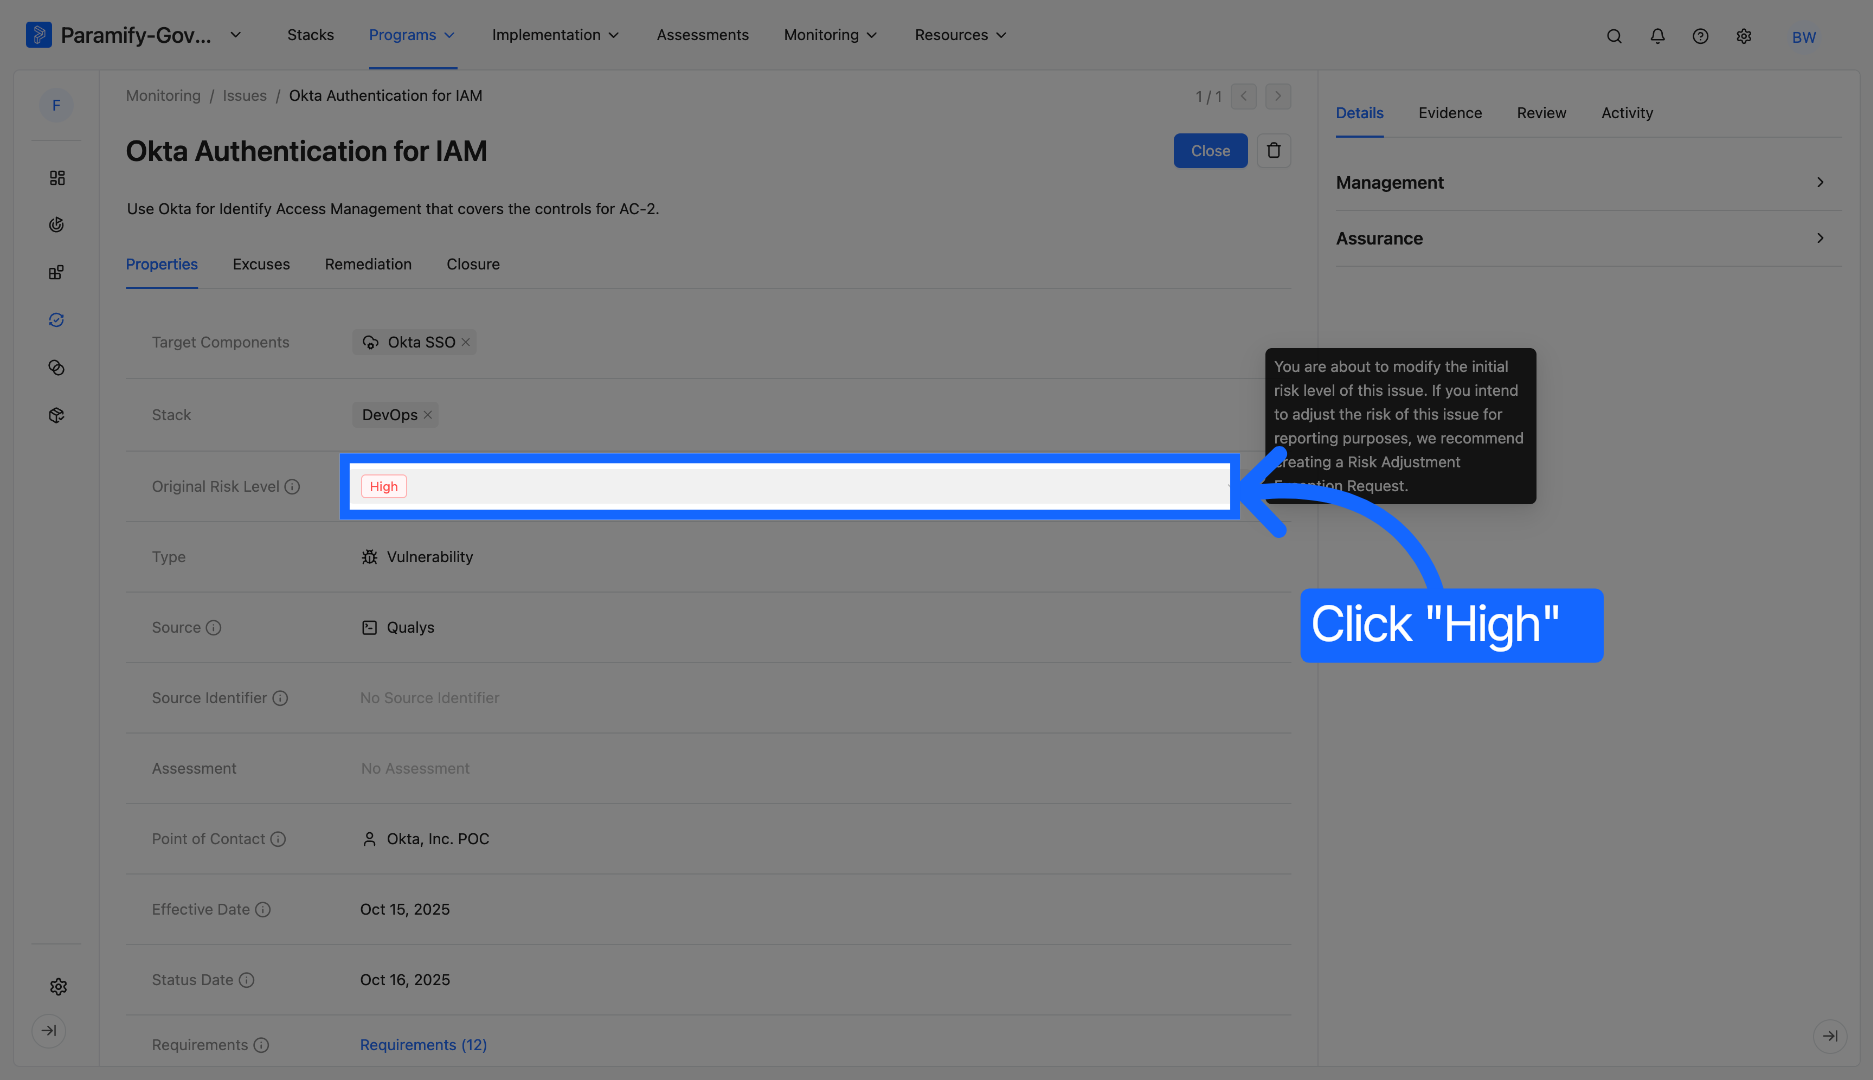
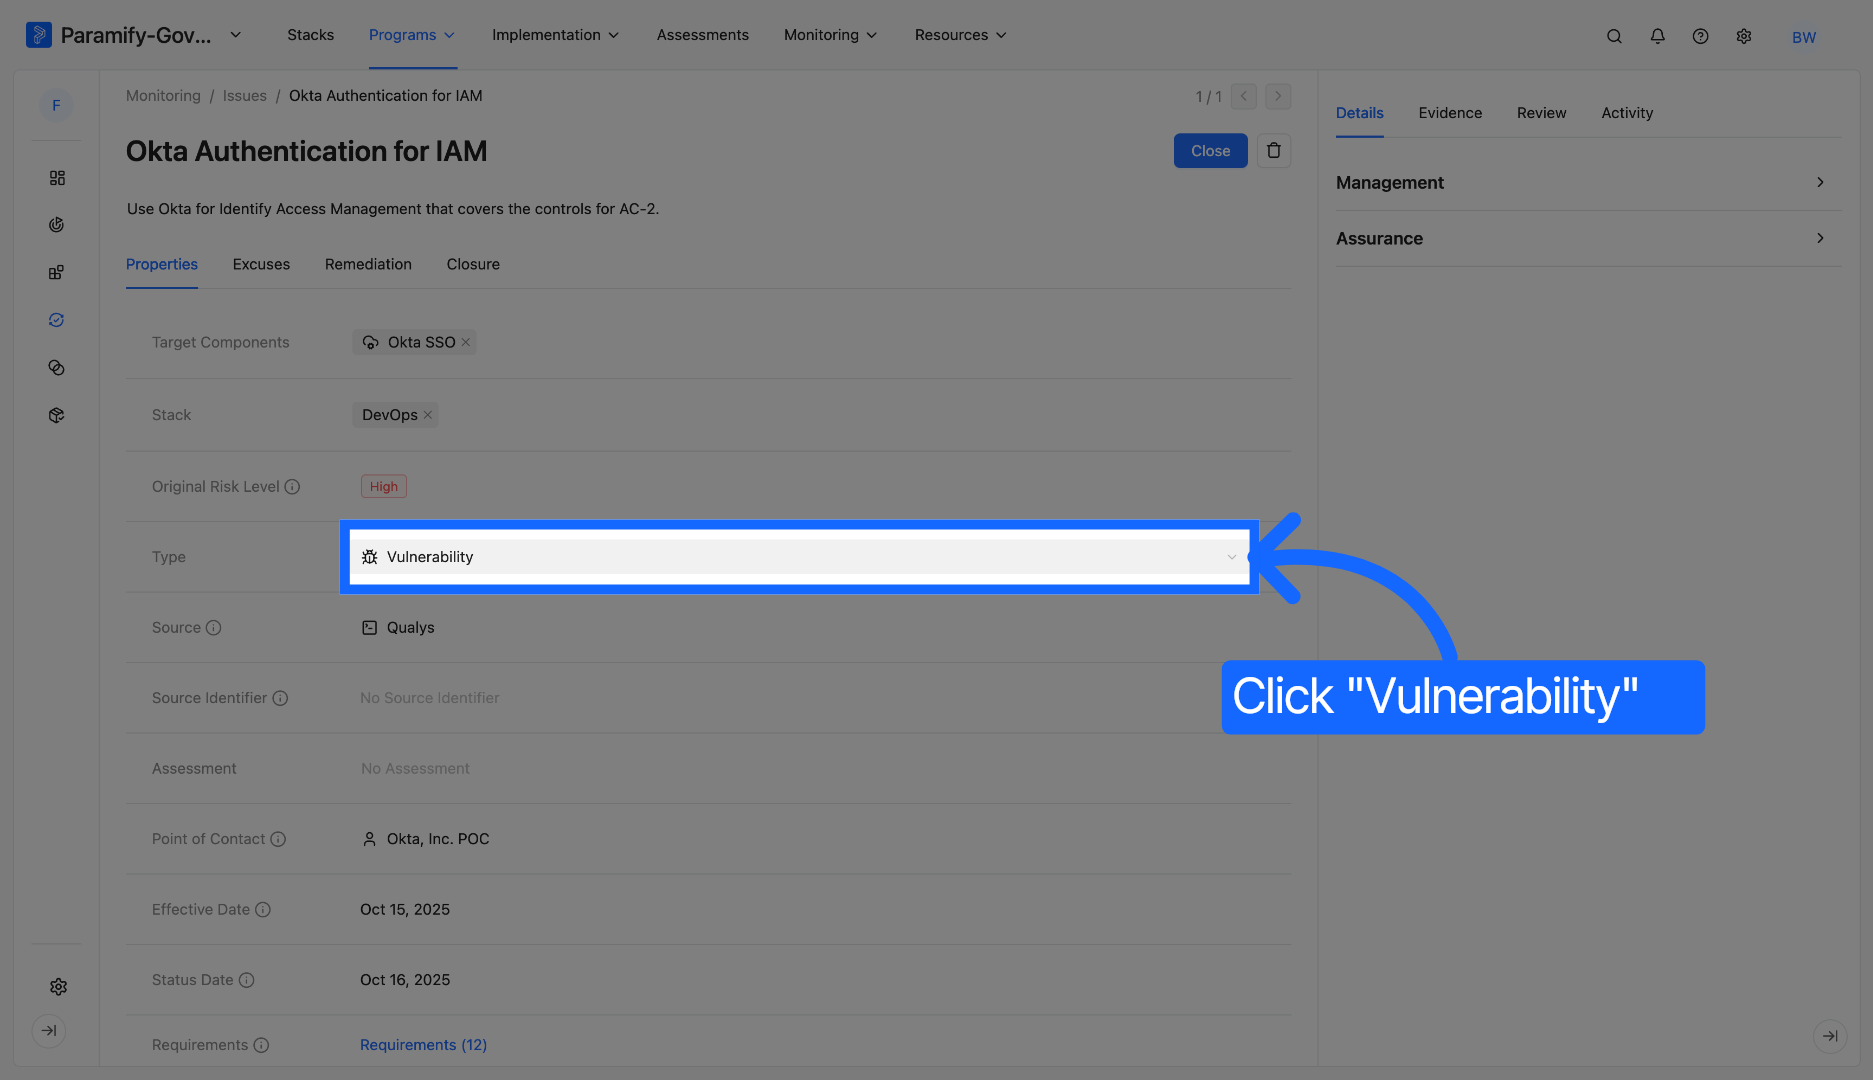
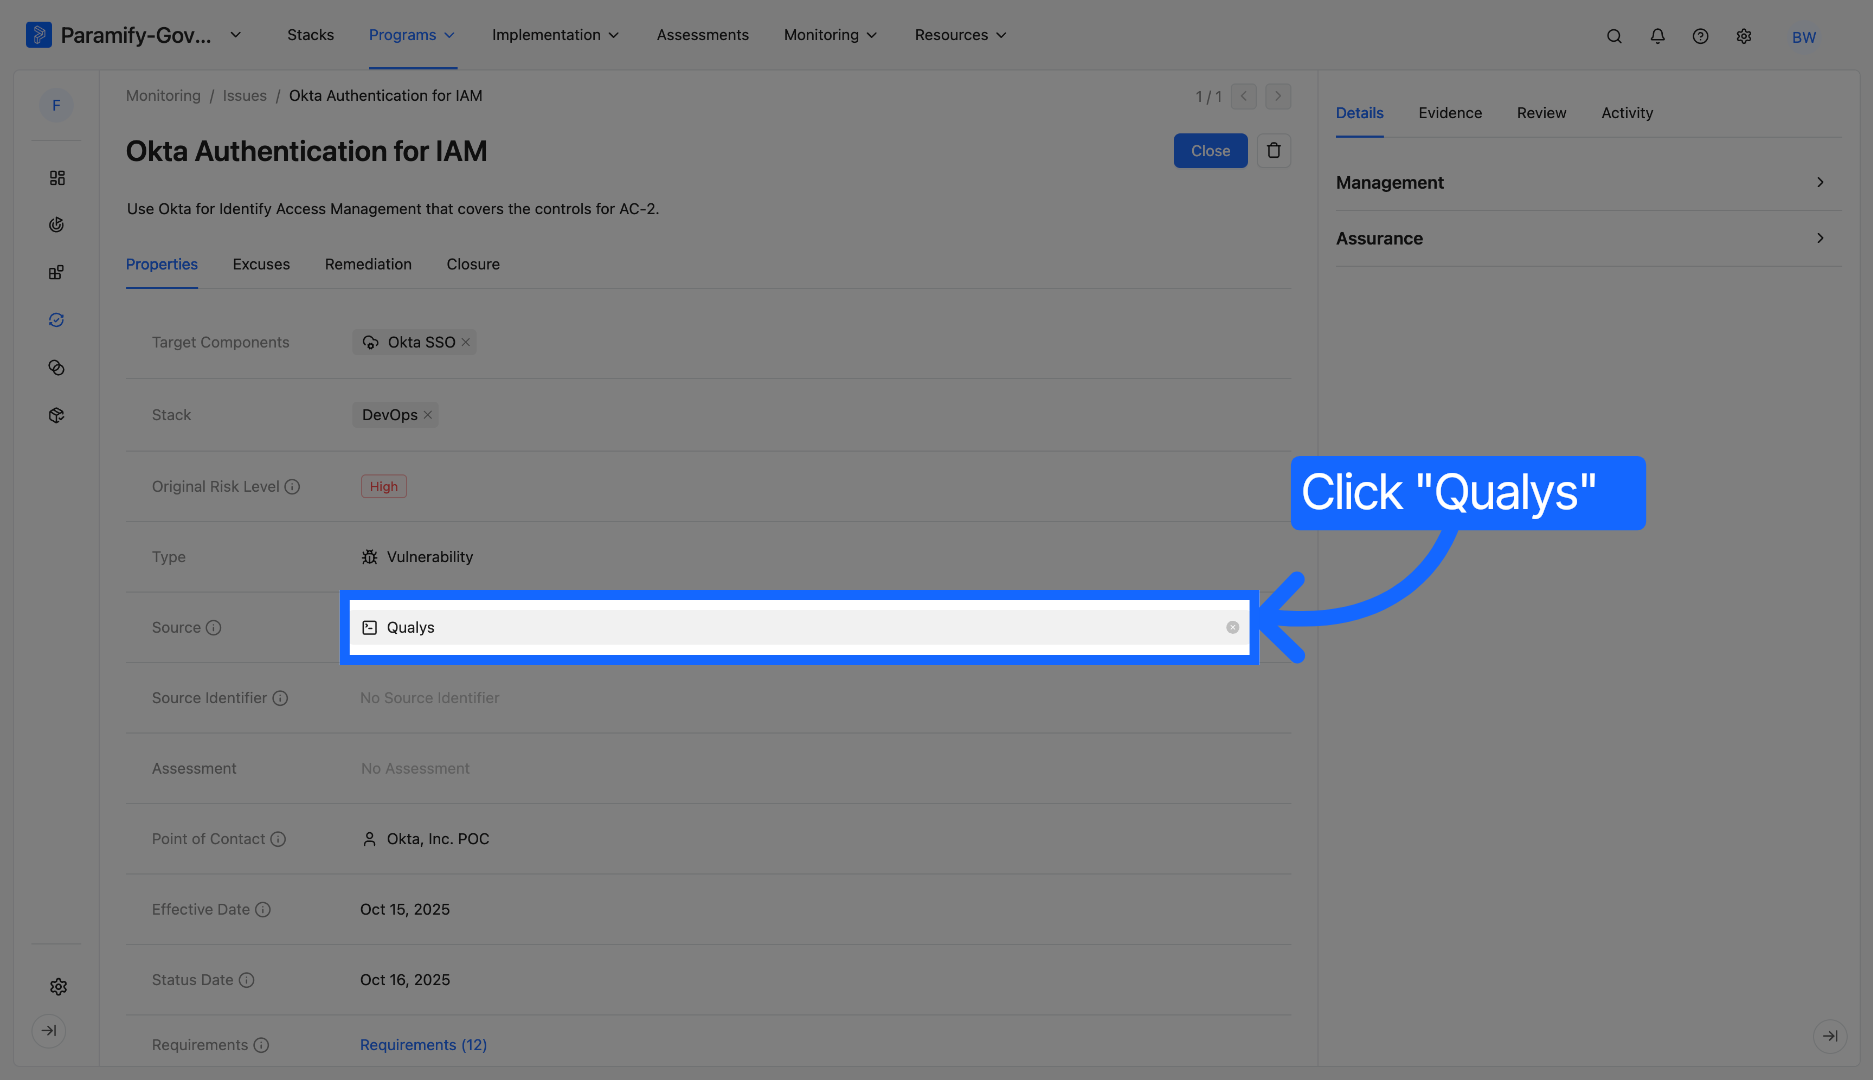
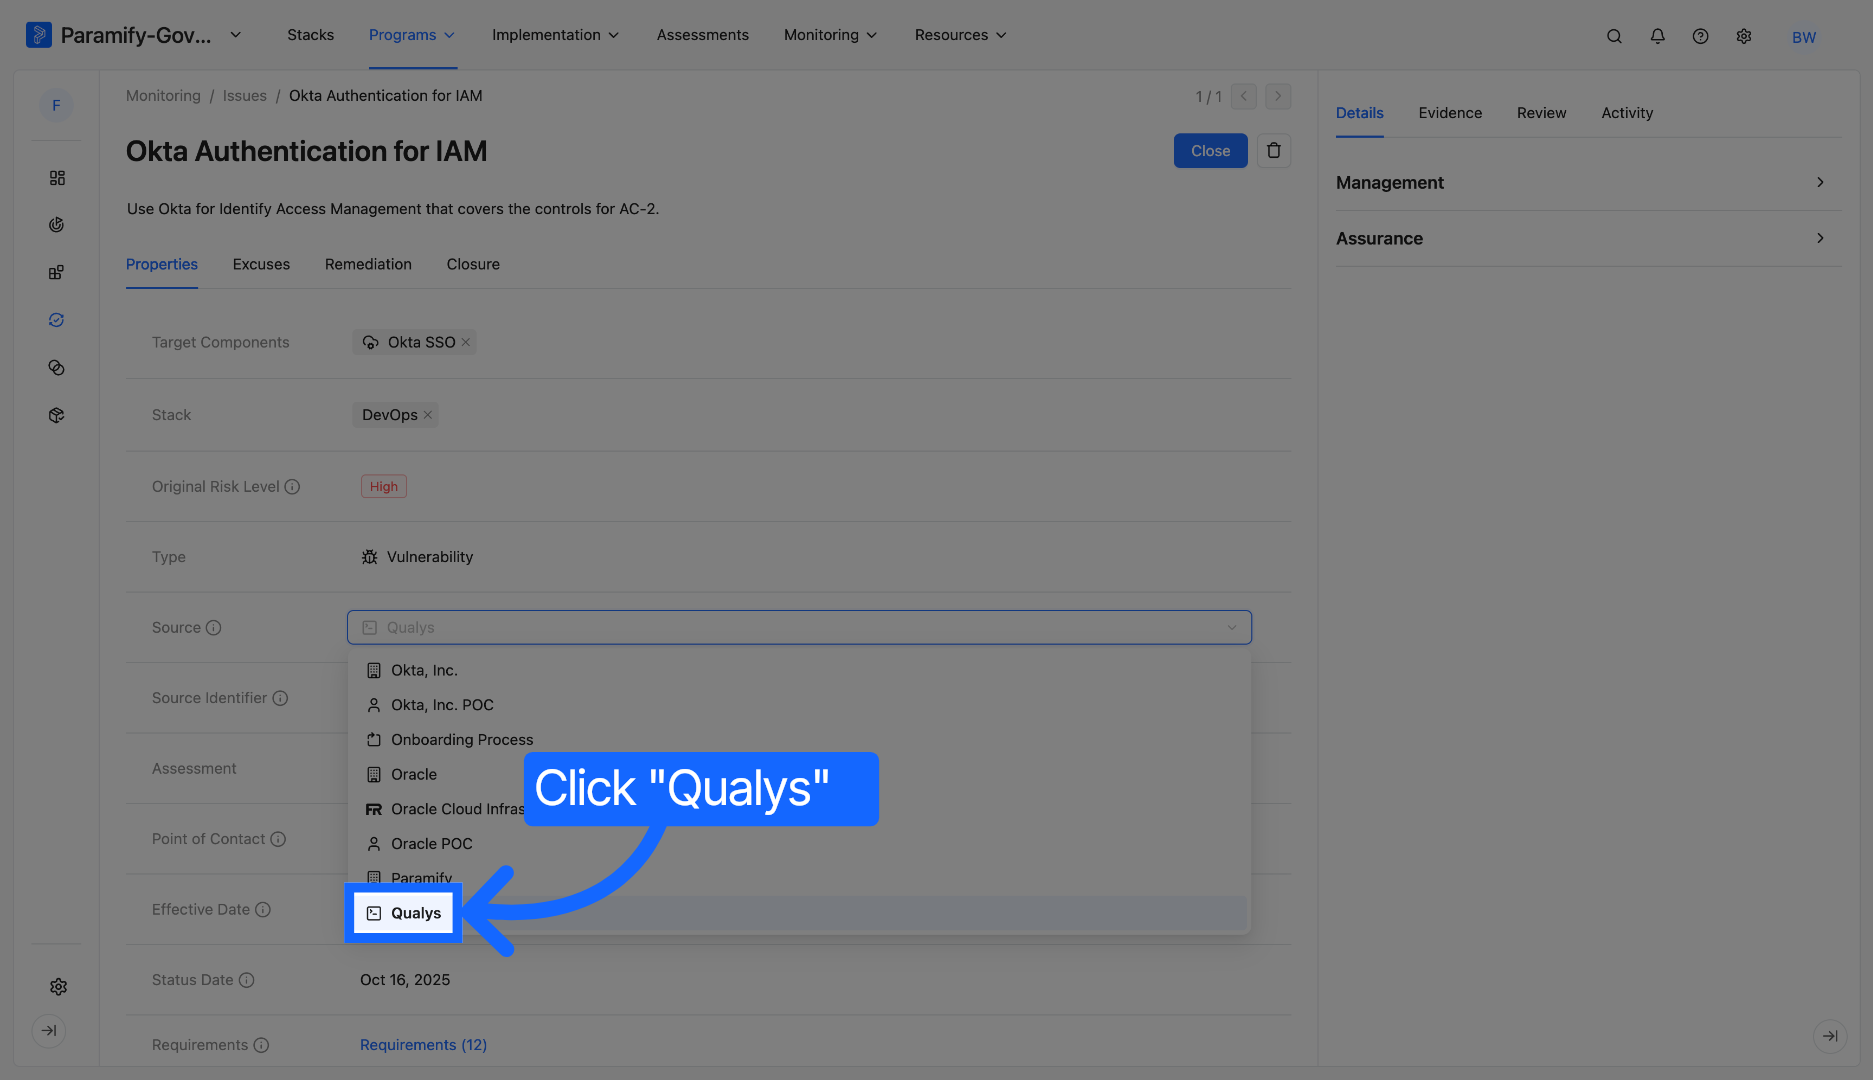
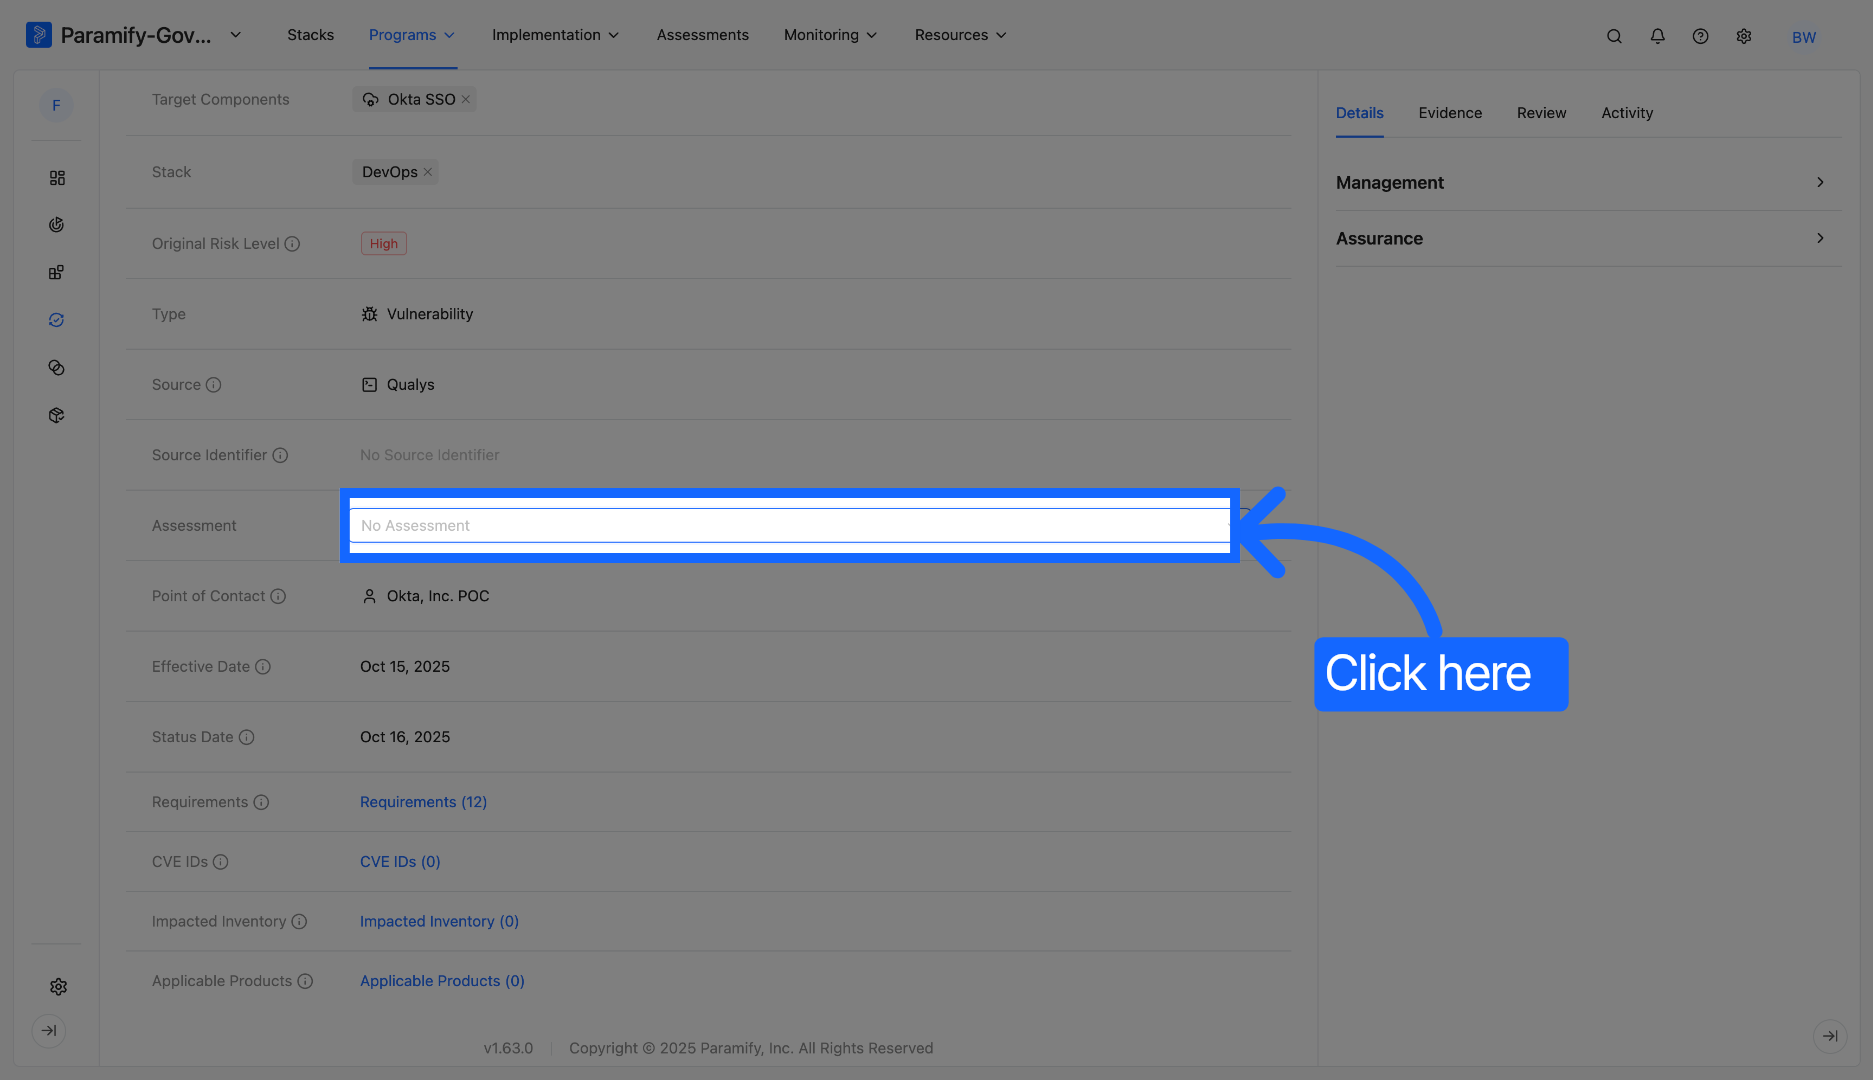
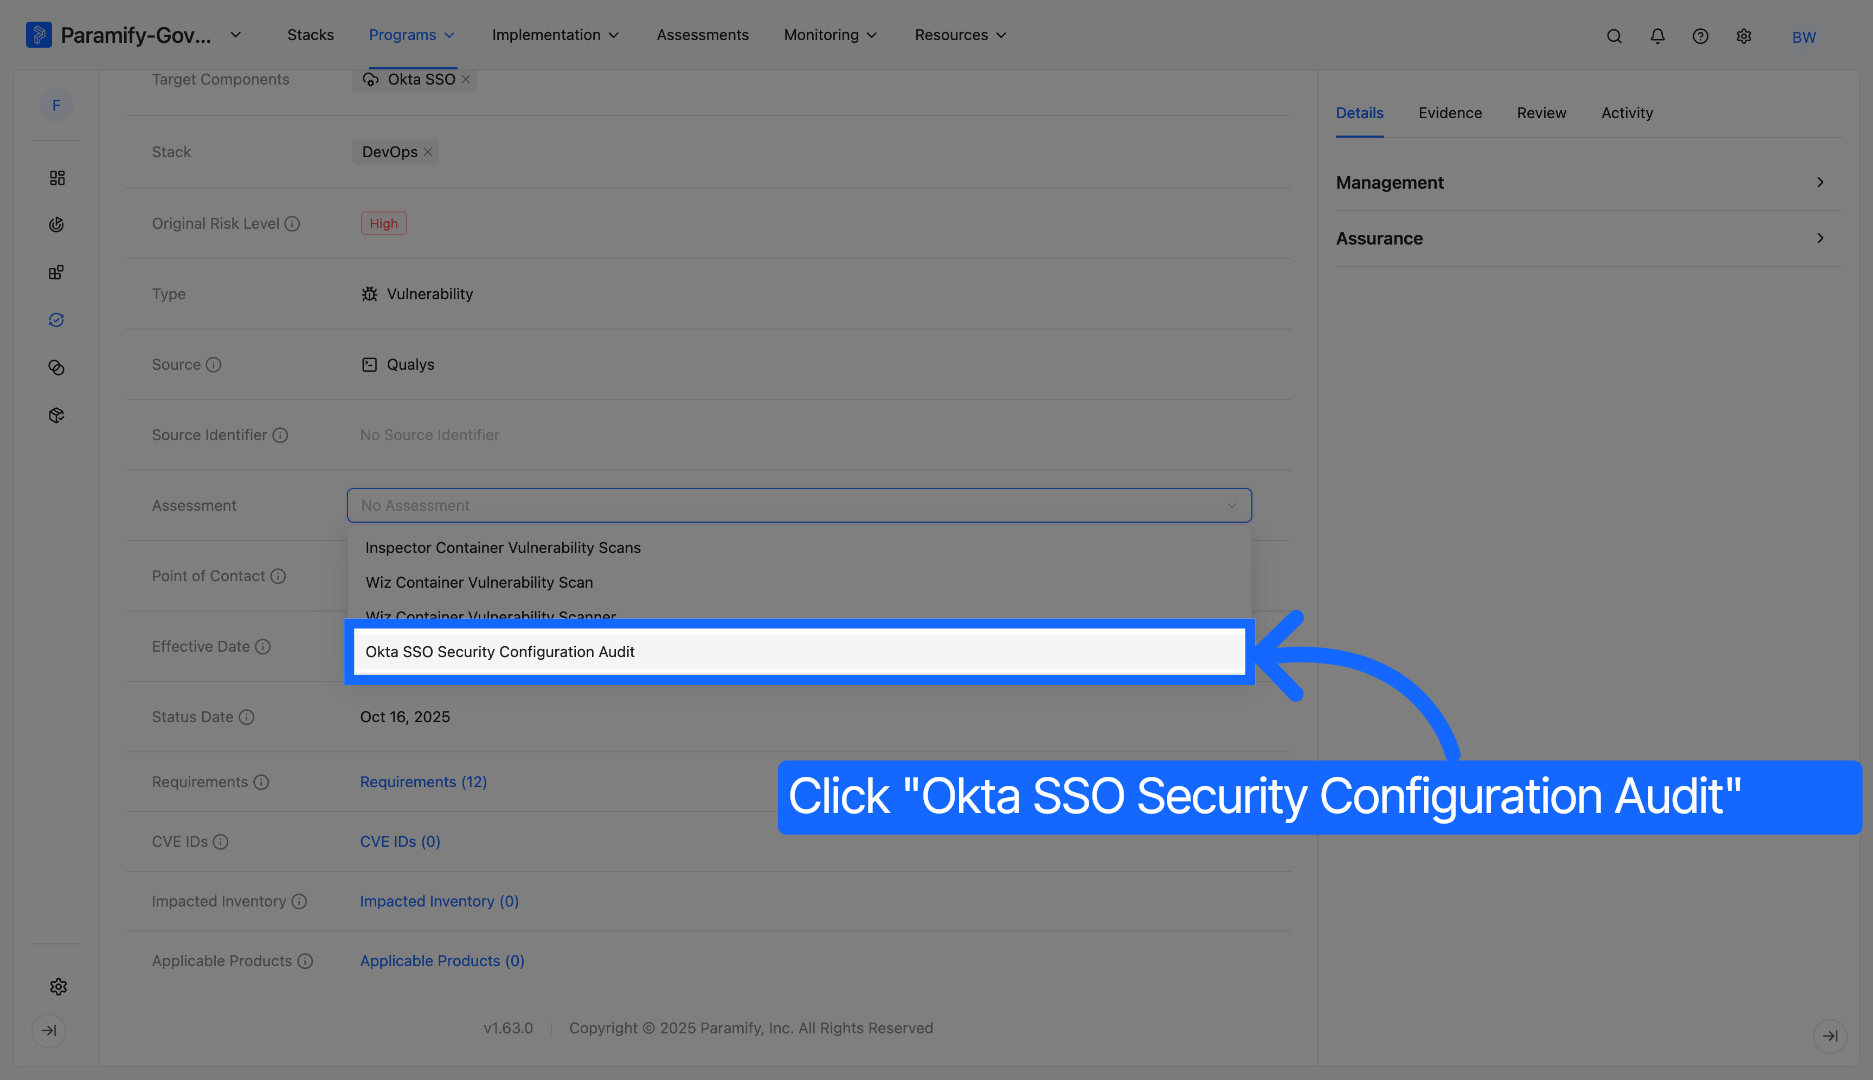
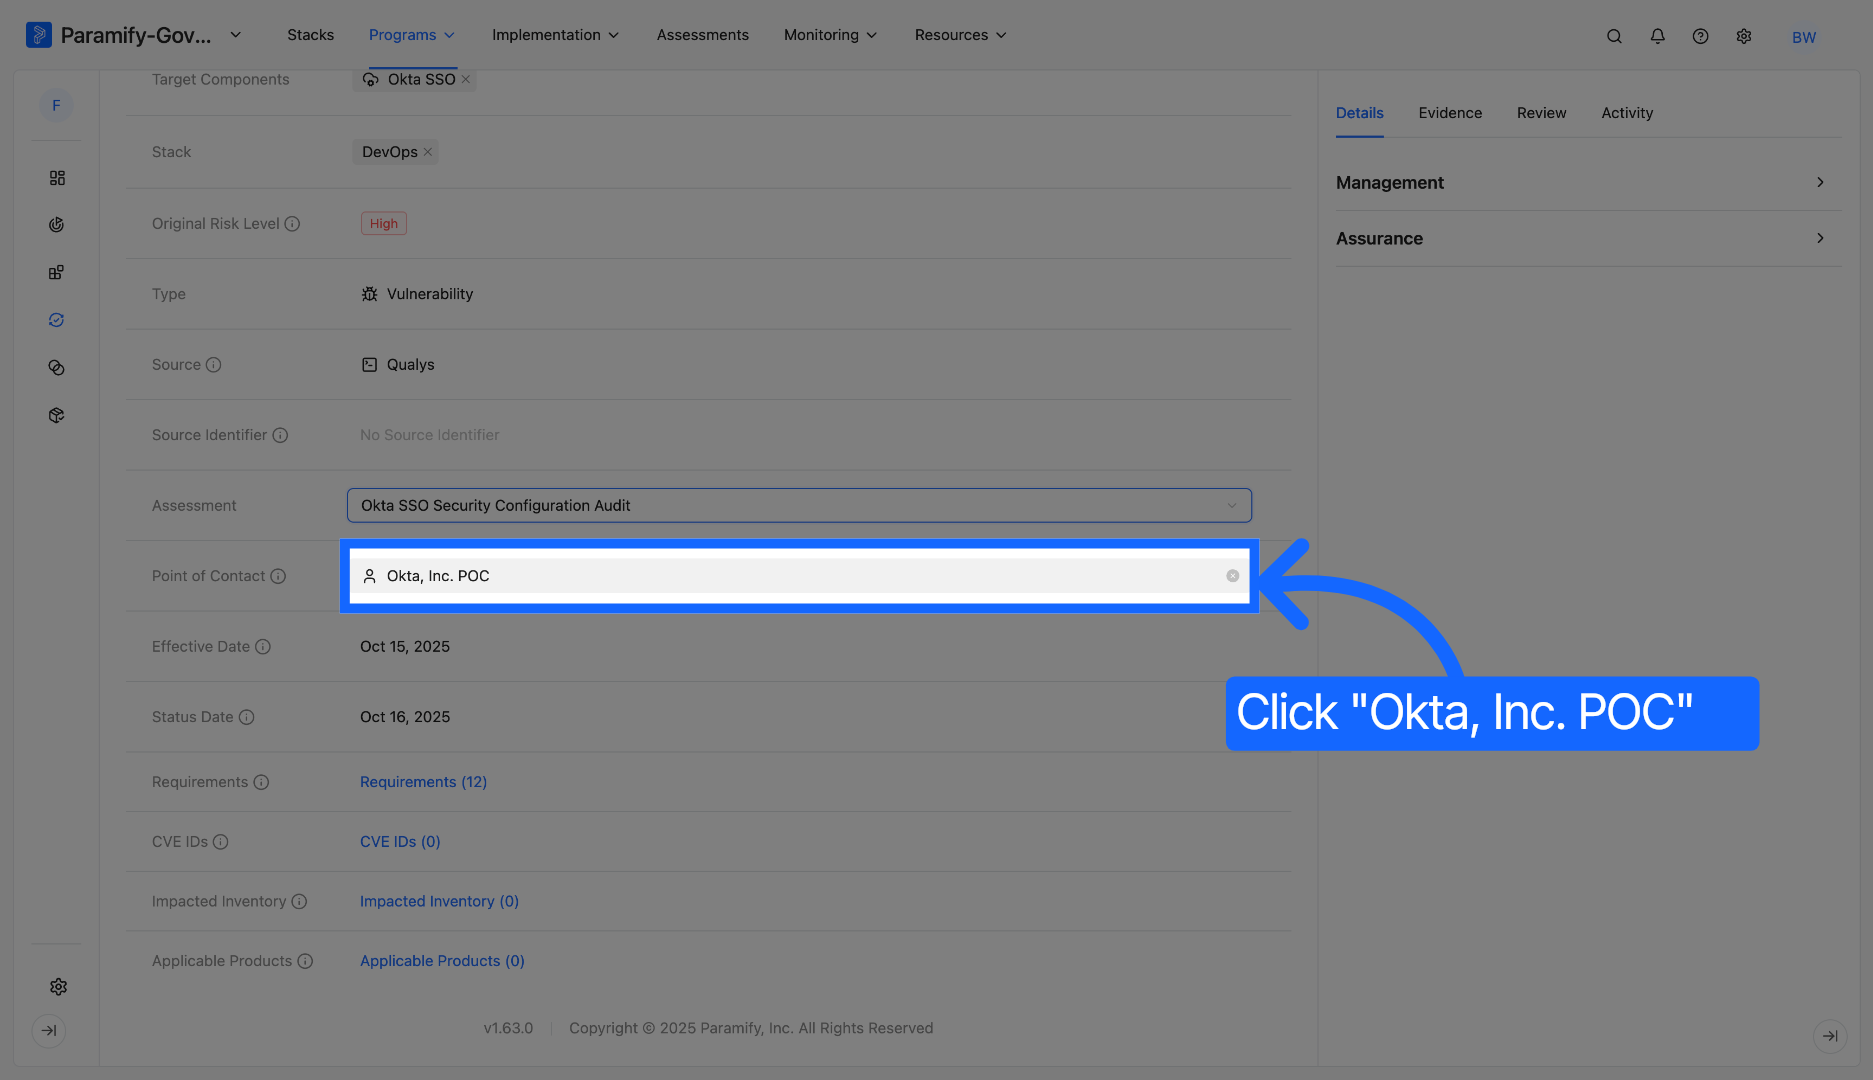
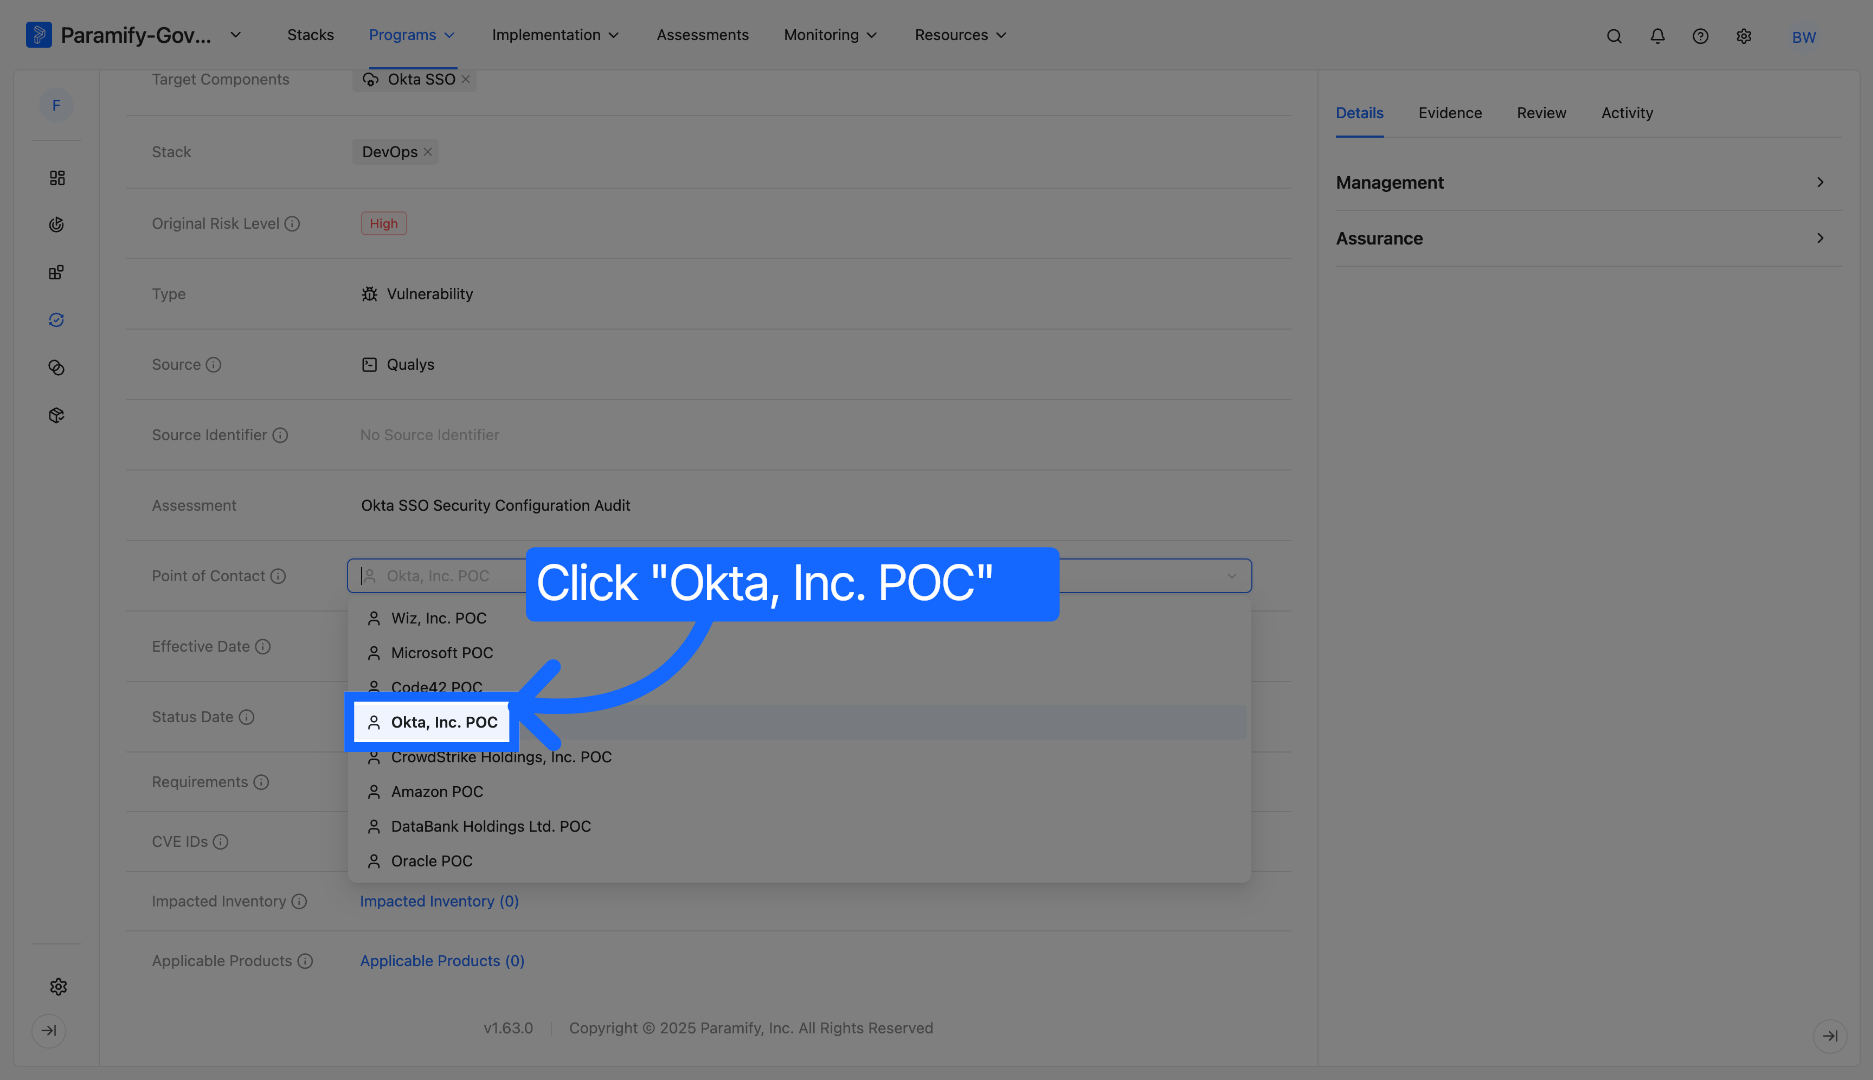
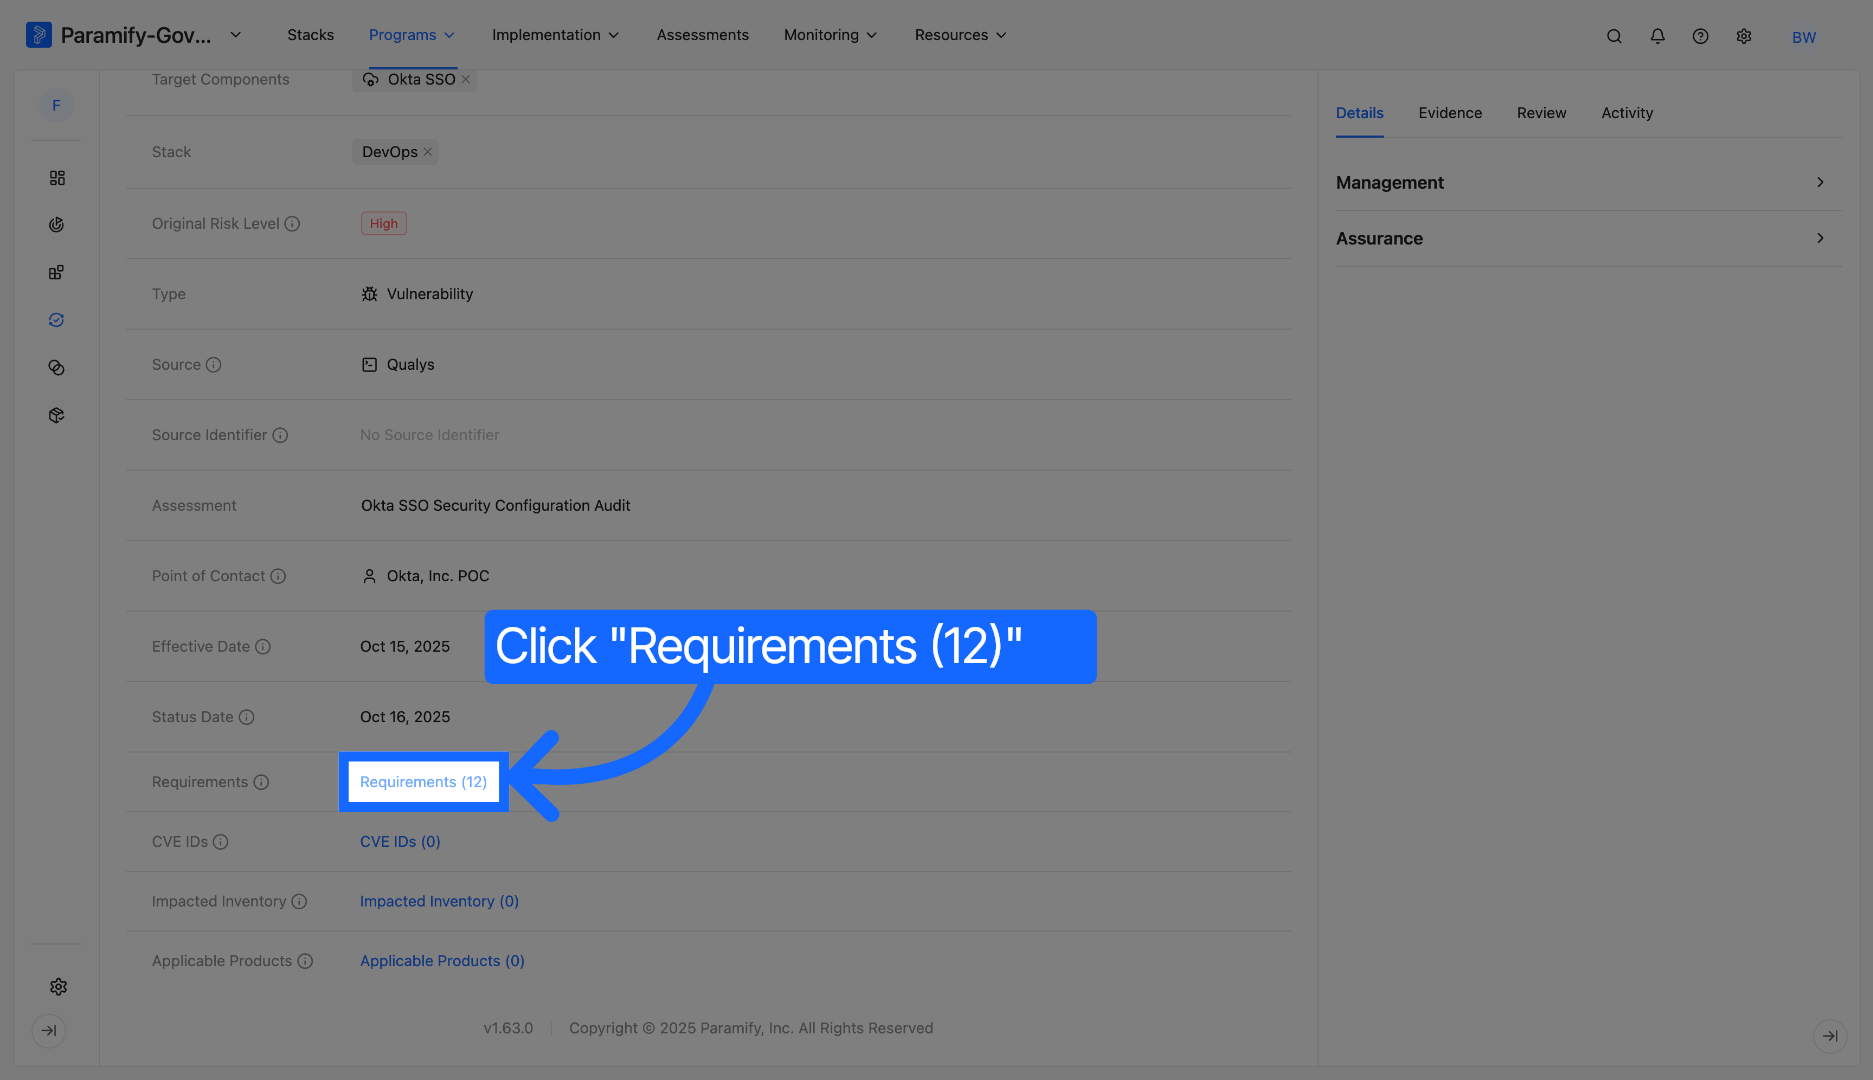
You can also check the CVE, Impacted Inventory, and Applicable Products at the bottom of the page.
With your issue properties configured, the next thing to understand is how issues connect to the broader assessment lifecycle in Paramify.
How Issues Tie Into Assessments
Assessments in Paramify provide a structured process for evaluating your security posture against specific controls and requirements. When an assessment cycle identifies a gap or finding, that finding becomes an Issue—automatically linked to the assessment that surfaced it.
This assessment-to-issue connection delivers several advantages:
- Full traceability — Every issue carries a direct link back to the assessment cycle, control requirement, and component that produced it, giving auditors and PMOs a clear chain of evidence.
- Continuous monitoring alignment — As you run recurring assessment cycles (monthly, quarterly, or on-demand), Paramify tracks which issues were opened, remediated, or carried forward across cycles.
- Automated POA&M generation — Because issues are linked to assessments, controls, and components, Paramify can generate a fully populated POA&M document with no manual copy-paste required.
-
Assessment-driven API workflows — The Paramify API includes
dedicated
/assessmentsand/assessment-cyclesendpoints, so you can manage assessment cycles programmatically alongside the issues they produce.
GETTING STARTED WITH ASSESSMENTS
If you haven't set up assessments yet, start with Create an Assessment in Paramify and then Create a Cycle Within an Assessment to begin linking findings to issues.
Not every issue requires immediate remediation. In some cases, a finding may be a false positive, an accepted operational risk, or blocked by a vendor dependency. Paramify handles these scenarios through Excuses.
Excuses are most commonly known as Deviation Requests or Exception Requests. Here, we can create and submit Excuses so that Auditors can review and accept Excuses for specific situations. They are very useful to organize and take record of specific Excuses needs.
There are 4 types of Excuses you can categorize your Excuse.
| False Positive | A reported issue that is incorrect or does not impose an actual threat to a system. It appears in the POAM document under Column V (False Positive). |
| Operational Requirement | A justified need to accept risk temporarily to avoid disrupting critical operations. It appears in the POAM document under Column W (Operational Requirement). |
| Risk Adjustment | Adjusting risk levels based on factors vulnerability exploitability or the environment's overall impact. It appears in the POAM document under Column U (Risk Adjustment). |
| Vendor Dependency | A reliance on a third-party delaying risk remediation until the vendor provides a resolution. It appears in the POAM document under Column P (Vendor Dependency). |
How to create an Excuse
Introduction: How to select and change the appropriate excuse settings to accurately classify reported issues.
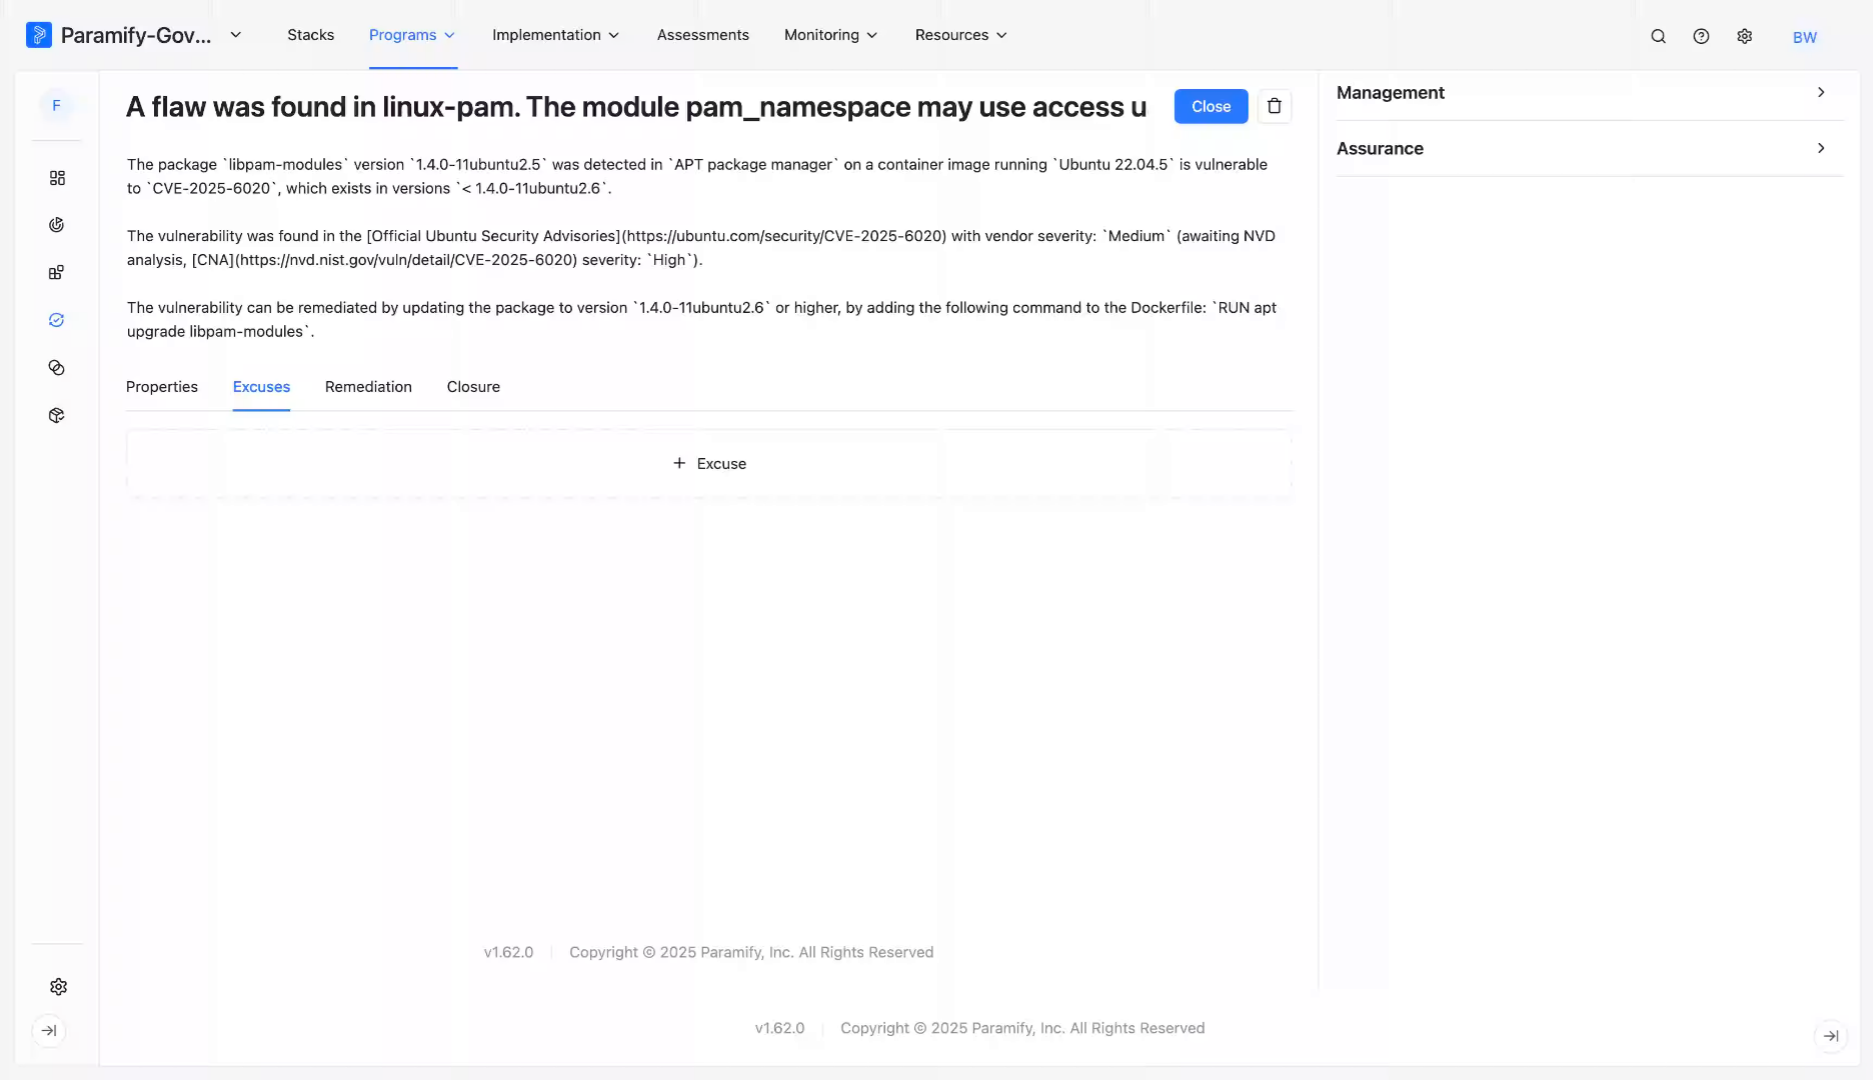
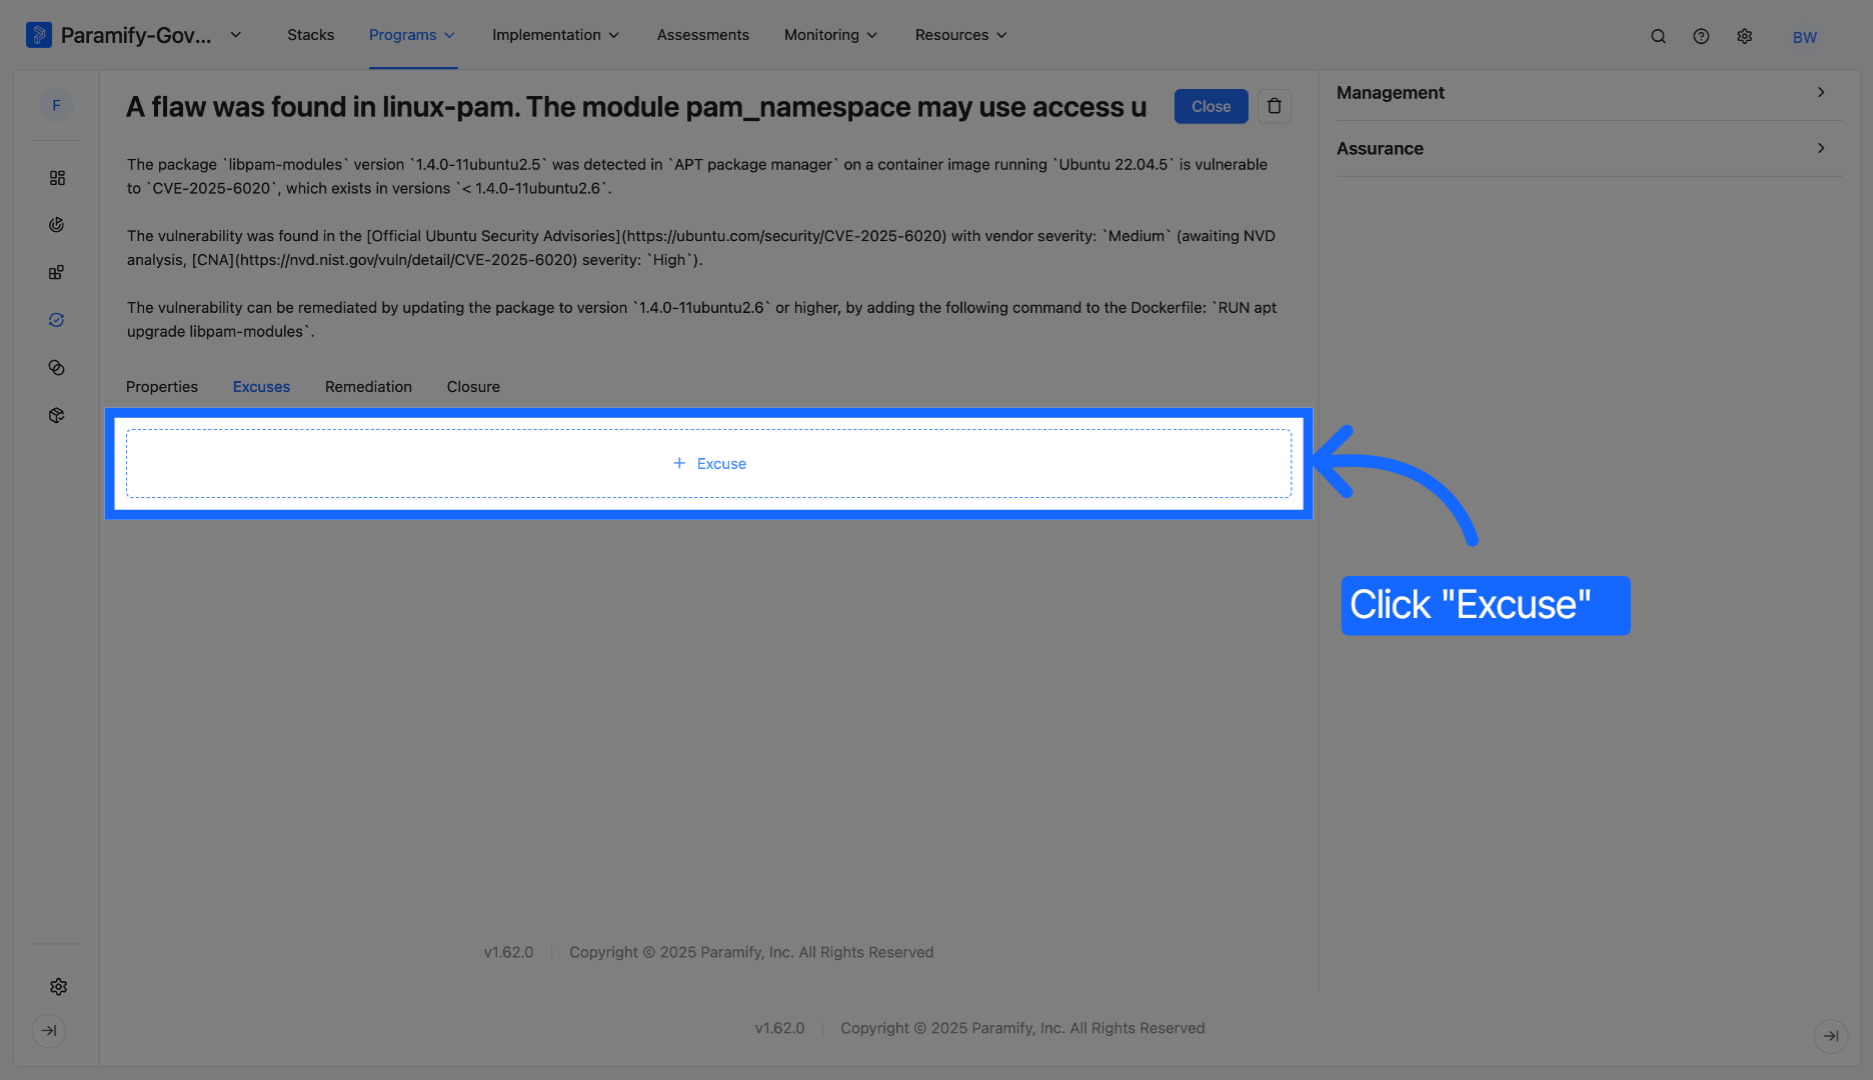
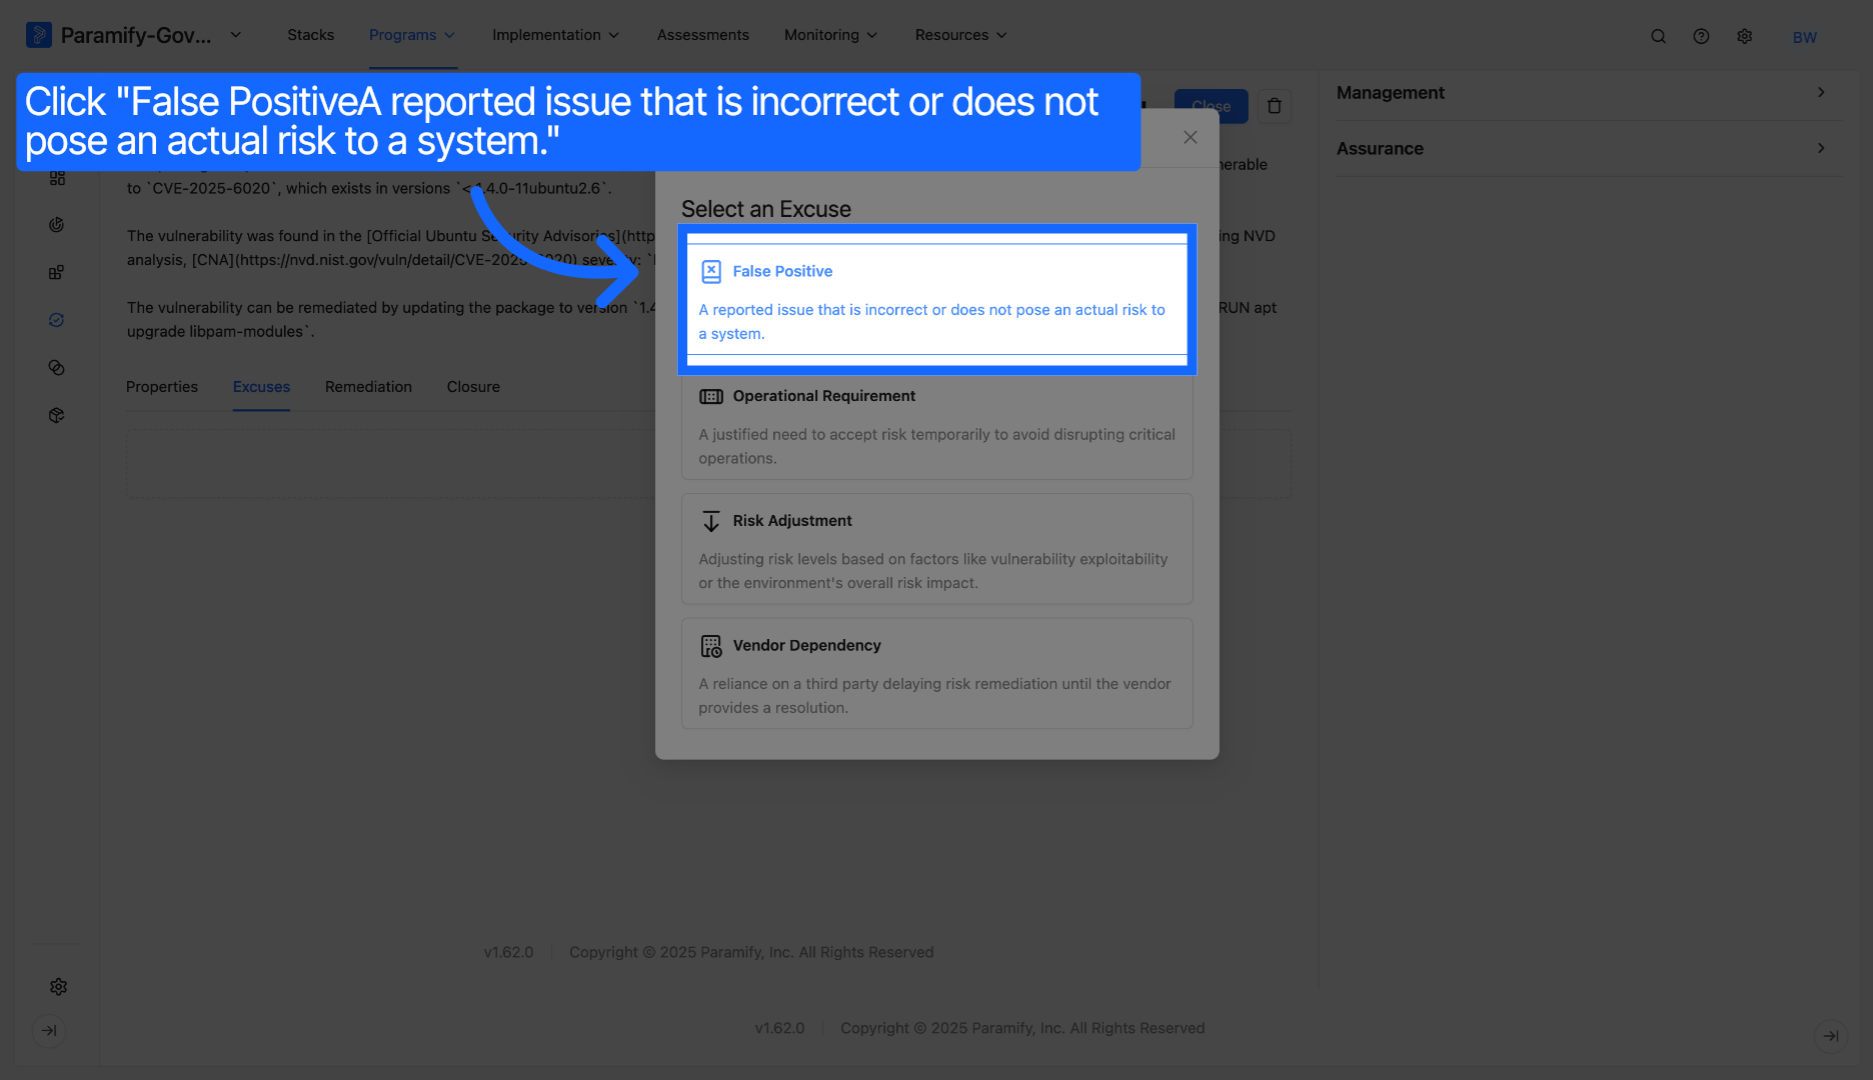
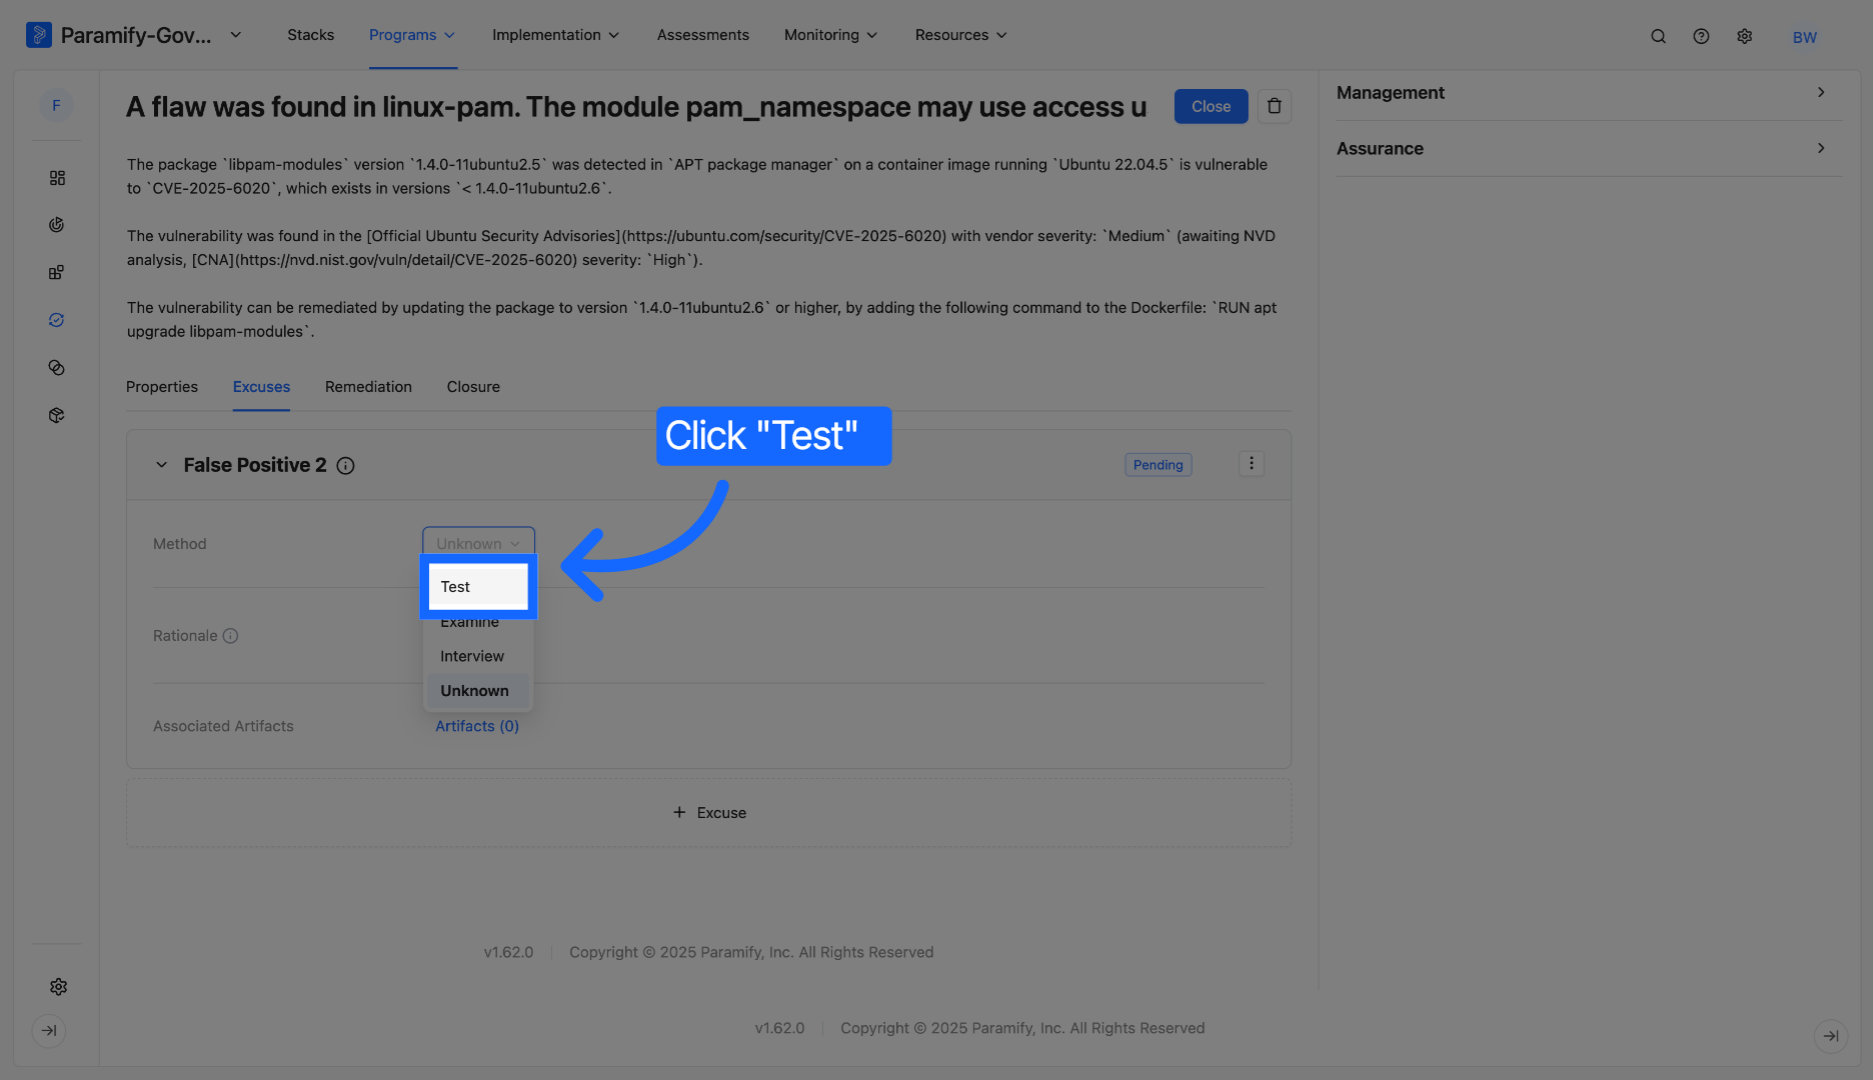
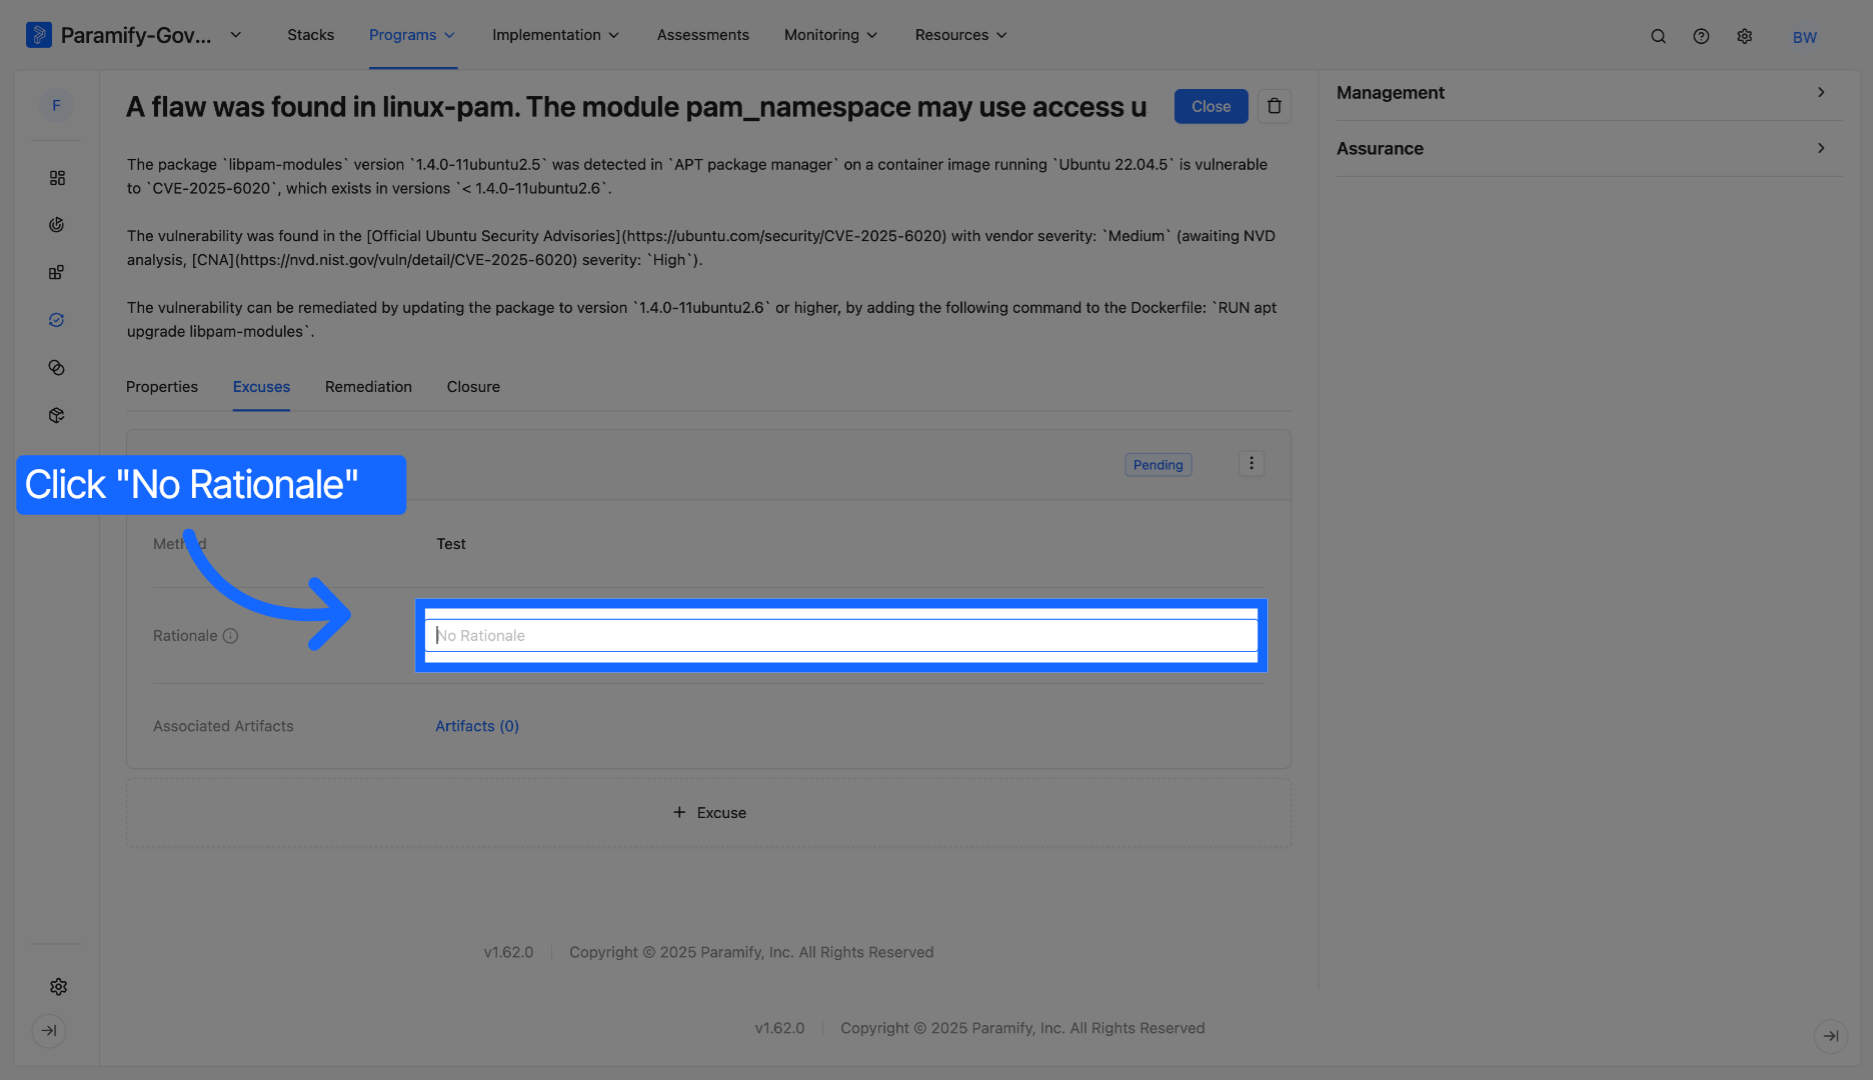
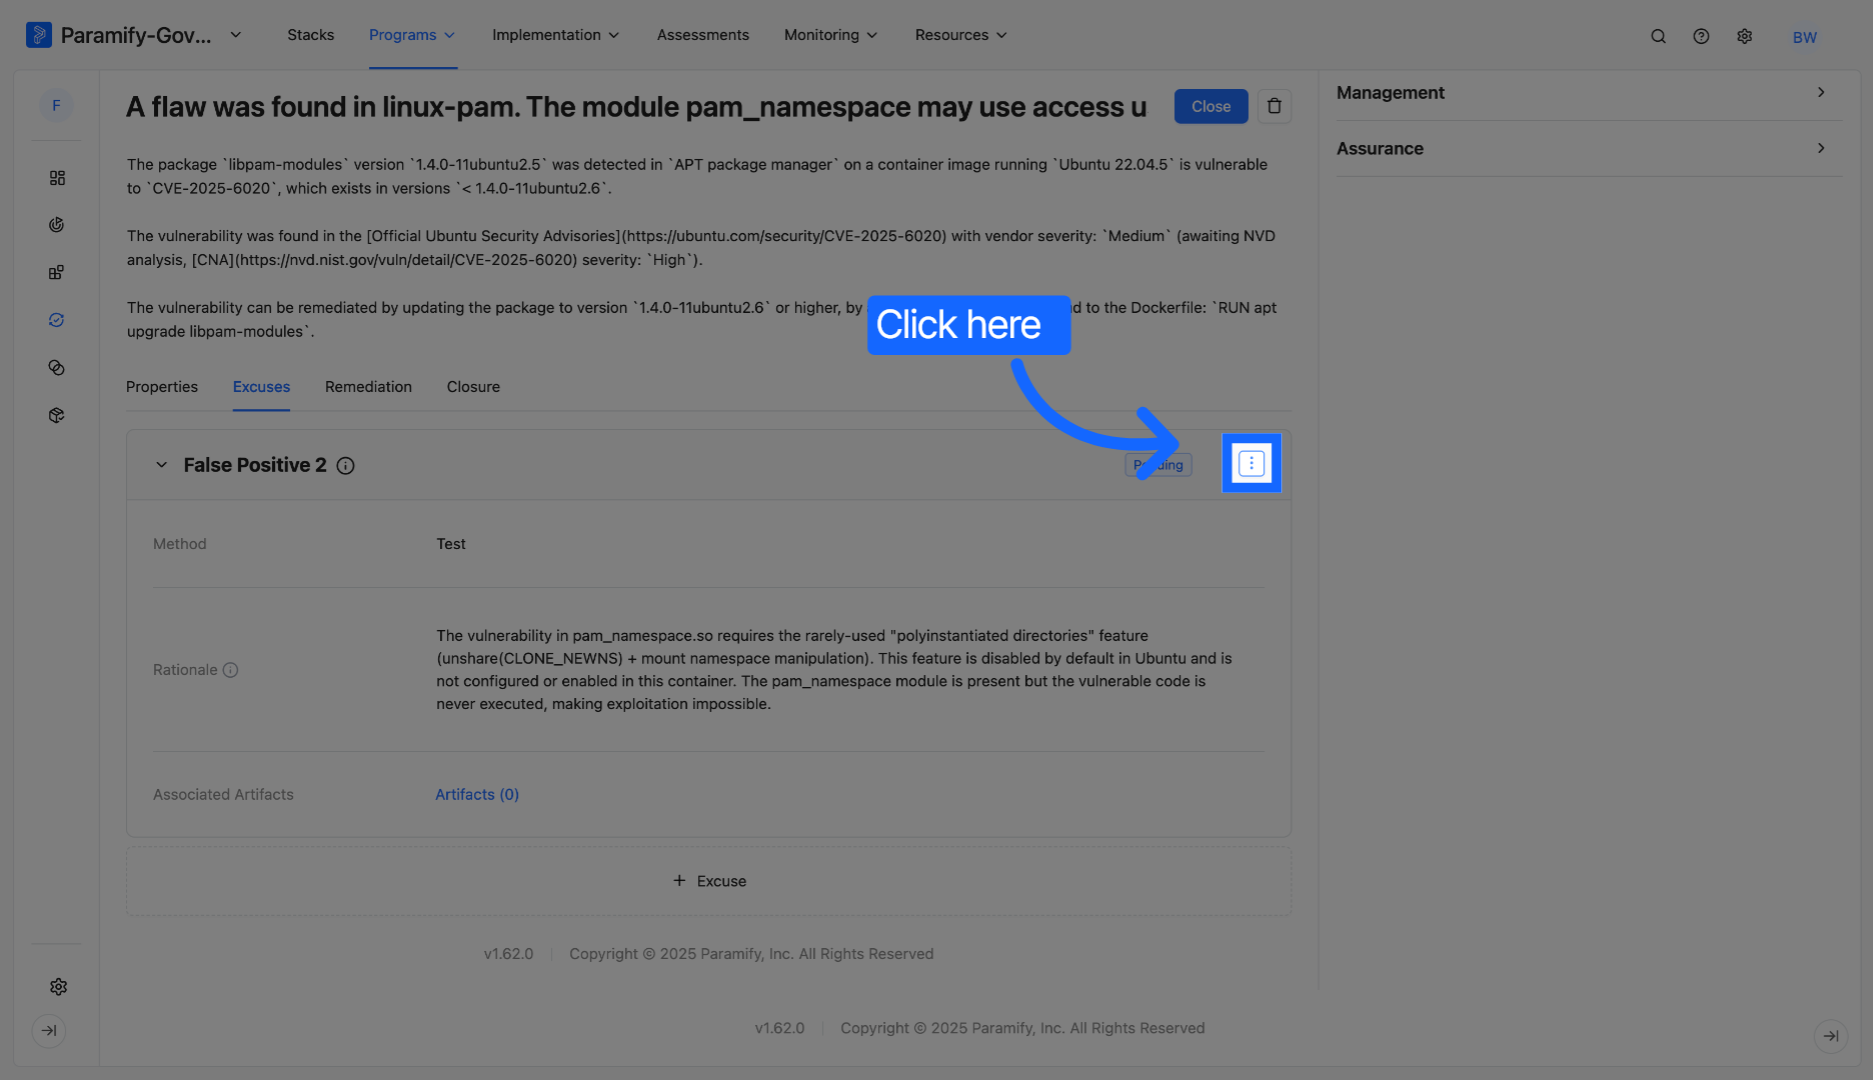
For "Risk Adjustment" Excuses, you will be able to choose the new Risk Level you want to assign to the Issue.
For "Vendor Dependency" Excuses, you will be able to select the vendor associated with the Issue.
When an issue does require a fix and no excuse applies, the next step is to define a remediation plan. Remediation tracks the specific activities, recommendations, and milestones needed to resolve the issue.
Remediation
Remediations in Issues are activities you set up to fix or address specific problems. Think of them as action plans—each one tracks what needs to be done, who's responsible, and when it should be finished. You can create, update, and monitor these from the Remediation or Issues pages.
The Remediation page has three sections:
- Activities
- Recommendations
- Summary
Let's start with the core of any remediation plan — the individual activities that define what needs to be done, by whom, and by when.
Remediation Activities
This appears in the POAM document under Column M (Planned Milestones).
Here is the structure of the Remediation Activities section:
| Title | Title of the activity. |
| Vendor Dependency | Yes or No |
| Target Date | Target date for the activity to be complete. |
| Status | Open of Closed |
| Responsible Role | The responsible role for the activity. |
| Target Component | The Component associated with the activity. |
| Updates | A history of updates for the activity. |
You can create a Remediation Activity by clicking "+ Remediation Activity" and follow the instructions.
In addition to planned activities, you can also capture recommendations. Suggested actions tied to specific components that inform future remediation efforts.
Recommendations
Here is the structure of the Recommendations section:
| Target Component | The Component associated with the recommended activity. |
| Description | Description of the recommended activity. |
| Date | The date the recommendation was created. |
You can create a Recommendation by clicking "+ Recommendation" and follow the instructions.
Summary
This is a simple summary of the Remediations. You can click the blue "Summarize" button to generate an automated summary.
Once all remediation activities are complete and the summary reflects the current state, the final step is closing the issue.
Closure
The Closure simply includes the Closing Statement, Date Closed, and the person who closed the Issue.
Comments
0 comments
Please sign in to leave a comment.