
This article walks you through everything you need to do to get your Paramify Trust Center live — from initial setup to publishing content, managing access requests, and keeping your portal up to date.
Before You Begin
The Trust Center tab is only visible to workspace admins. If you don't see it in your Paramify navigation bar, contact your workspace owner to have admin permissions assigned. To start configuring your Trust Center, a system name needs to be set in the program settings, and the workspace needs to contain necessary controls or KSIs.
Step 1: Configure Your Trust Center Settings
Before publishing anything, set up your Trust Center's identity — the URL slug and branding that visitors will see.
1. Open Trust Center Settings
In your Paramify workspace, click Trust Center on the top navigation bar, then select the Trust Center → Settings tab.

2. Set your company slug
Enter a URL-friendly identifier for your organization in the Company Slug field. This becomes the last segment of your public Trust Center URL (e.g., trust.paramify.com/your-slug). The slug must be set before you can publish.

3. Add your branding
Upload your company logo and icon, and configure your company name so the Trust Center reflects your organization's identity to every visitor.

Step 2: Publish Your Trust Center
Publishing pushes your current compliance data — programs, controls, subprocessors, and systems — from your Paramify workspace to the live Trust Center portal. This is what makes your security posture visible externally.
1. Click Publish
From the current tab, click the Publish button. Before anything goes live, Paramify displays a confirmation screen listing exactly which content will be made public.

2. Review and confirm
Review the list of items that will be published. Pay particular attention to any deliverables marked as Public — these will be accessible to anyone without an access request. Once you're satisfied, confirm to publish.
3. Verify your portal is live
After publishing, navigate to your Trust Center URL and confirm everything looks correct. The Settings tab also shows a Last Published timestamp so you always know how current your portal is.
TIP
Re-publish any time your compliance program changes — for example, after completing new controls, updating policies, or onboarding a new subprocessor. Your Trust Center always reflects whatever is published at that moment.
Step 3: Manage Deliverables
Deliverables are the compliance documents you make available through the Trust Center — ATO packages, SSPs, policies, custom artifacts, and more. Each deliverable can be set as Public (anyone can download it) or Restricted (requires an approved access request).
1. Open the Deliverables tab
Navigate to Trust Center → Content to upload deliverables to your trust center.

2. Upload each deliverable
Select Add Programs, and select the program for which you want to upload the desired deliverable. For each document, choose Public or Restricted. Public deliverables are immediately downloadable by any visitor. Restricted deliverables are visible to visitors but require them to submit an access request before downloading.
3. Publish to make changes live
Changing a deliverable's visibility does not take effect until you publish again. After updating any deliverable settings, return to the Settings tab and click Publish.
4. Un-publish a deliverable (if needed)
To remove a deliverable from your public Trust Center — for example, if a document was shared by mistake — remove the document via the delete icon and re-publish. The document will no longer be downloadable publicly.
Step 4: Review Your Published Controls
The Trust Center displays your security controls grouped by compliance program, each with a status that tells visitors how your implementation stands:
| Status | What It Means |
|---|---|
| Pass | Control is implemented, has an alternative implementation, or is not applicable |
| Planned | Implementation is on the roadmap but not yet complete |
| Partial | Control is partially implemented |
| Pending | Implementation status is not set or is pending validation |
| Fail | Control is not implemented |
Control statuses are set within Paramify and published to the Trust Center along with your program data.
Step 5: Designate Subprocessor Systems
When publishing to the trust center, you can designate which subprocessor systems are relevant to a published program.
1. Click Programs to open the list of available programs
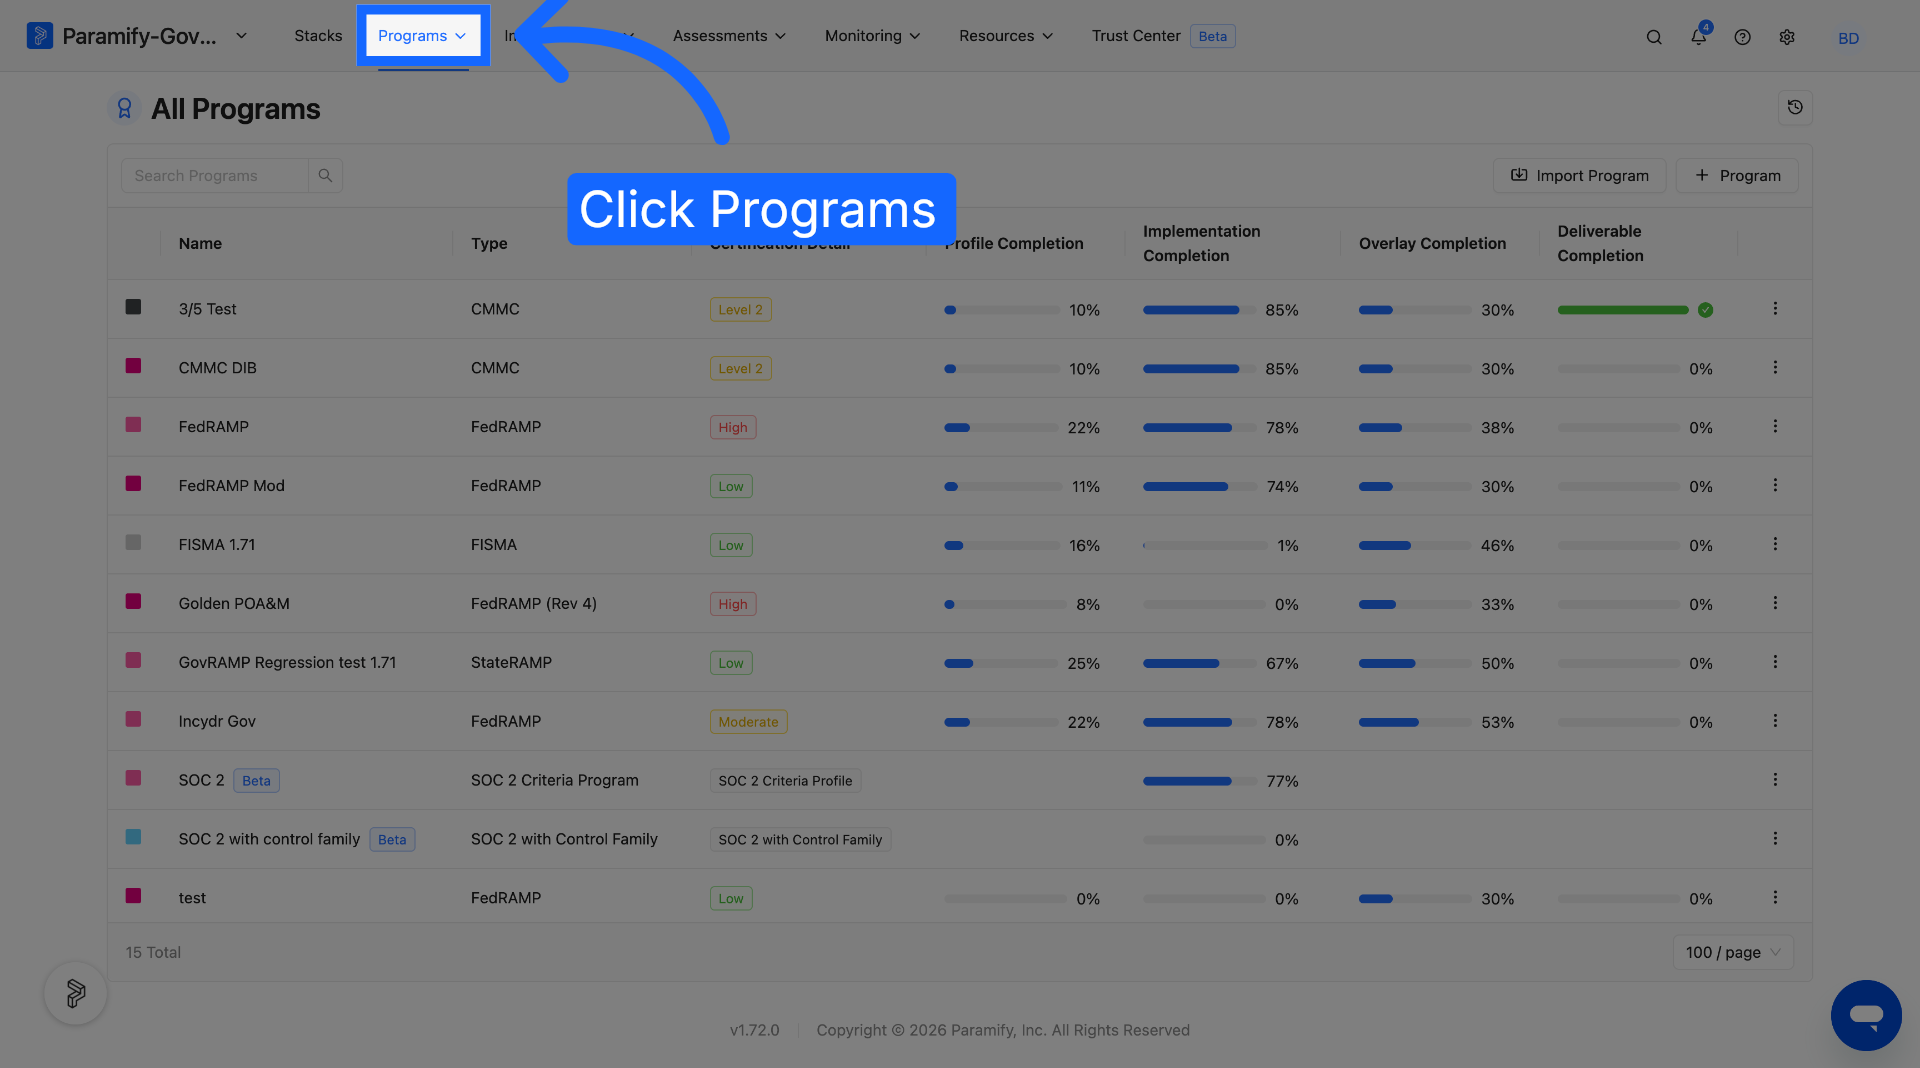
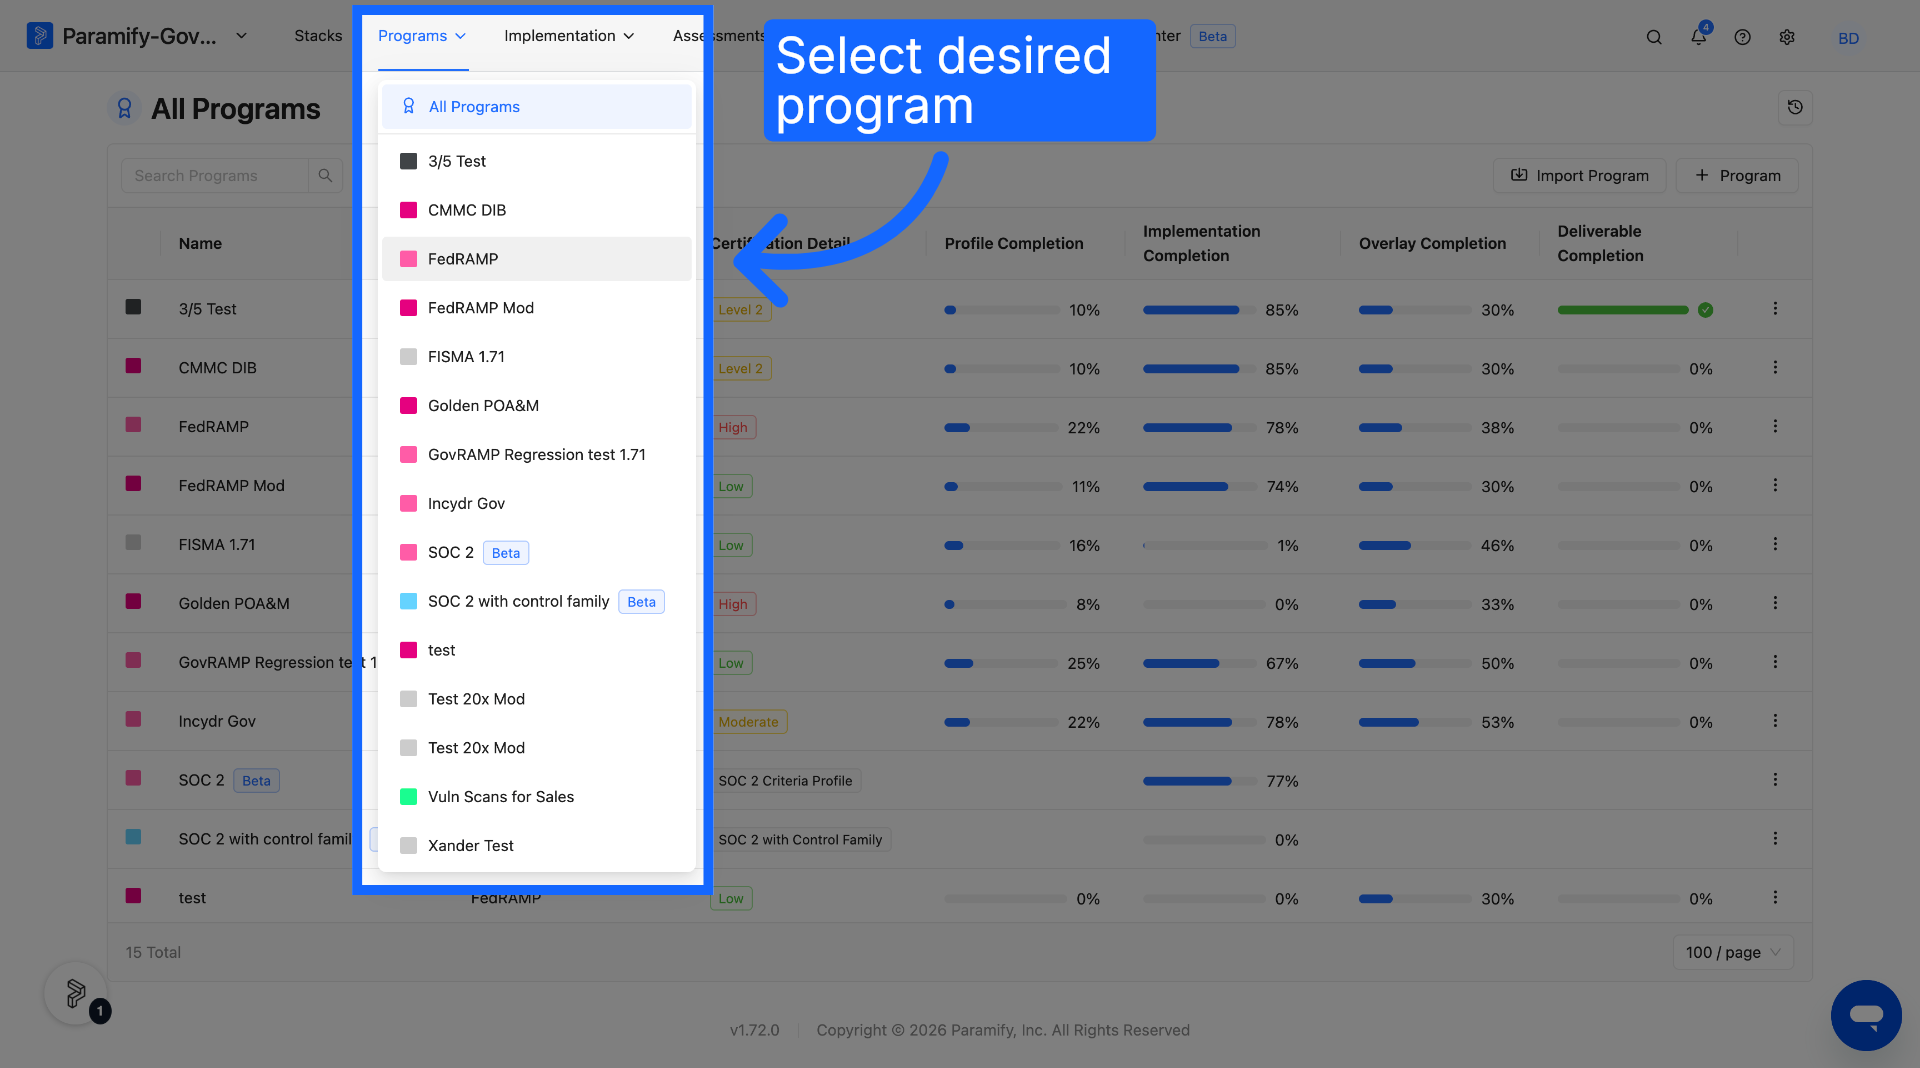
2. Open a Desired Program
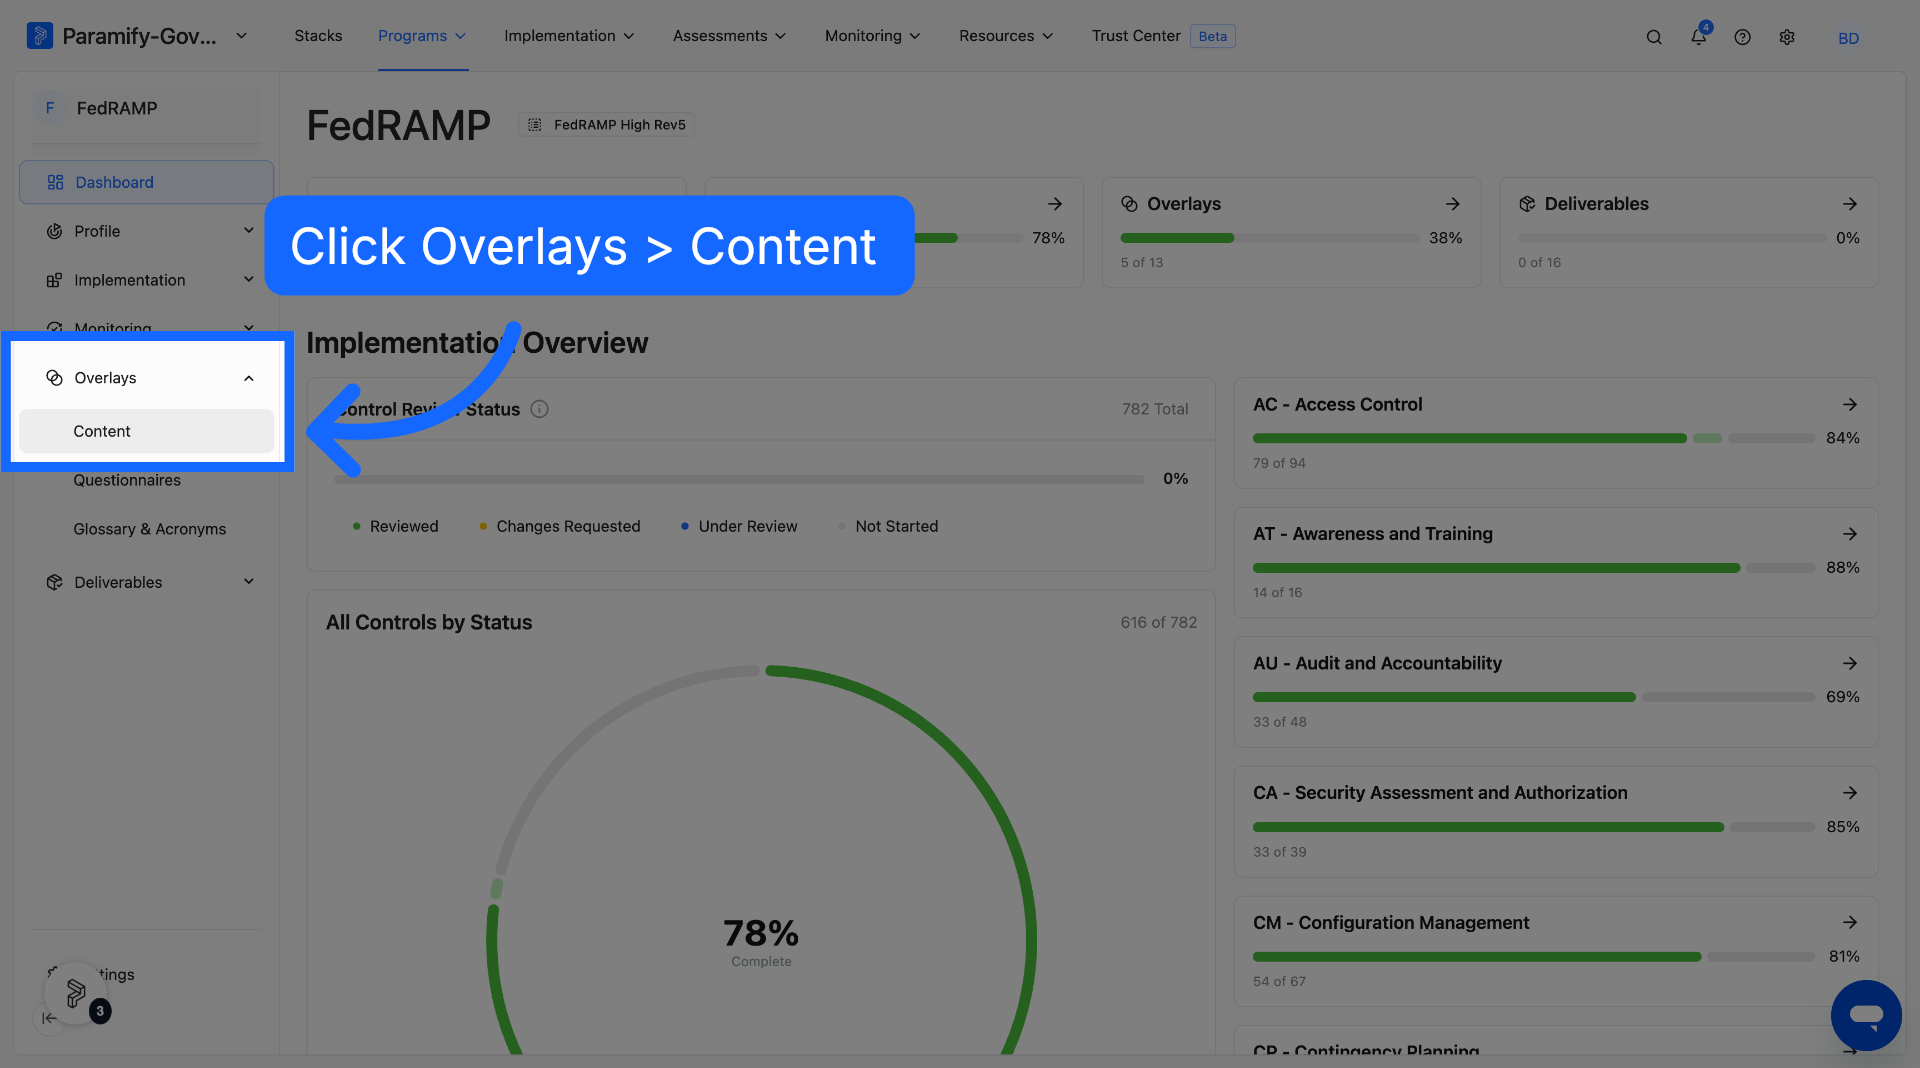
3. Click Content" under Overlays to manage the content settings for the program
4. Select Start under Leveraged Systems
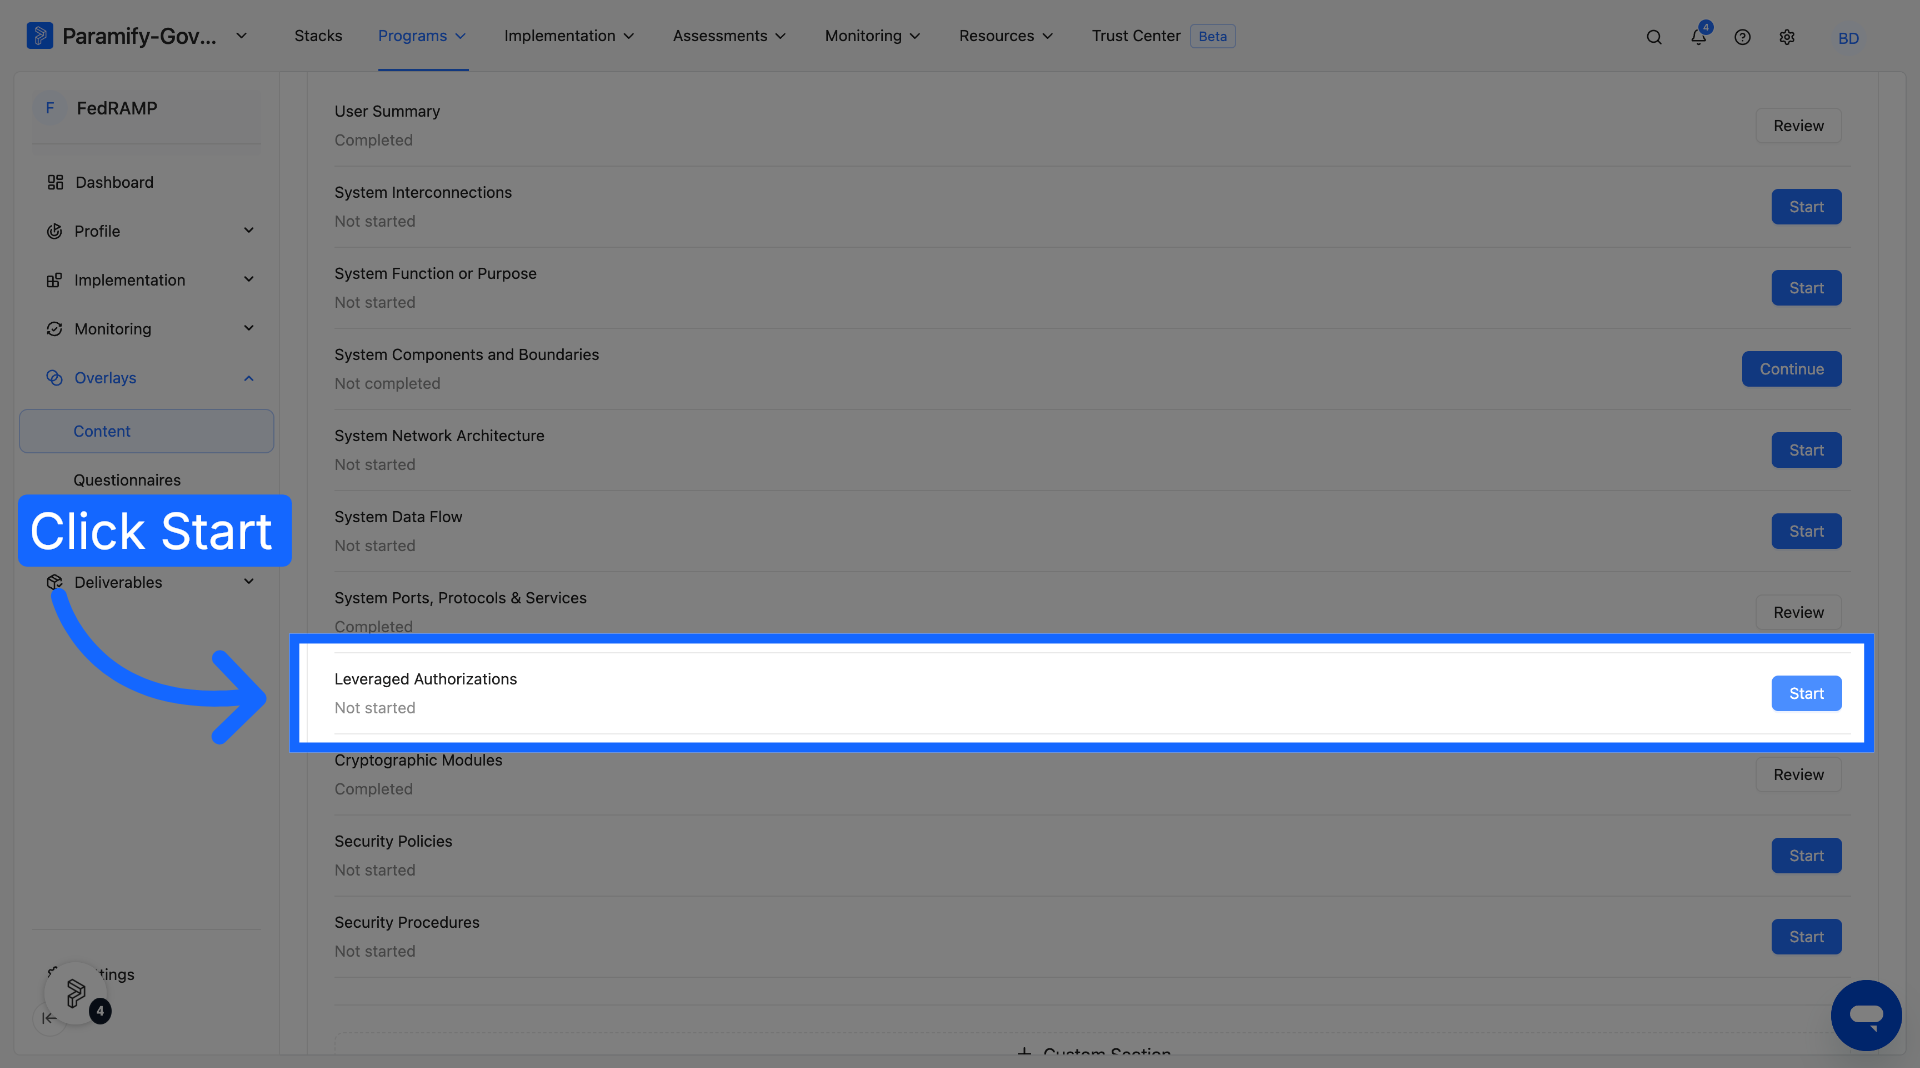
5. Select Checkbox and Subprocessor System Toggle
For any component that you want to appear as a Subprocessor System on your Trust Center, select both the checkbox and toggle.
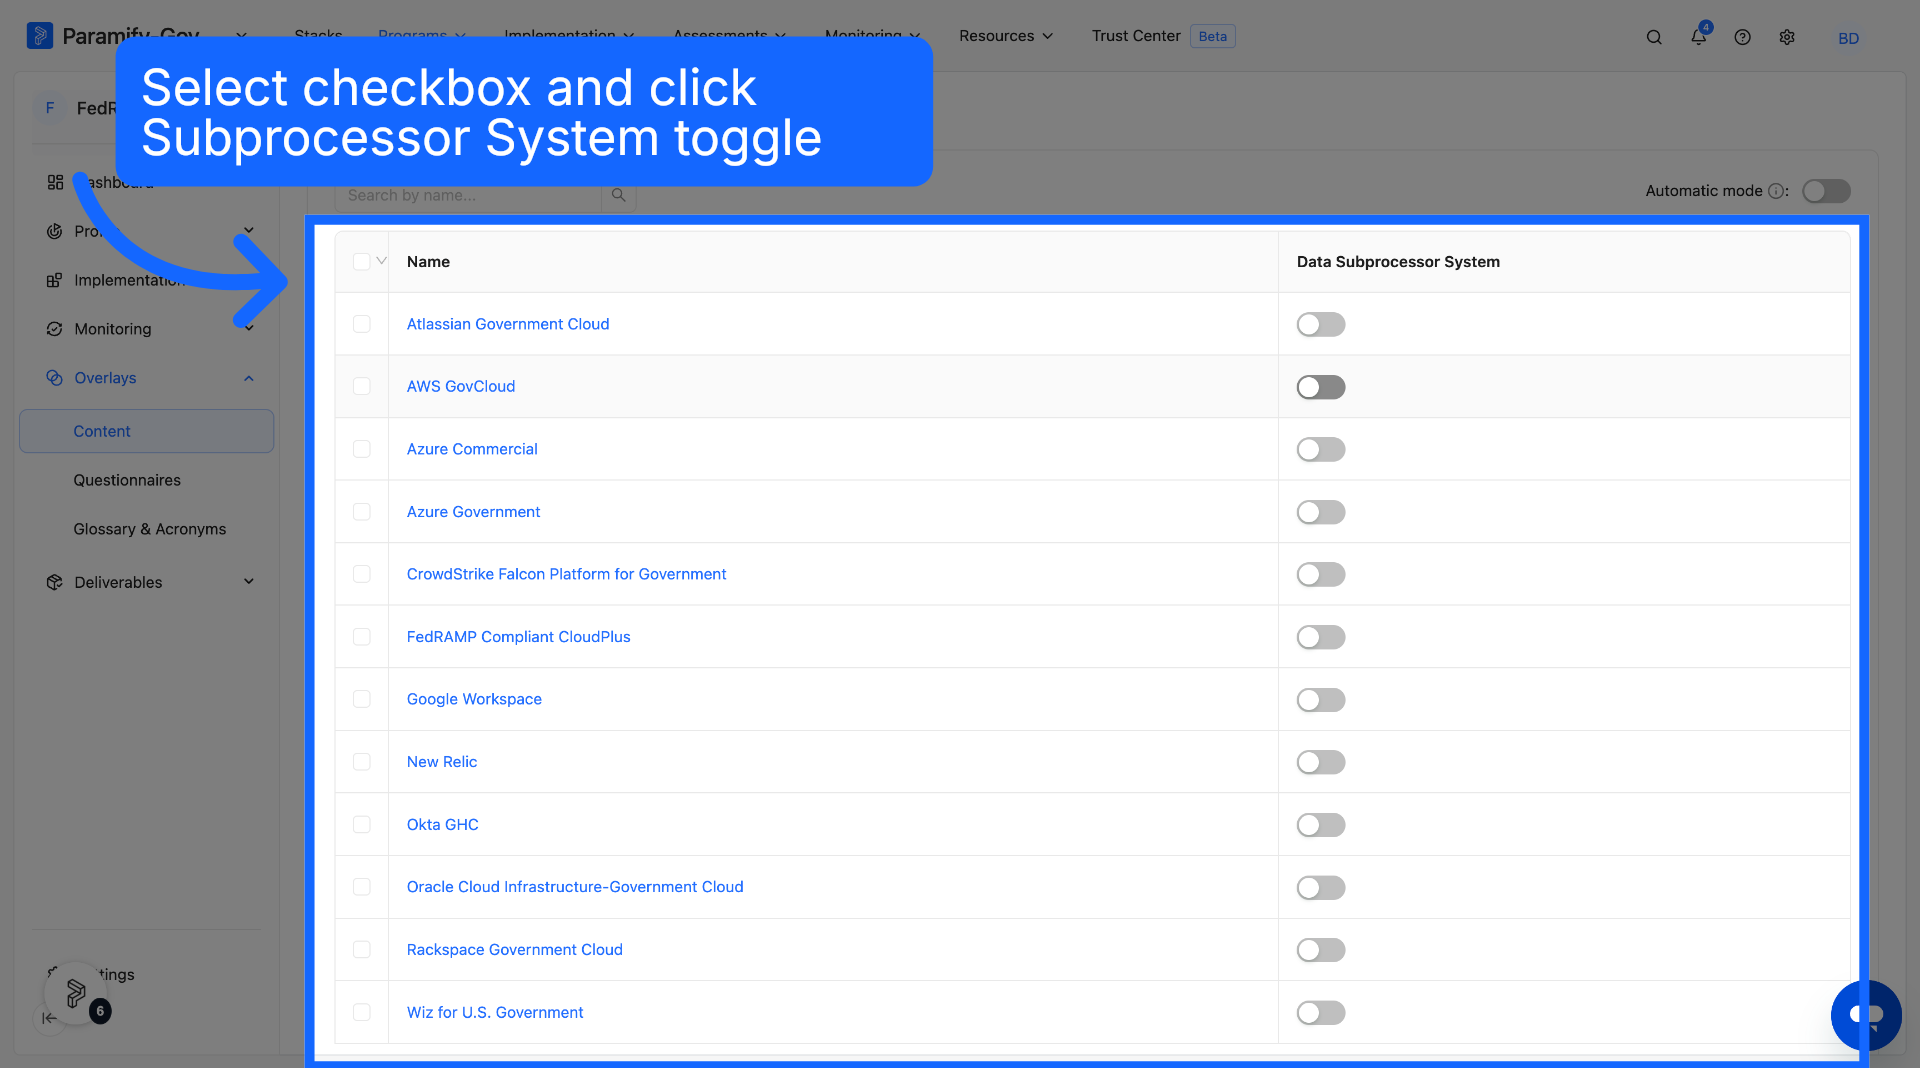
After selecting desired Subprocessor Systems, be sure to publish again to the Trust Center in order to see the changes take effect.
Step 5: Handle Incoming Access Requests
When a visitor requests access to a restricted deliverable, a notification is sent to your team and the request appears in the Requests tab of your Trust Center management page.
1. Open the Requests tab
Navigate to Trust Center → User Access → Access Requests to see all pending access requests. Each request shows the visitor's name, email, organization, and the reason they provided (Existing Customer, Potential Customer, or Other).
2. Approve or deny the request
Click on a request to open the access request modal. Review the visitor's details and select Approve or Deny. The requestor automatically receives an email informing them of your decision — no manual follow-up required.

3. Approved requests are cleared automatically
Once a request is approved or denied, it is removed from the pending queue. Approved users are added to the Users tab where their access can be managed going forward.
NOTE
If the same visitor submits multiple requests of the same type, only the most recent one is retained. Duplicates are automatically deduplicated so your queue stays clean.
Step 6: Manage Authorized Users
The User Access tab shows everyone who currently has approved access to restricted content in your Trust Center. From here you can review permissions, add users proactively, and revoke access at any time.
1. View authorized users
Navigate to the Users Access tab to see the full list of users with approved access, including their email, organization, approval status, and the level of access they hold.

2. Grant user access
Click the Access Requests button to grant access to a user. Access requests to all documents can be approved at once, or access can be given on an individual document basis. Access duration can also be specified per document.
3. Revoke access
To remove a user's access, locate them in the Users table and remove all access and delete the user via the three dots on the right.
Keeping Your Trust Center Up to Date
Your Trust Center only reflects what was published at the time of your last publish action. After making any of the following changes in Paramify, remember to re-publish so your portal stays accurate:
- Adding or updating compliance controls
- Publishing new or revised deliverables
- Adding, editing, or removing subprocessors
- Changing a deliverable from Restricted to Public (or vice versa)
- Updating your branding or company information
The Last Published timestamp on the Settings tab makes it easy to see if your portal is behind your current workspace state.
Comments
0 comments
Please sign in to leave a comment.