
Inventory Pipeline presets map data from scan files straight into Paramify. That works for most variables. Sometimes, though, a variable needs a value that doesn’t exist in the raw data, or needs to follow an organization’s formatting rules. Advanced Configuration handles those cases. It allows building the exact value a variable should receive and controlling which objects receive it.
Setting it up takes two steps, plus an optional one:
- Set the variable’s type to Advanced Configuration.
- (Optional) Create the custom variables that build the value you need.
- Create rules that assign those custom variables back to the variable.
Field Configuration
Each variable in a Pipeline preset, such as Unique ID or Parent Component, gets its value from the source selected in the Type column. Field from File pulls a value from the scan file, and Data from Workspace pulls one from the Paramify workspace. Use Advanced Configuration when neither option fits. Common use cases include:
- Custom Unique IDs: Build an identifier that follows the organization’s naming convention rather than using the scanner’s native ID.
- Matching formatting standards: Reshape scan output to match how the team already labels assets. For example, combine fields, add prefixes, or shorten long IDs.
- Targeted values: Assign a special value only to specific elements that meet certain conditions, while everything else keeps a standard value.
This example creates a custom Unique ID.
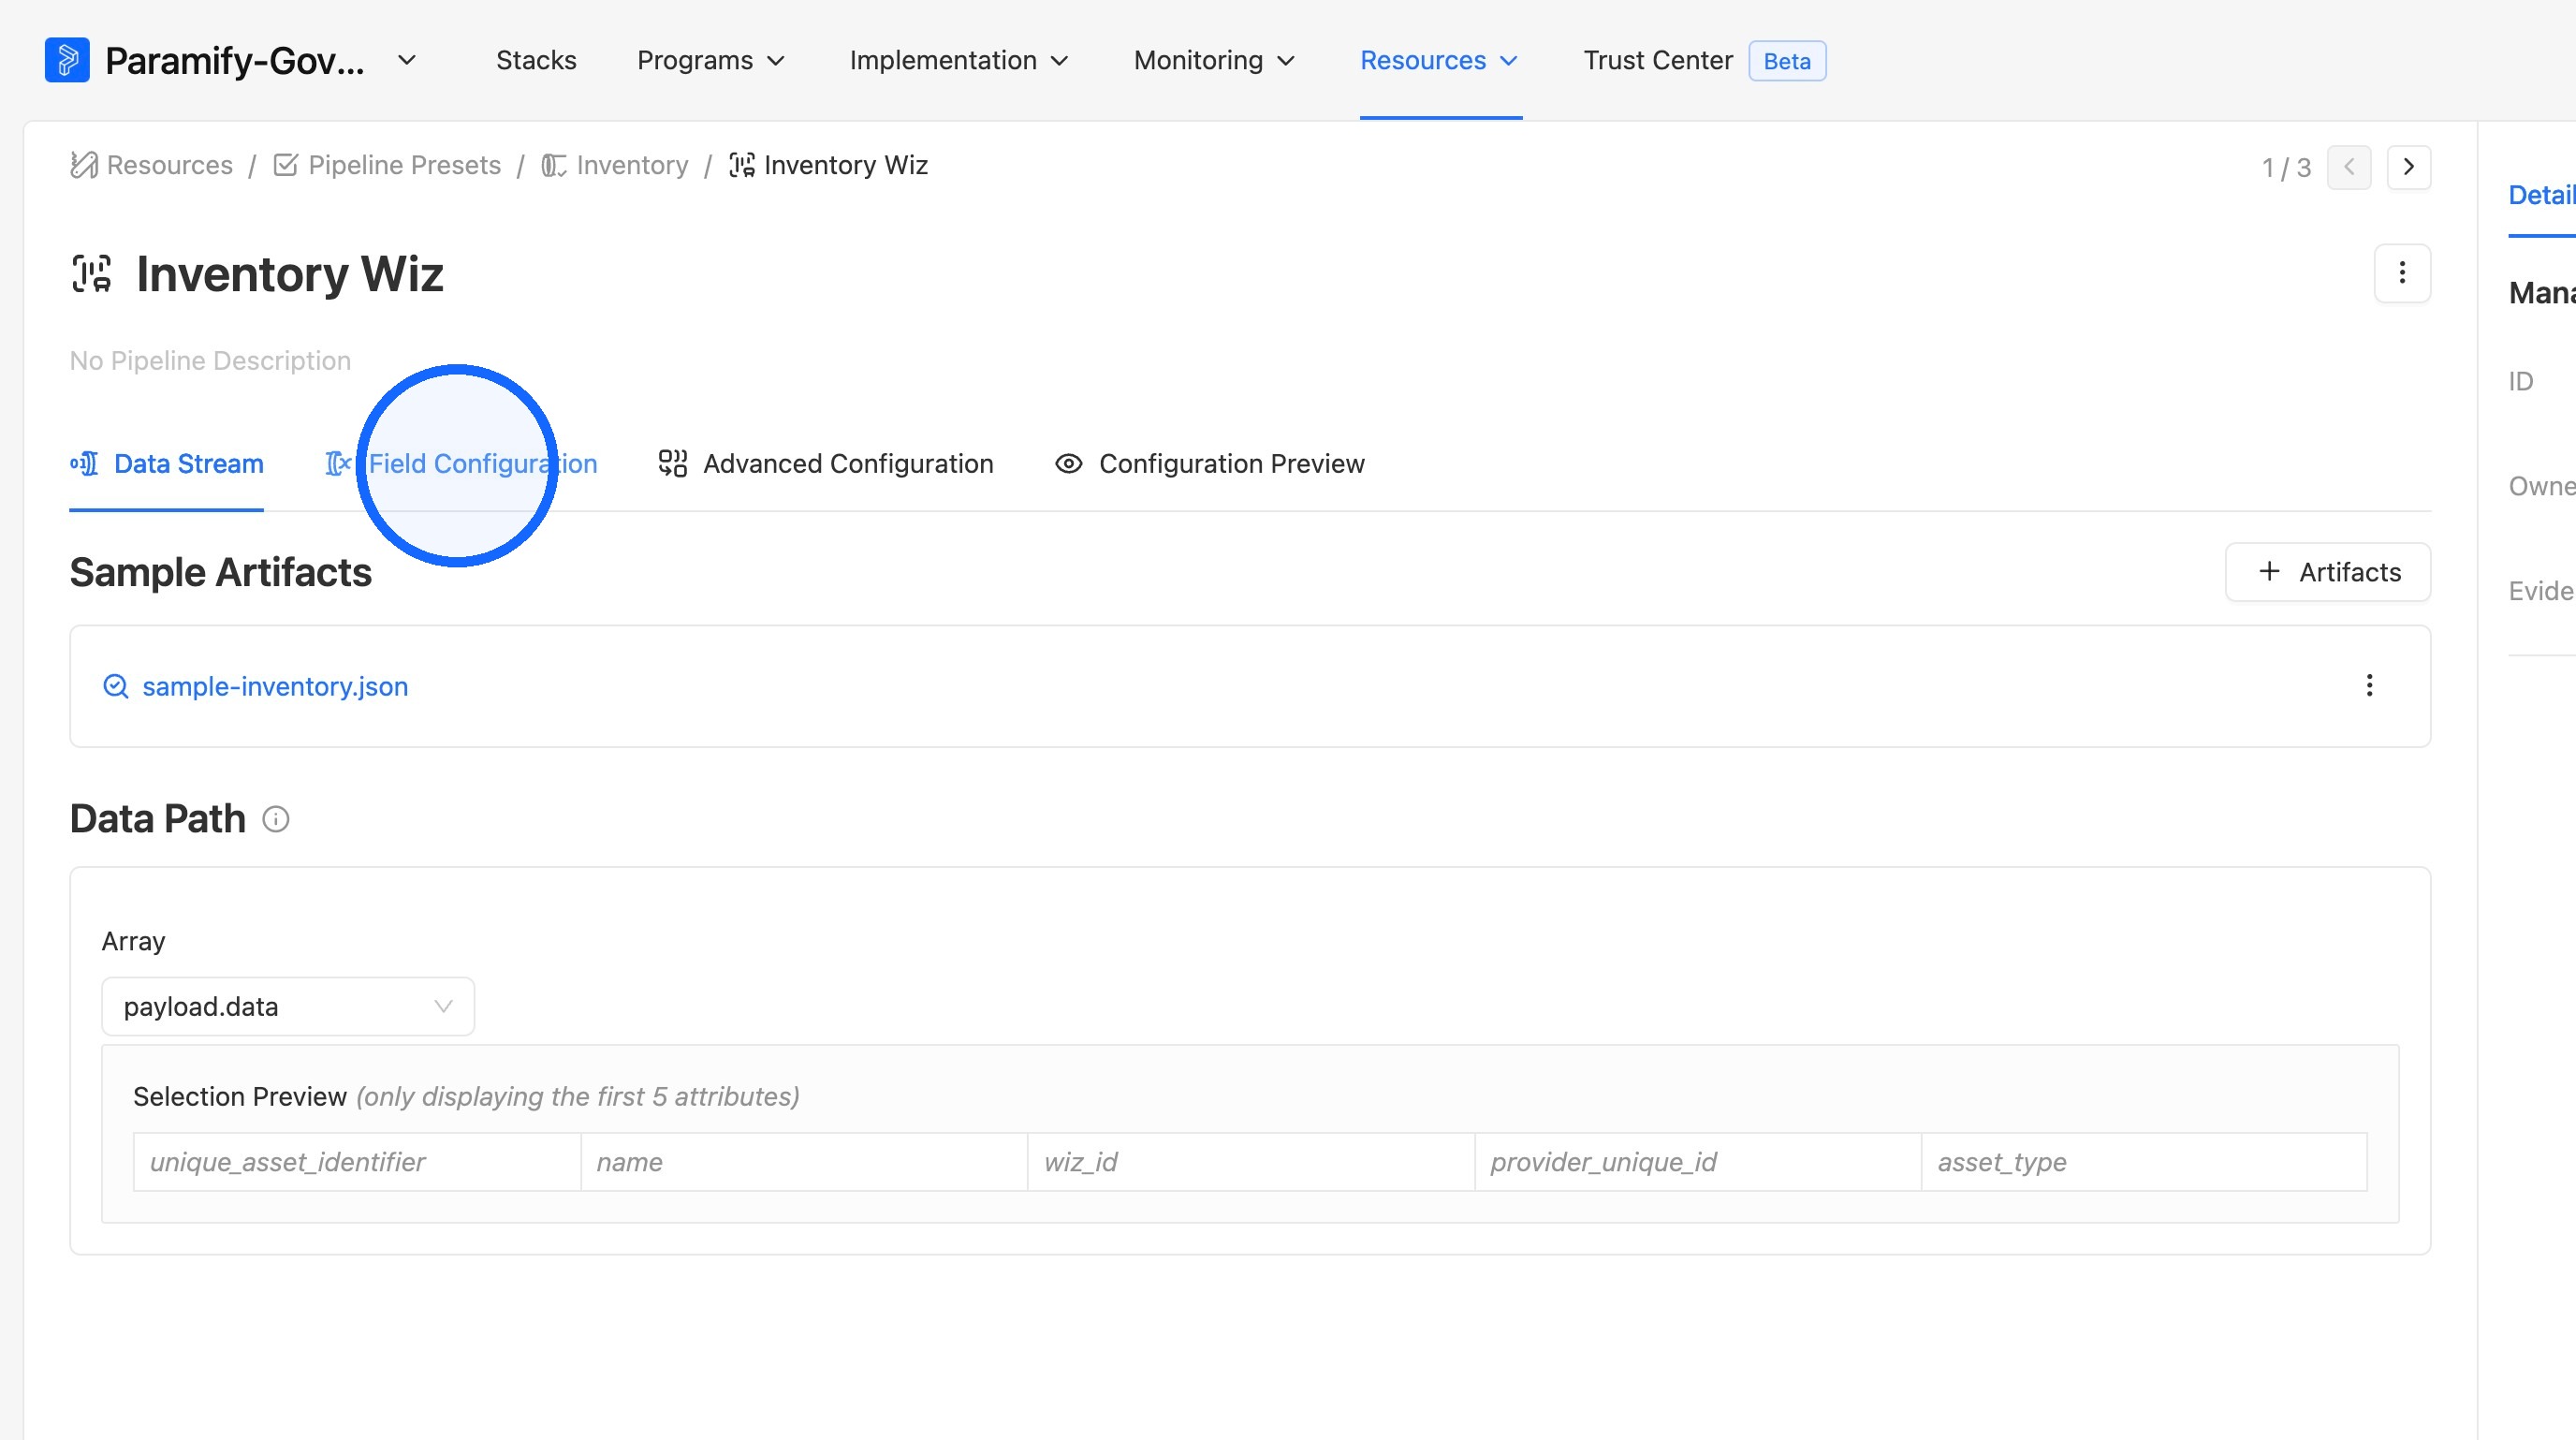
1. Open the Field Configuration tab
Navigate to the Pipeline and click the Field Configuration tab.
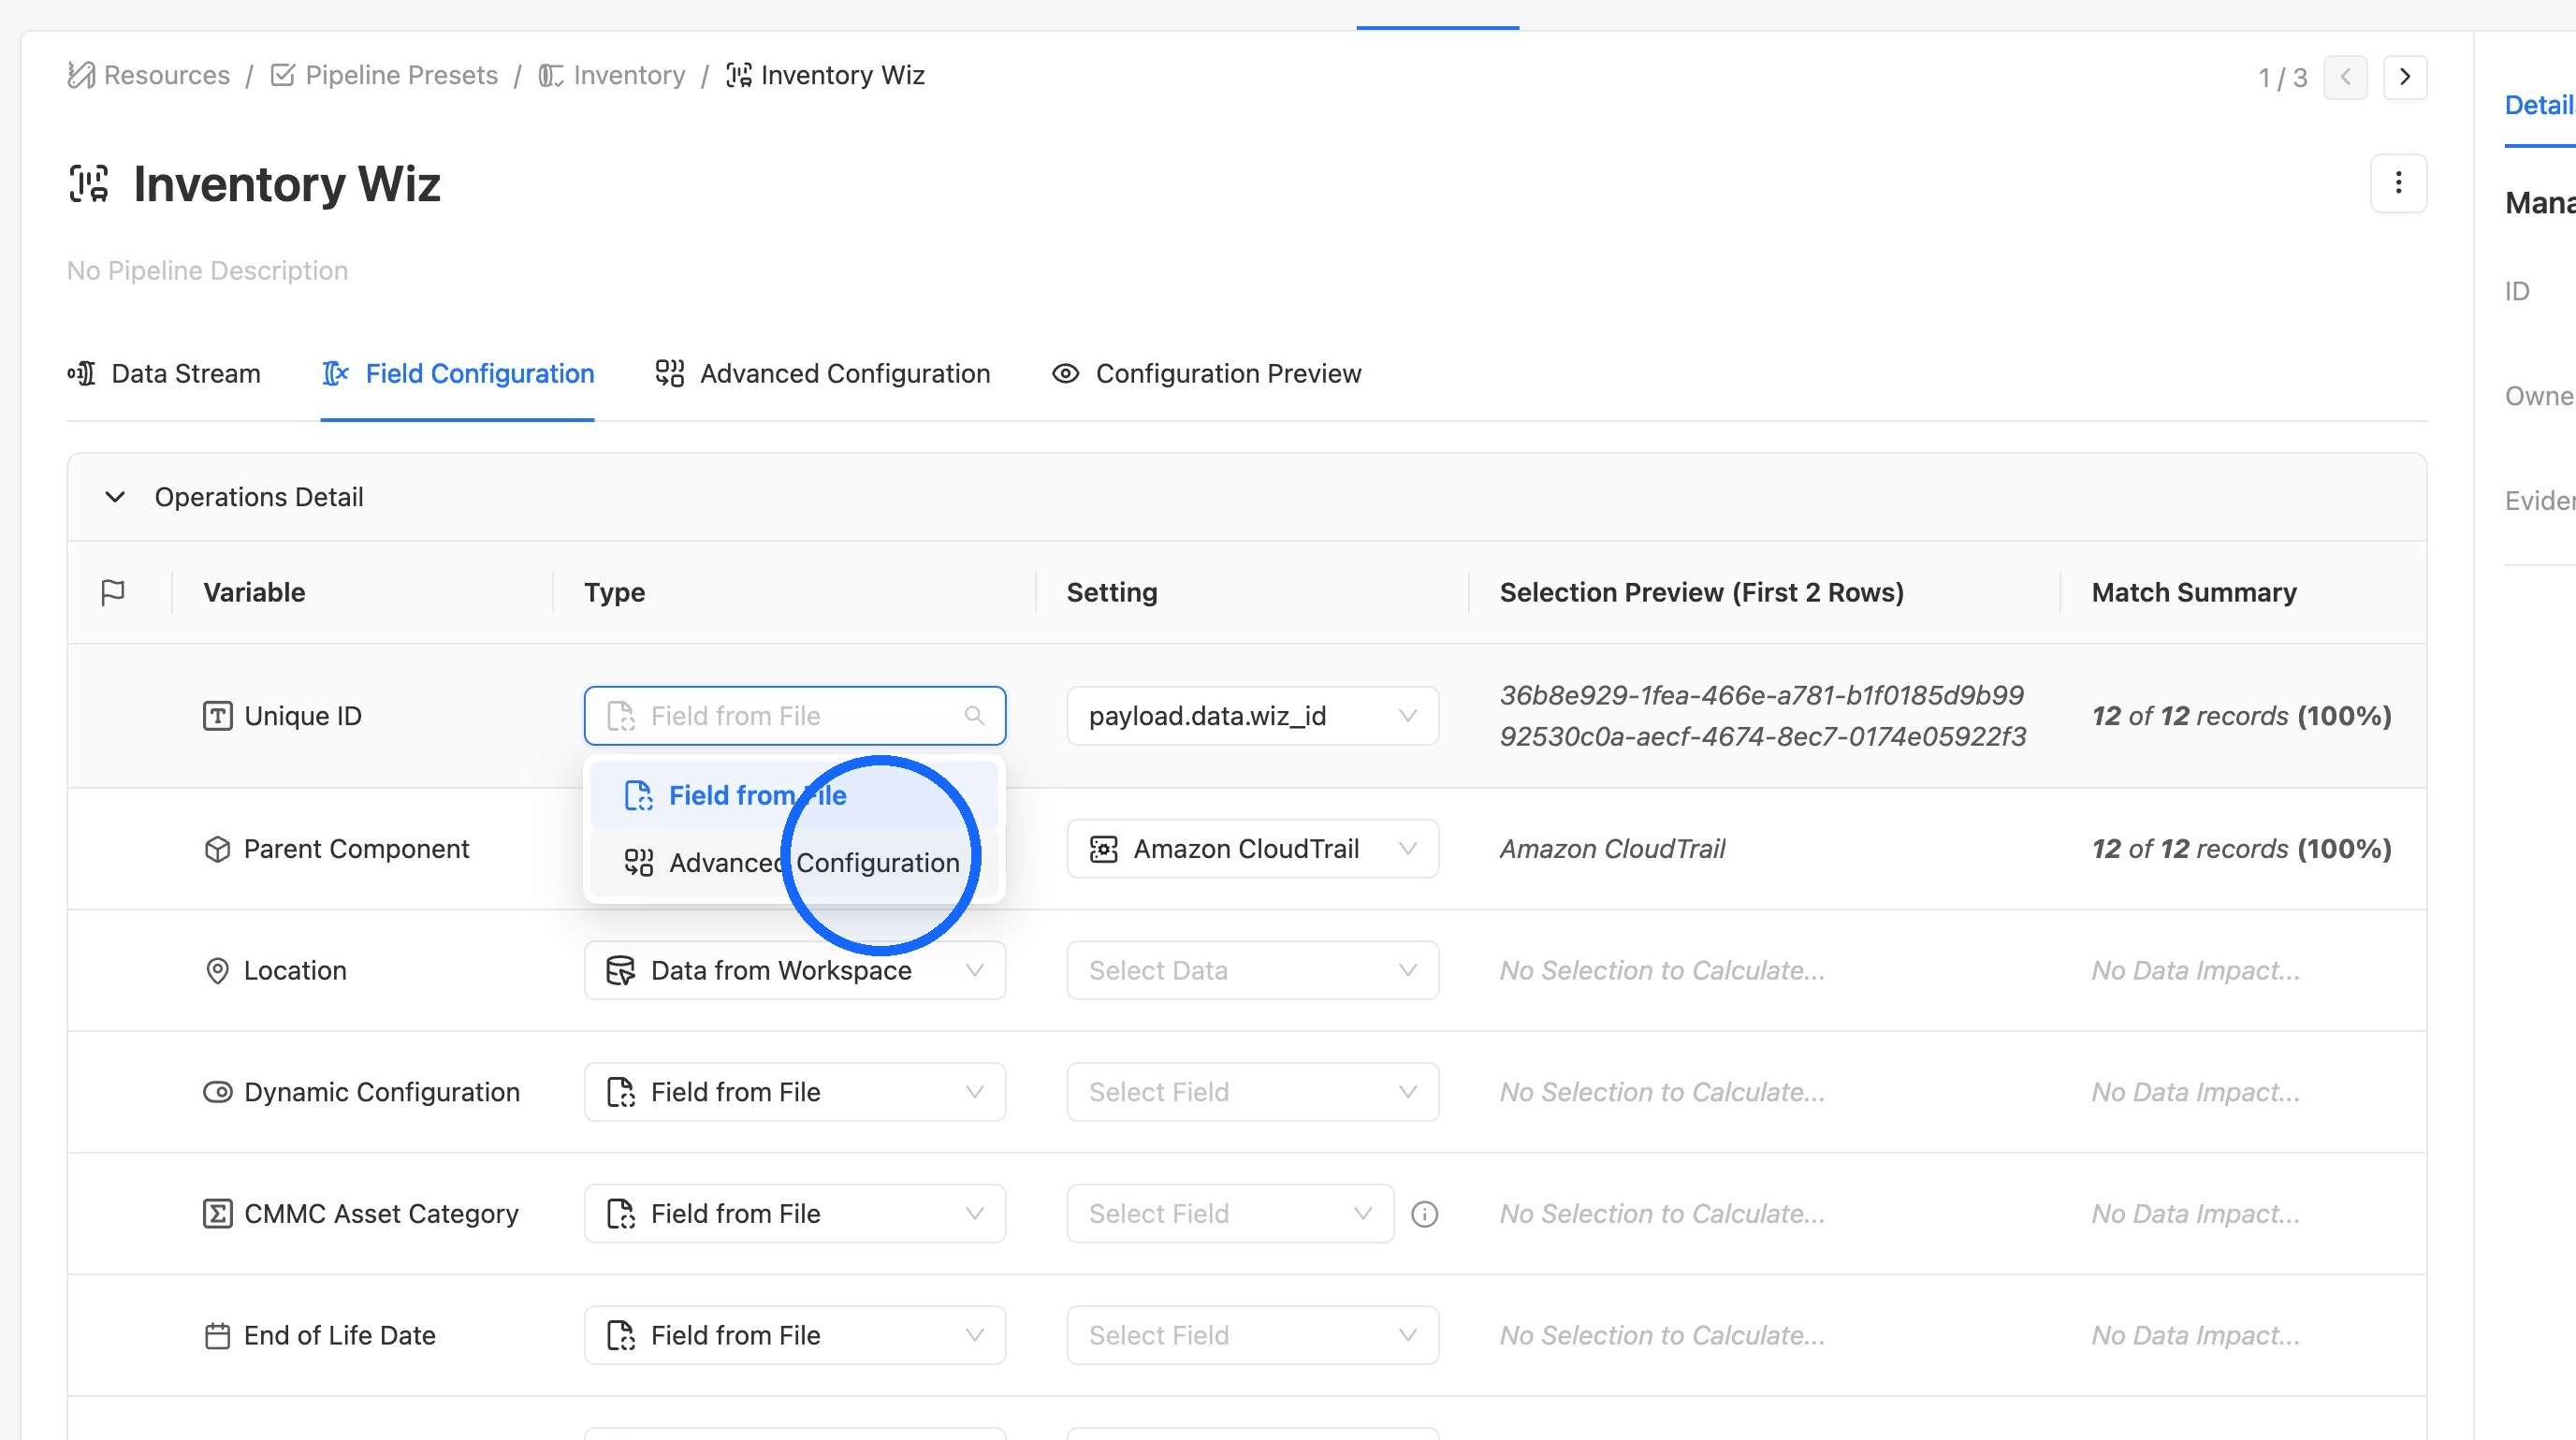
2. Set the variable type to Advanced Configuration
In the Type column, select Advanced Configuration for the variable that needs it.
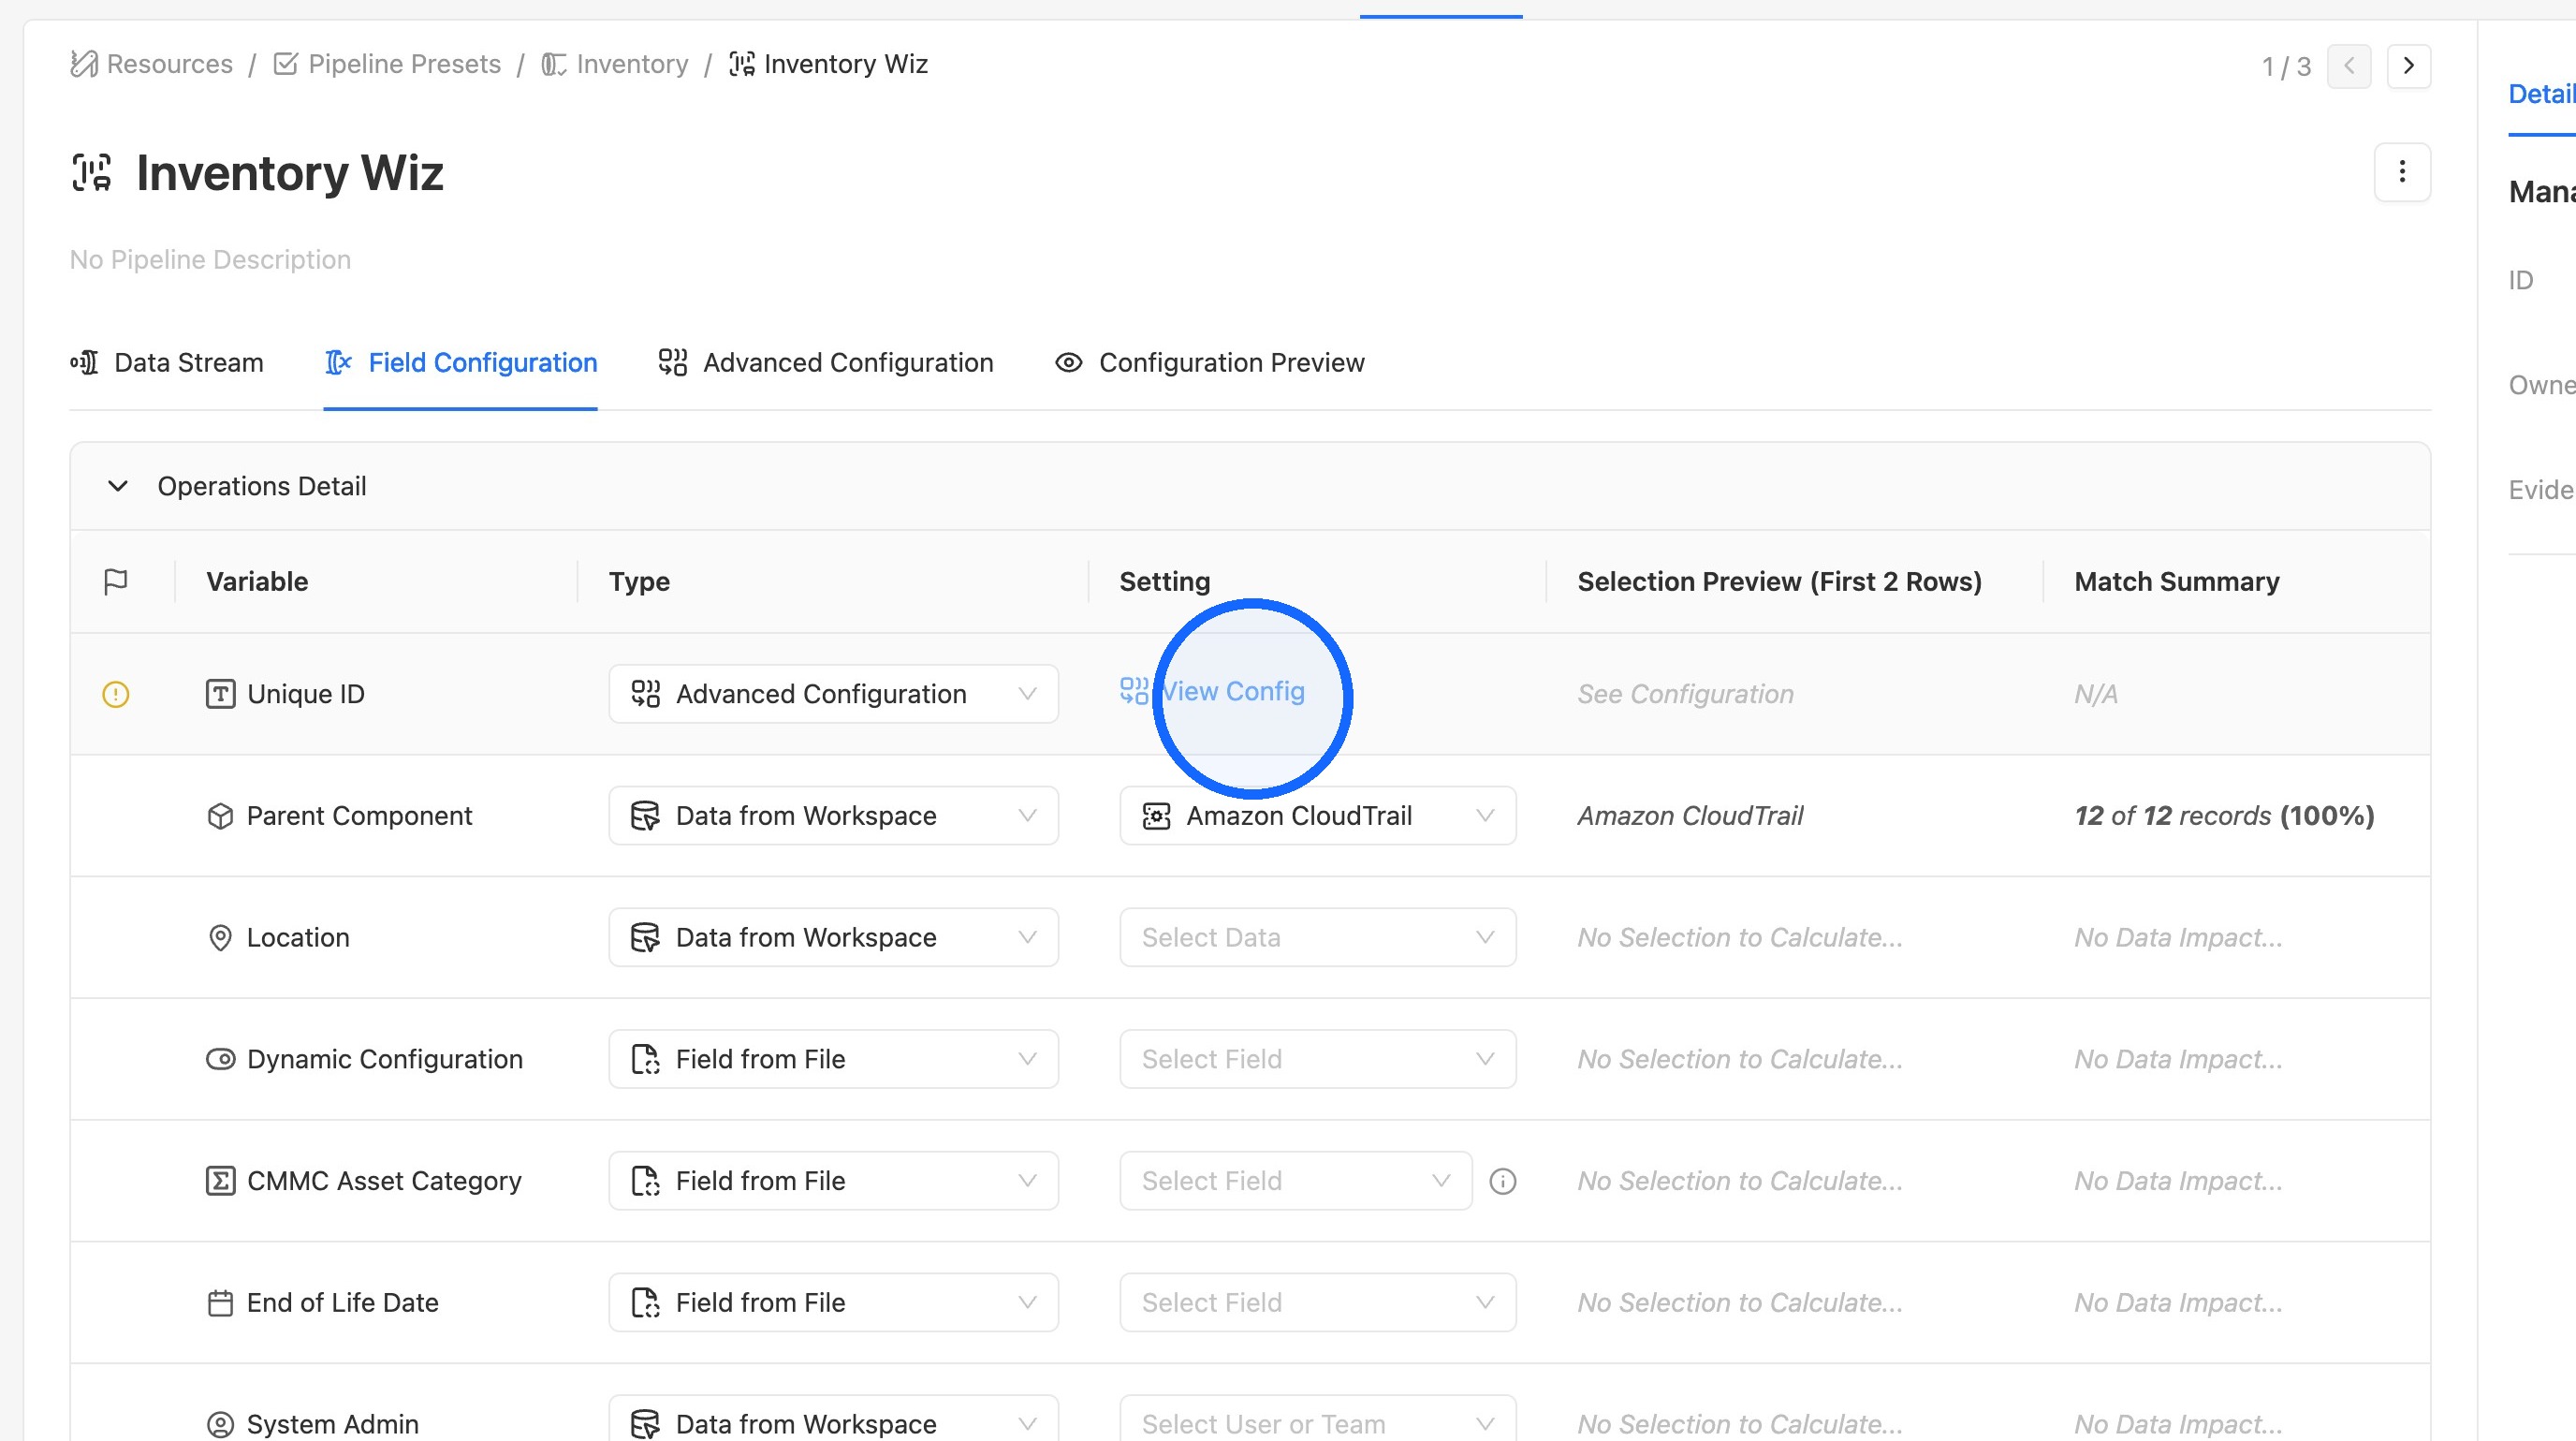
3. Open the variable’s configuration
Click View Config for that variable.
Custom Variables
Custom variables are optional values you can build and then use in rules. They’re useful when a variable needs a value that doesn’t exist as-is in the scan data, you want to pull data from the workspace, or perform calculations; such as a combined ID or a shortened string. If a rule can be created without constructing a Custom Variable, you can skip this section. Creating a custom variable doesn’t change anything or assign values on it's own. It only makes the value available to rules.
There are three types of custom variables:
- Concatenation: Joins multiple fields, and optional custom text, into a single value.
- Workspace Data: Pulls a value from an existing User or Element in the Paramify workspace.
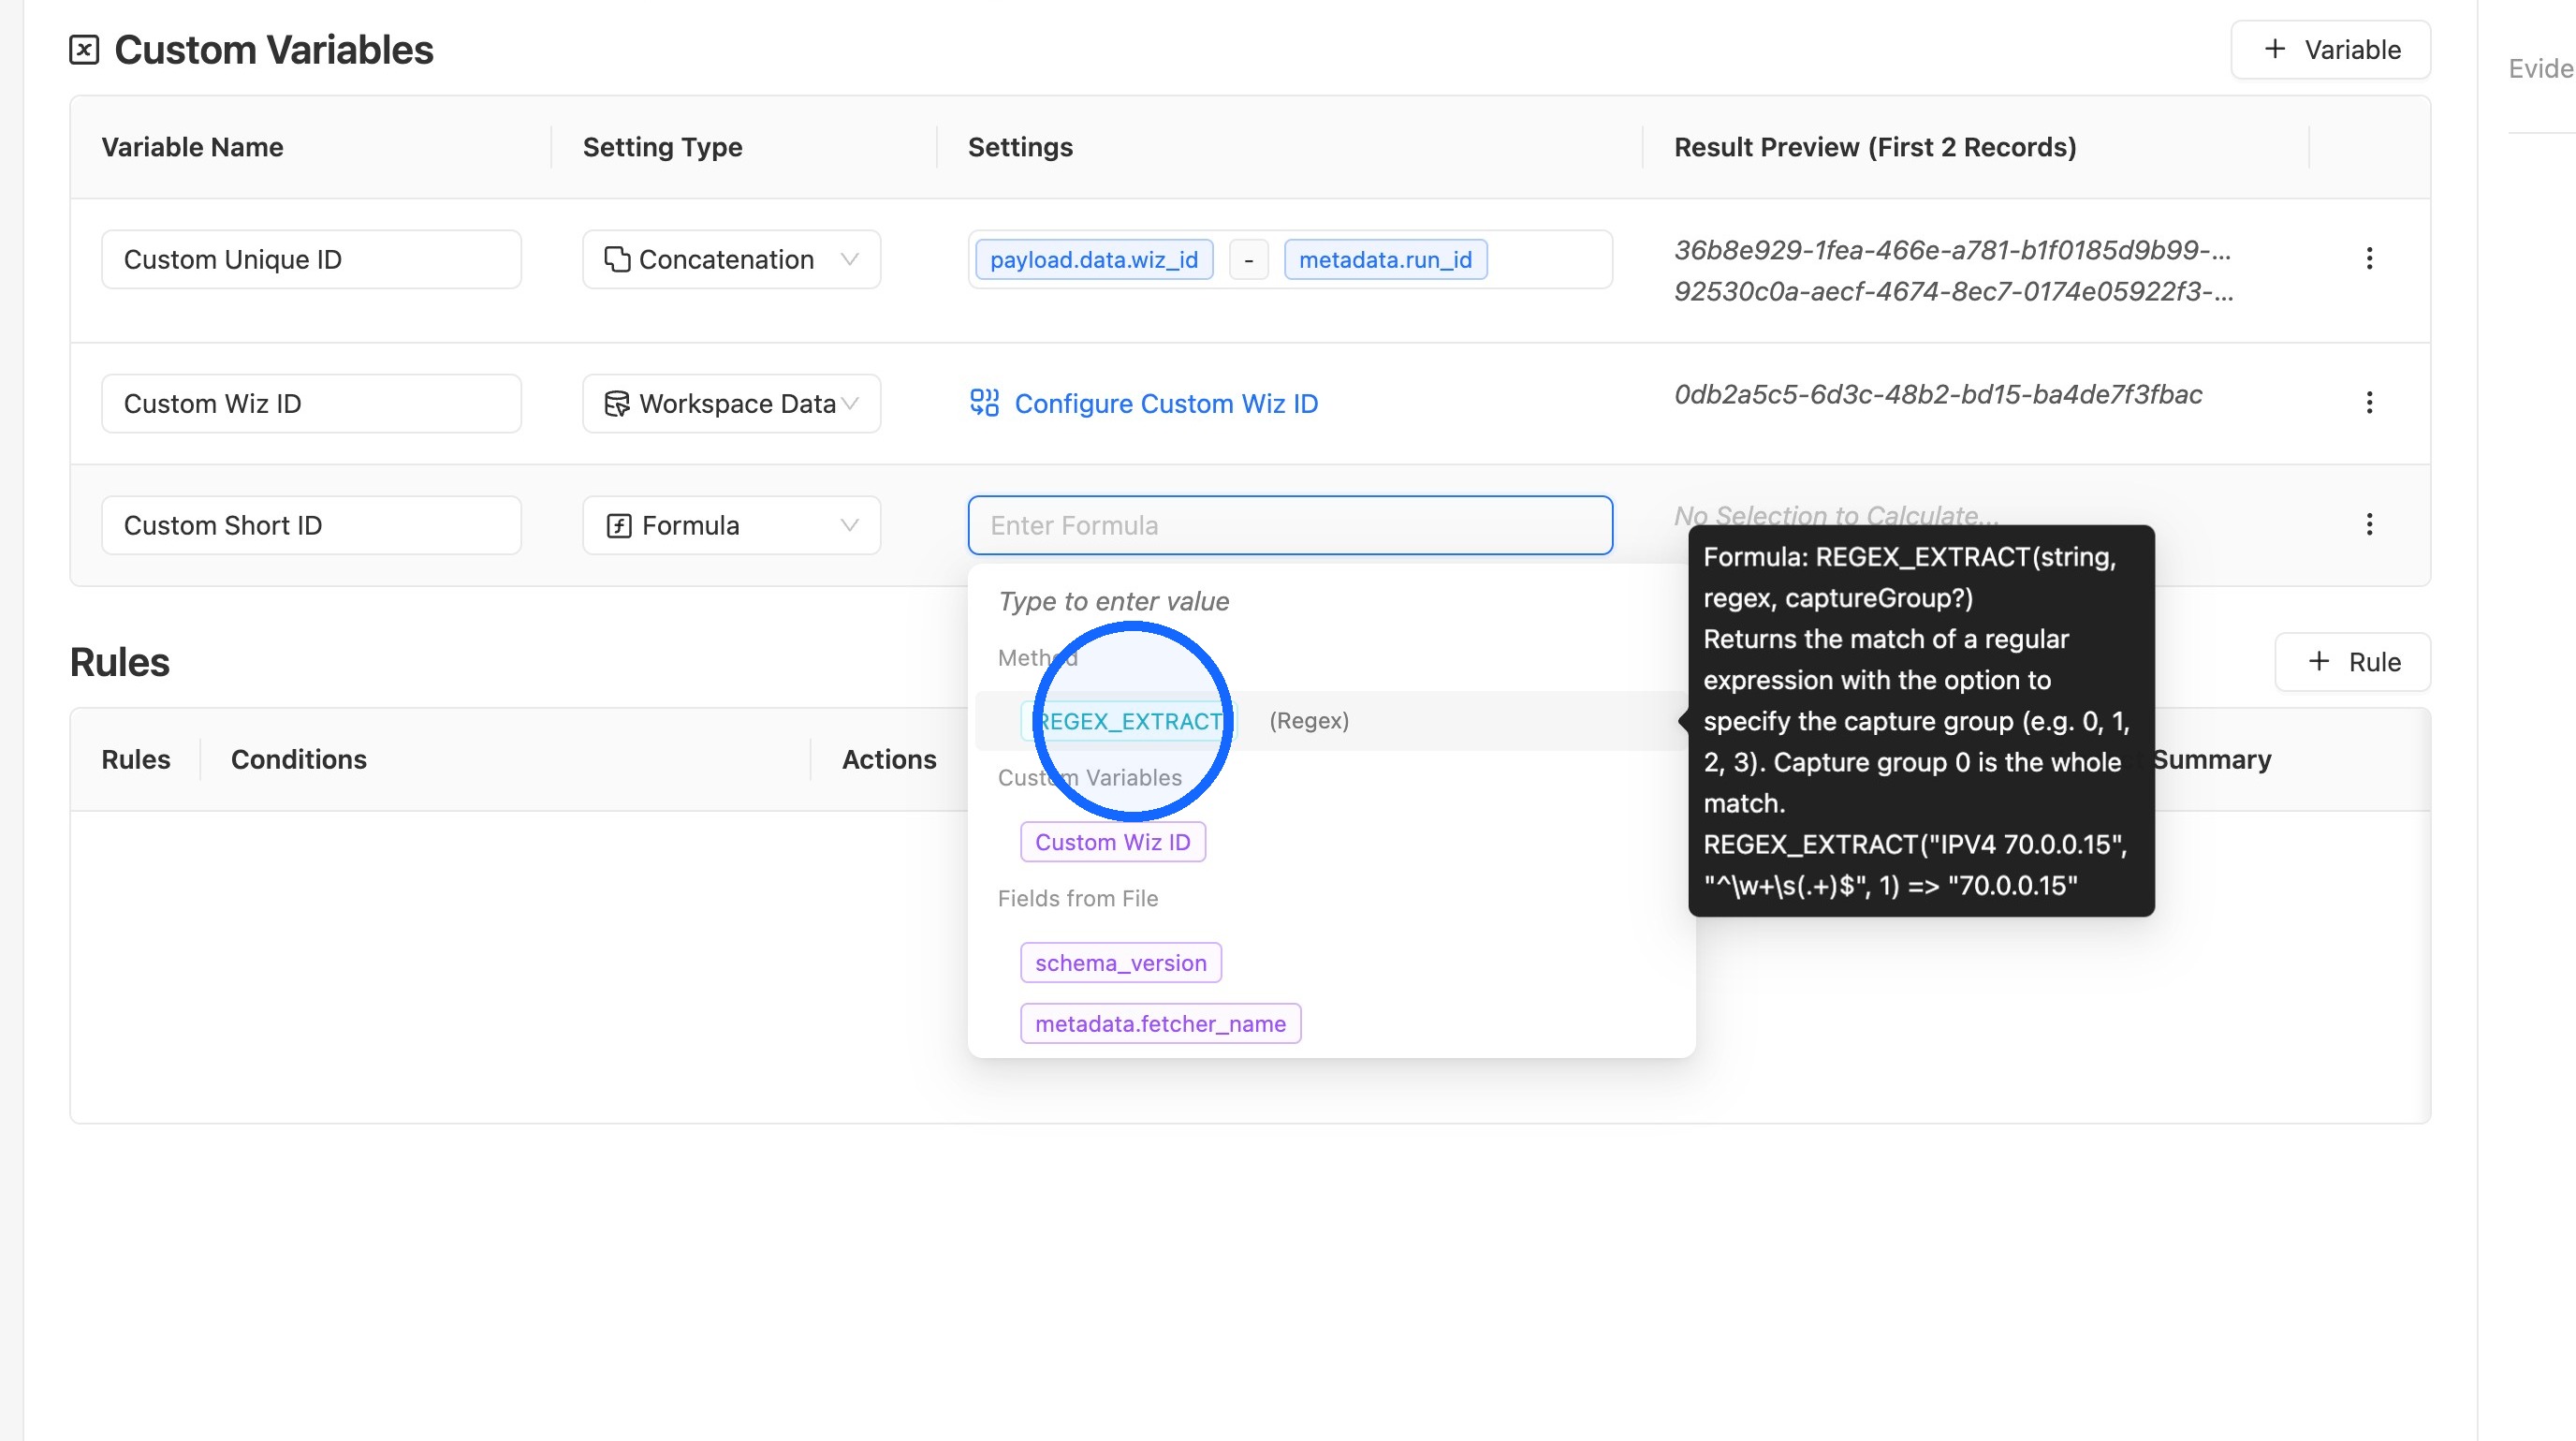
- Formula: Transforms a value with a function such as REGEX_EXTRACT to extract or reshape part of a field.
Concatenation
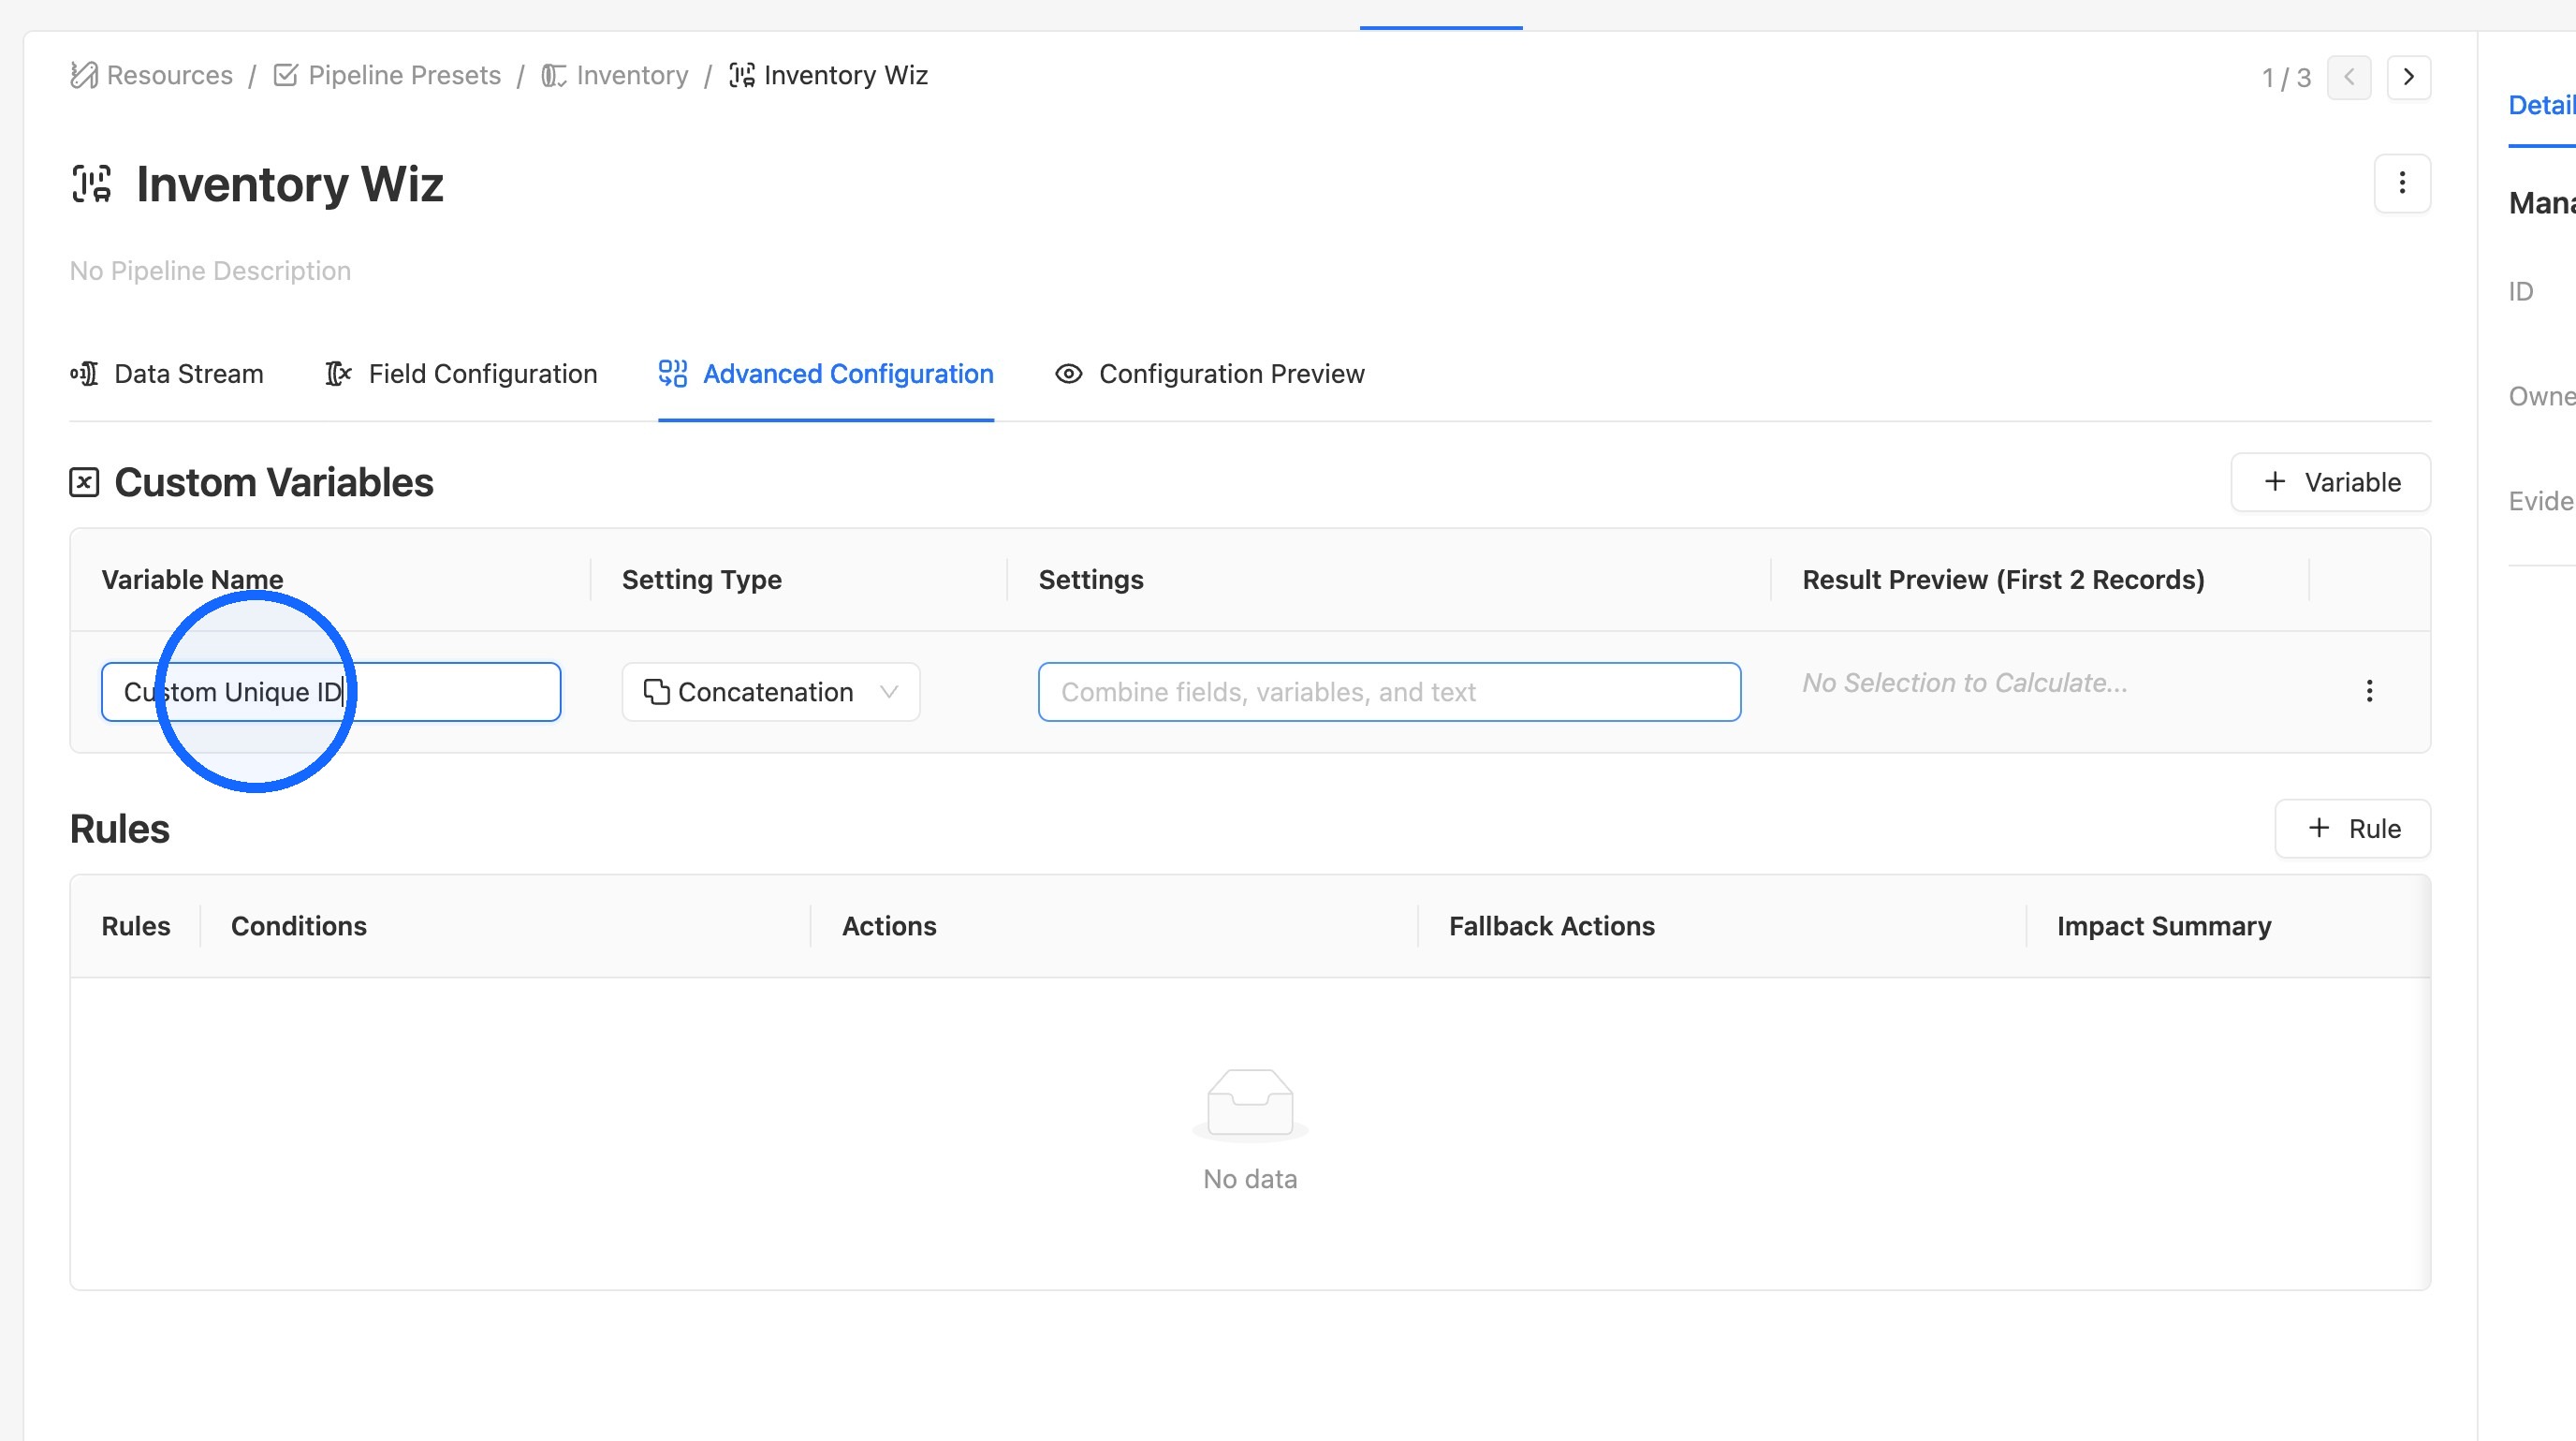
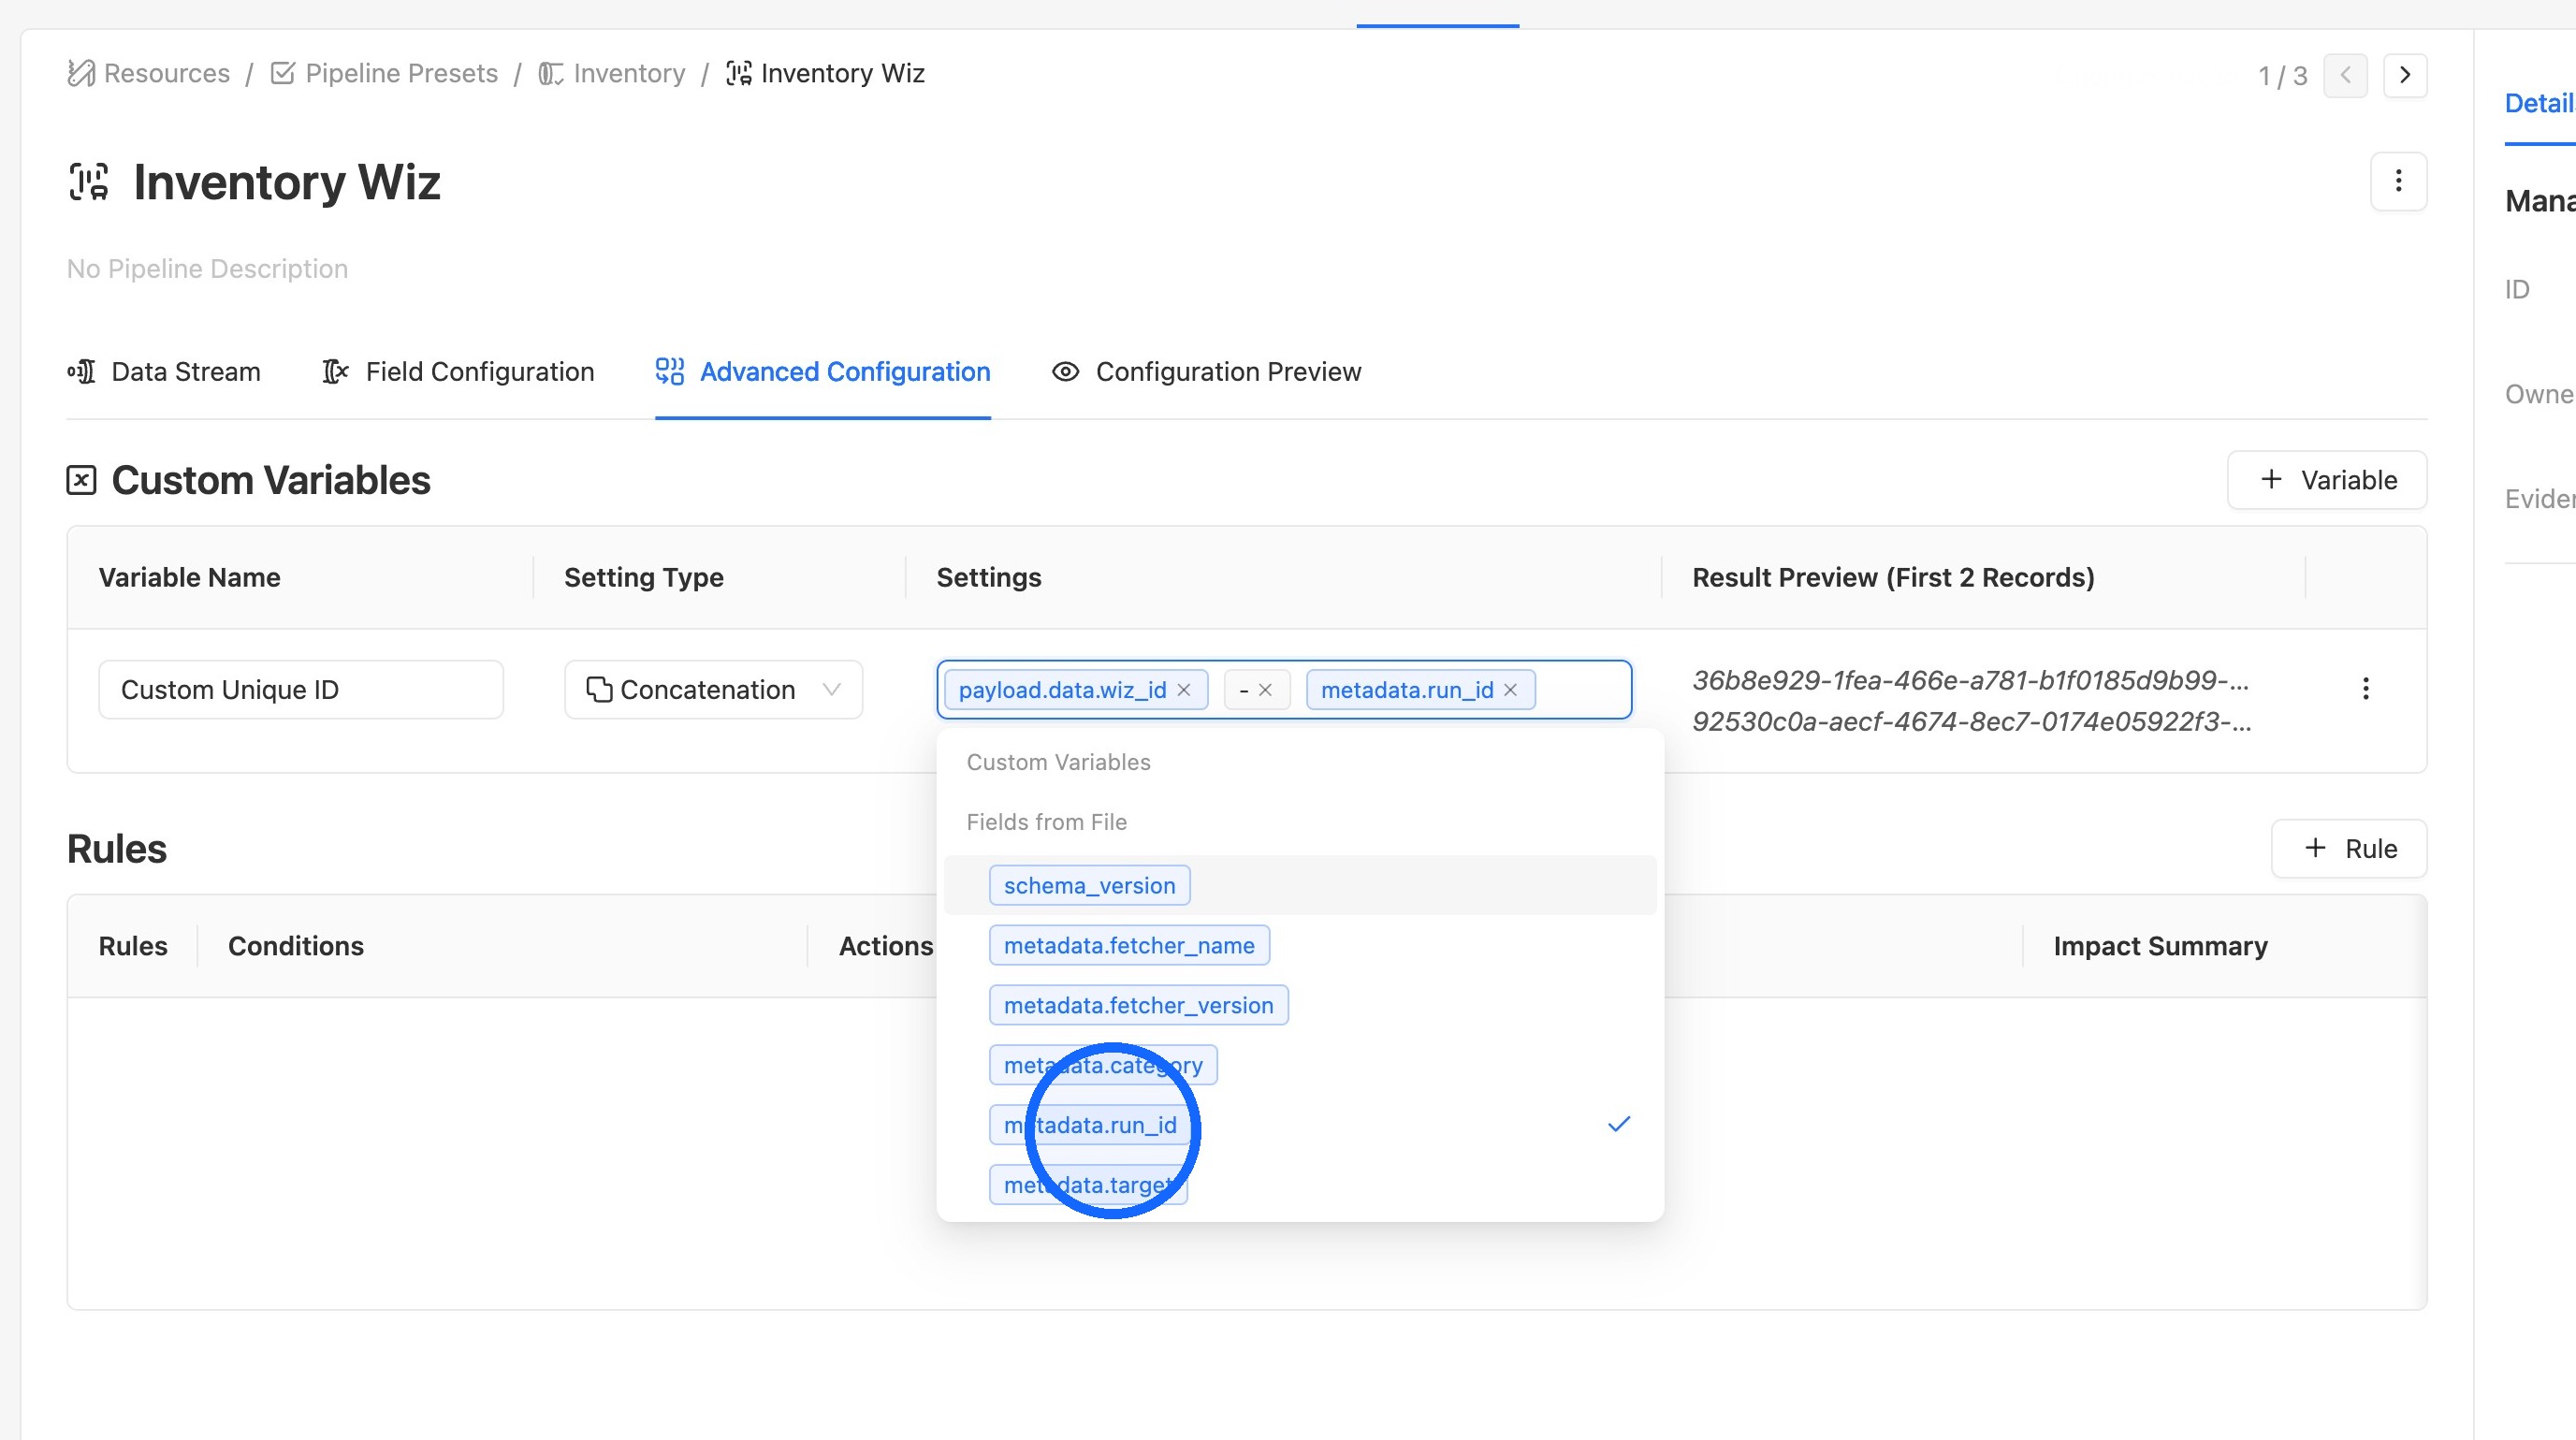
4. Name the Concatenation variable
Enter a name for the custom variable and make sure Setting Type is set to Concatenation.
5. Select the fields to combine
In Settings, select the fields to combine and add any custom text, such as a prefix or separator.
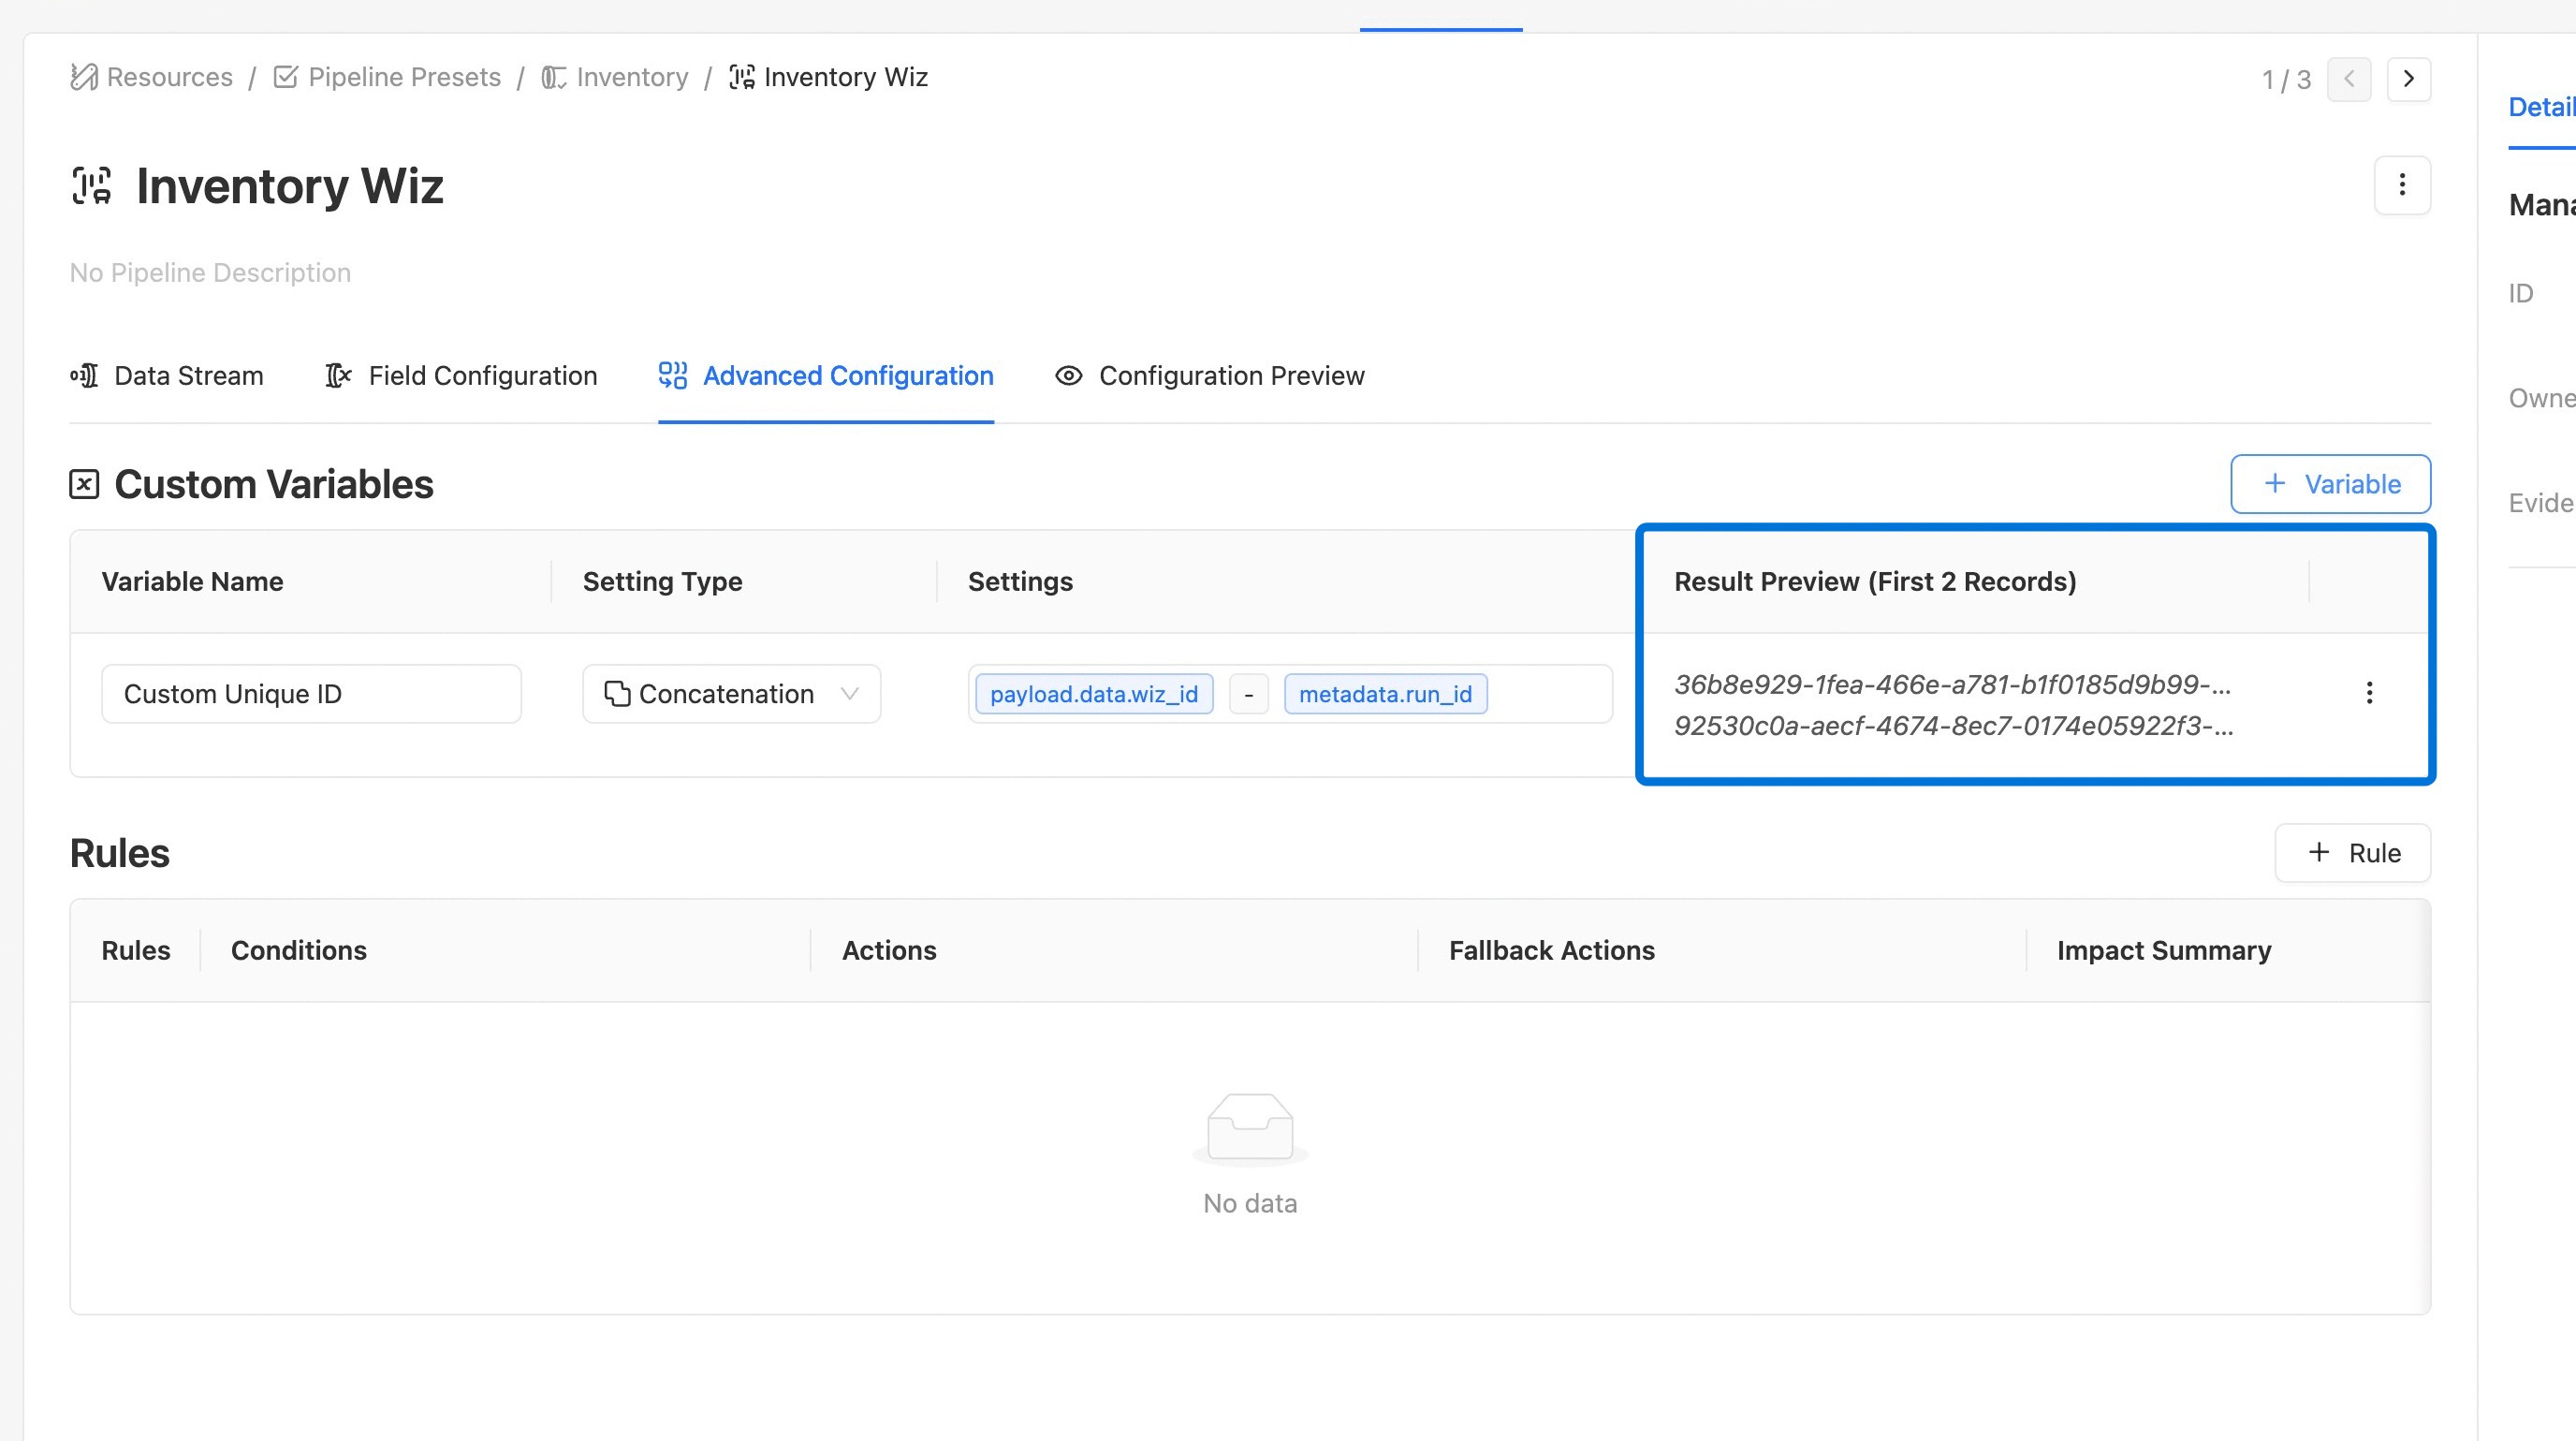
6. Check the result preview
Review the Result Preview column to confirm the output is correct.
Workspace Data
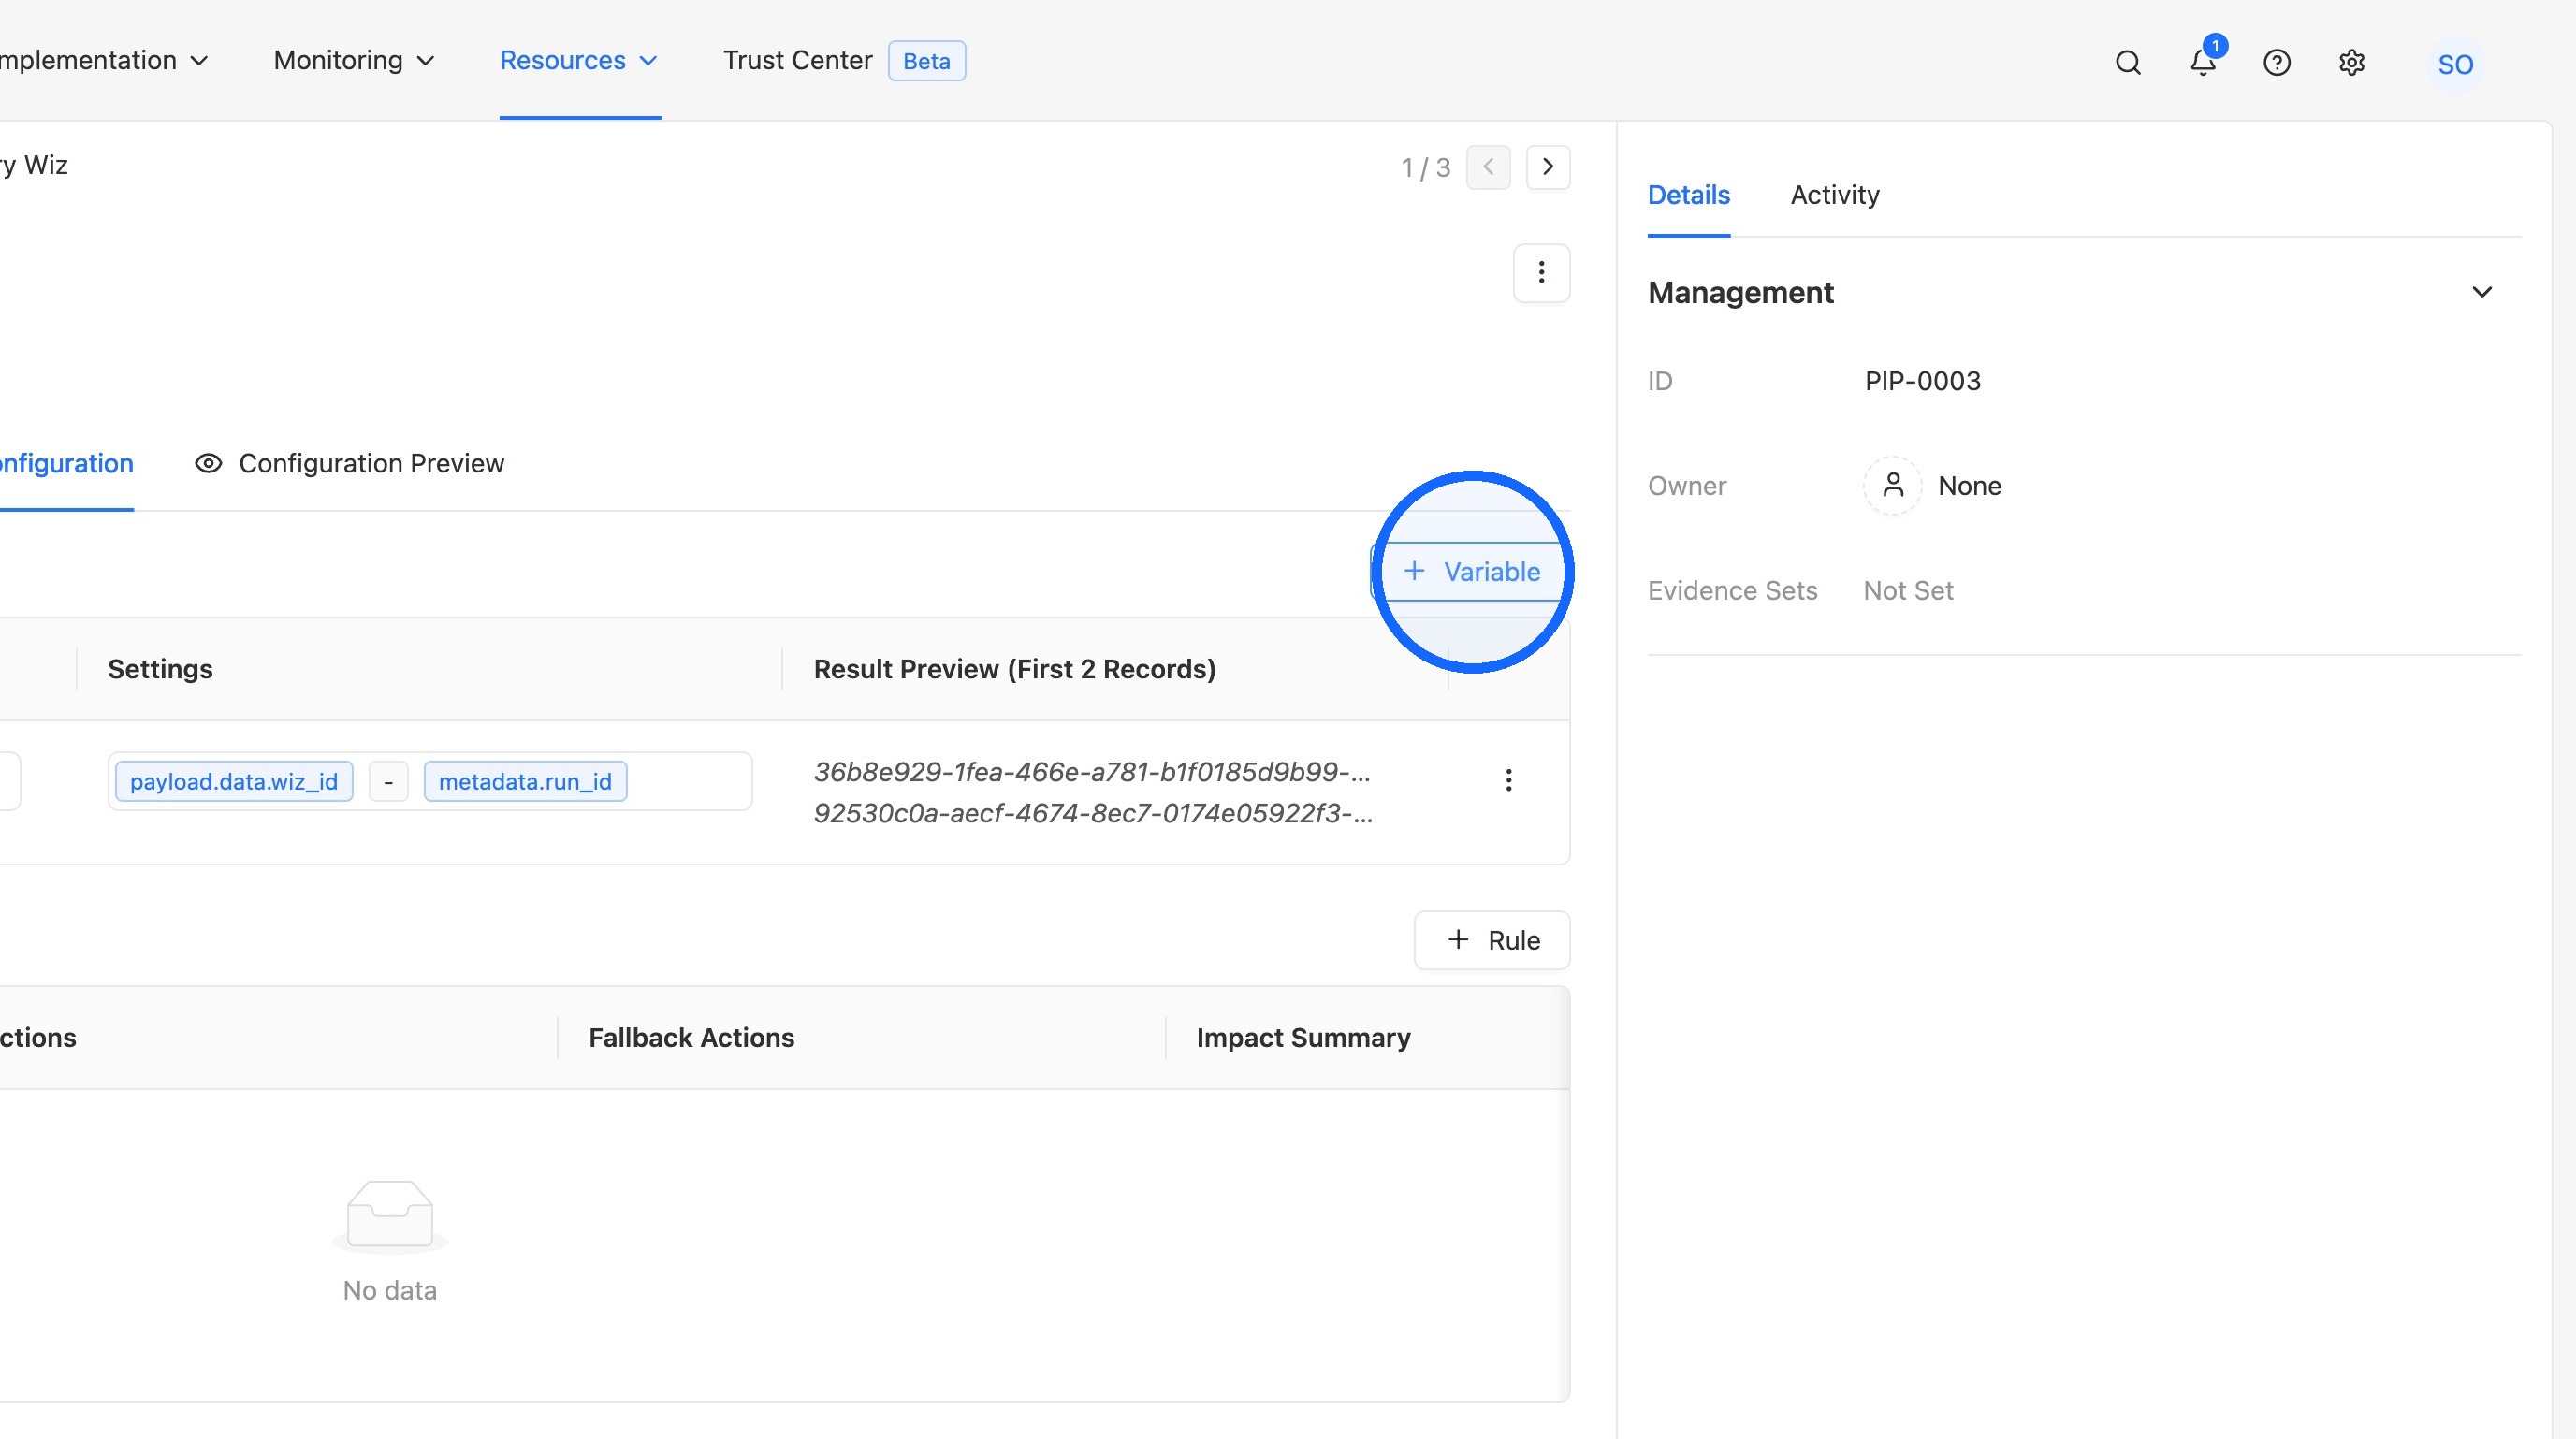
7. Add another custom variable
Click + Variable to add another custom variable.
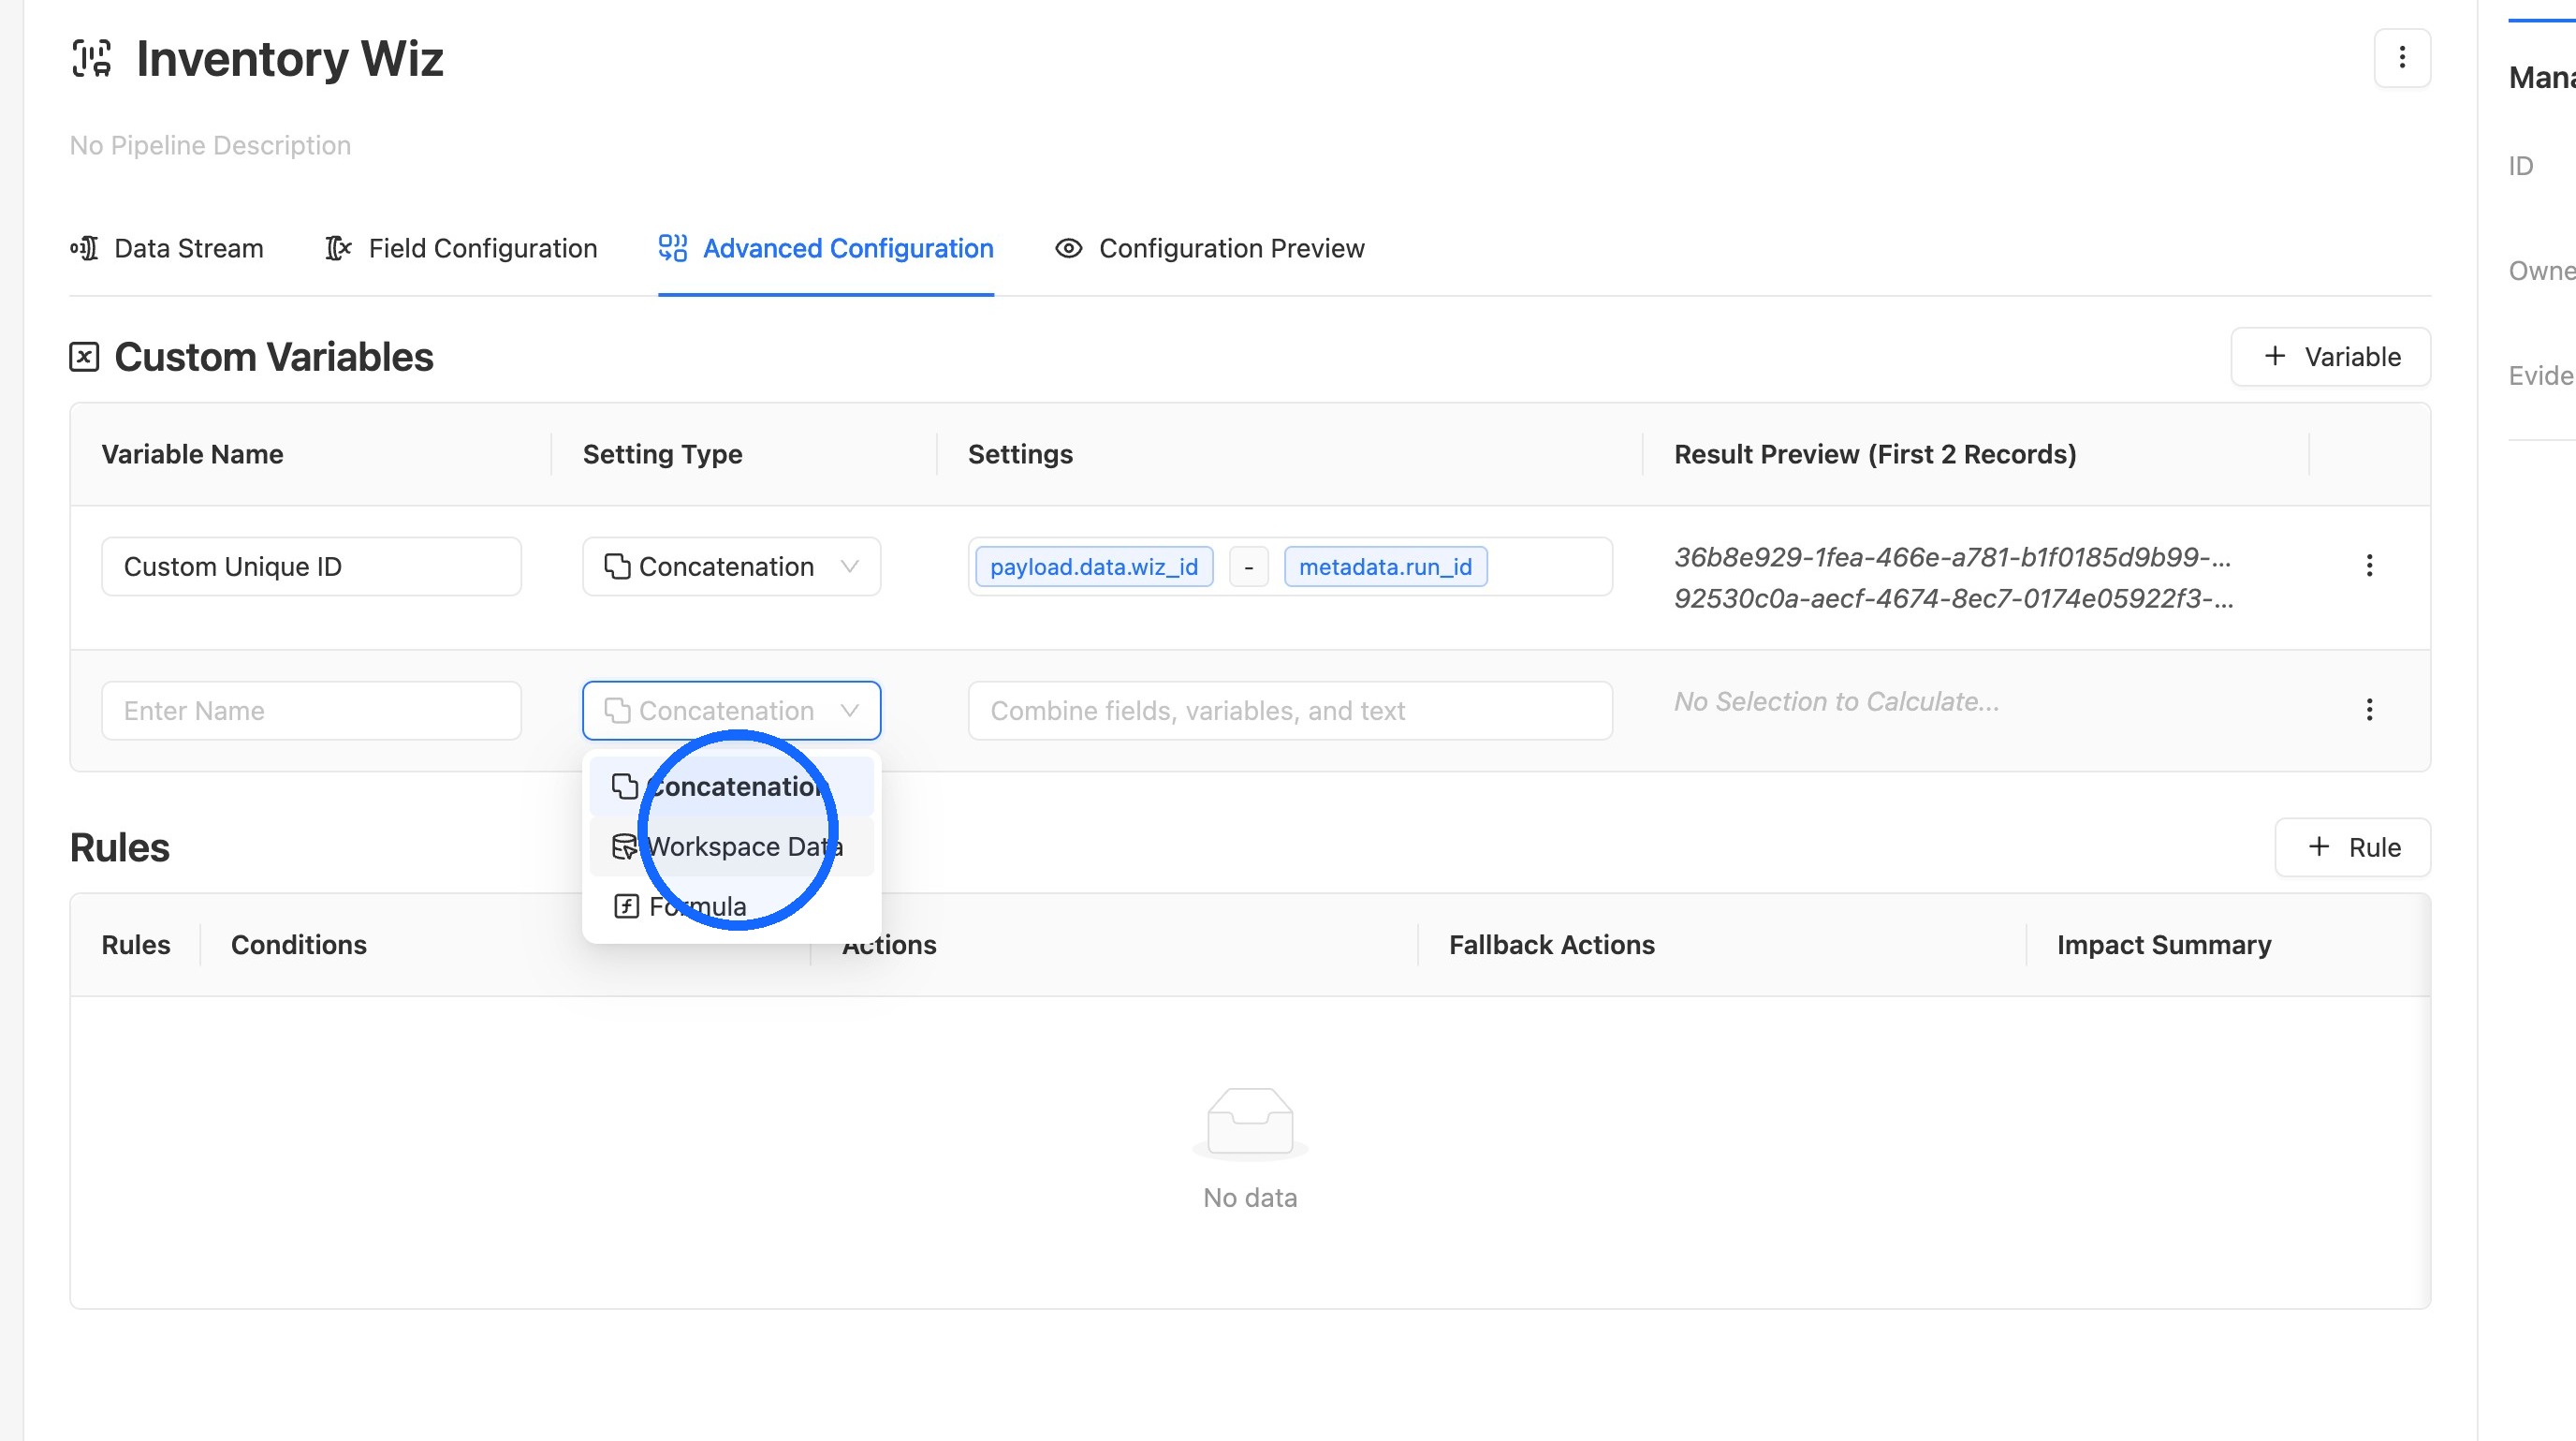
8. Select Workspace Data as the setting type
Select Workspace Data as the Setting Type.
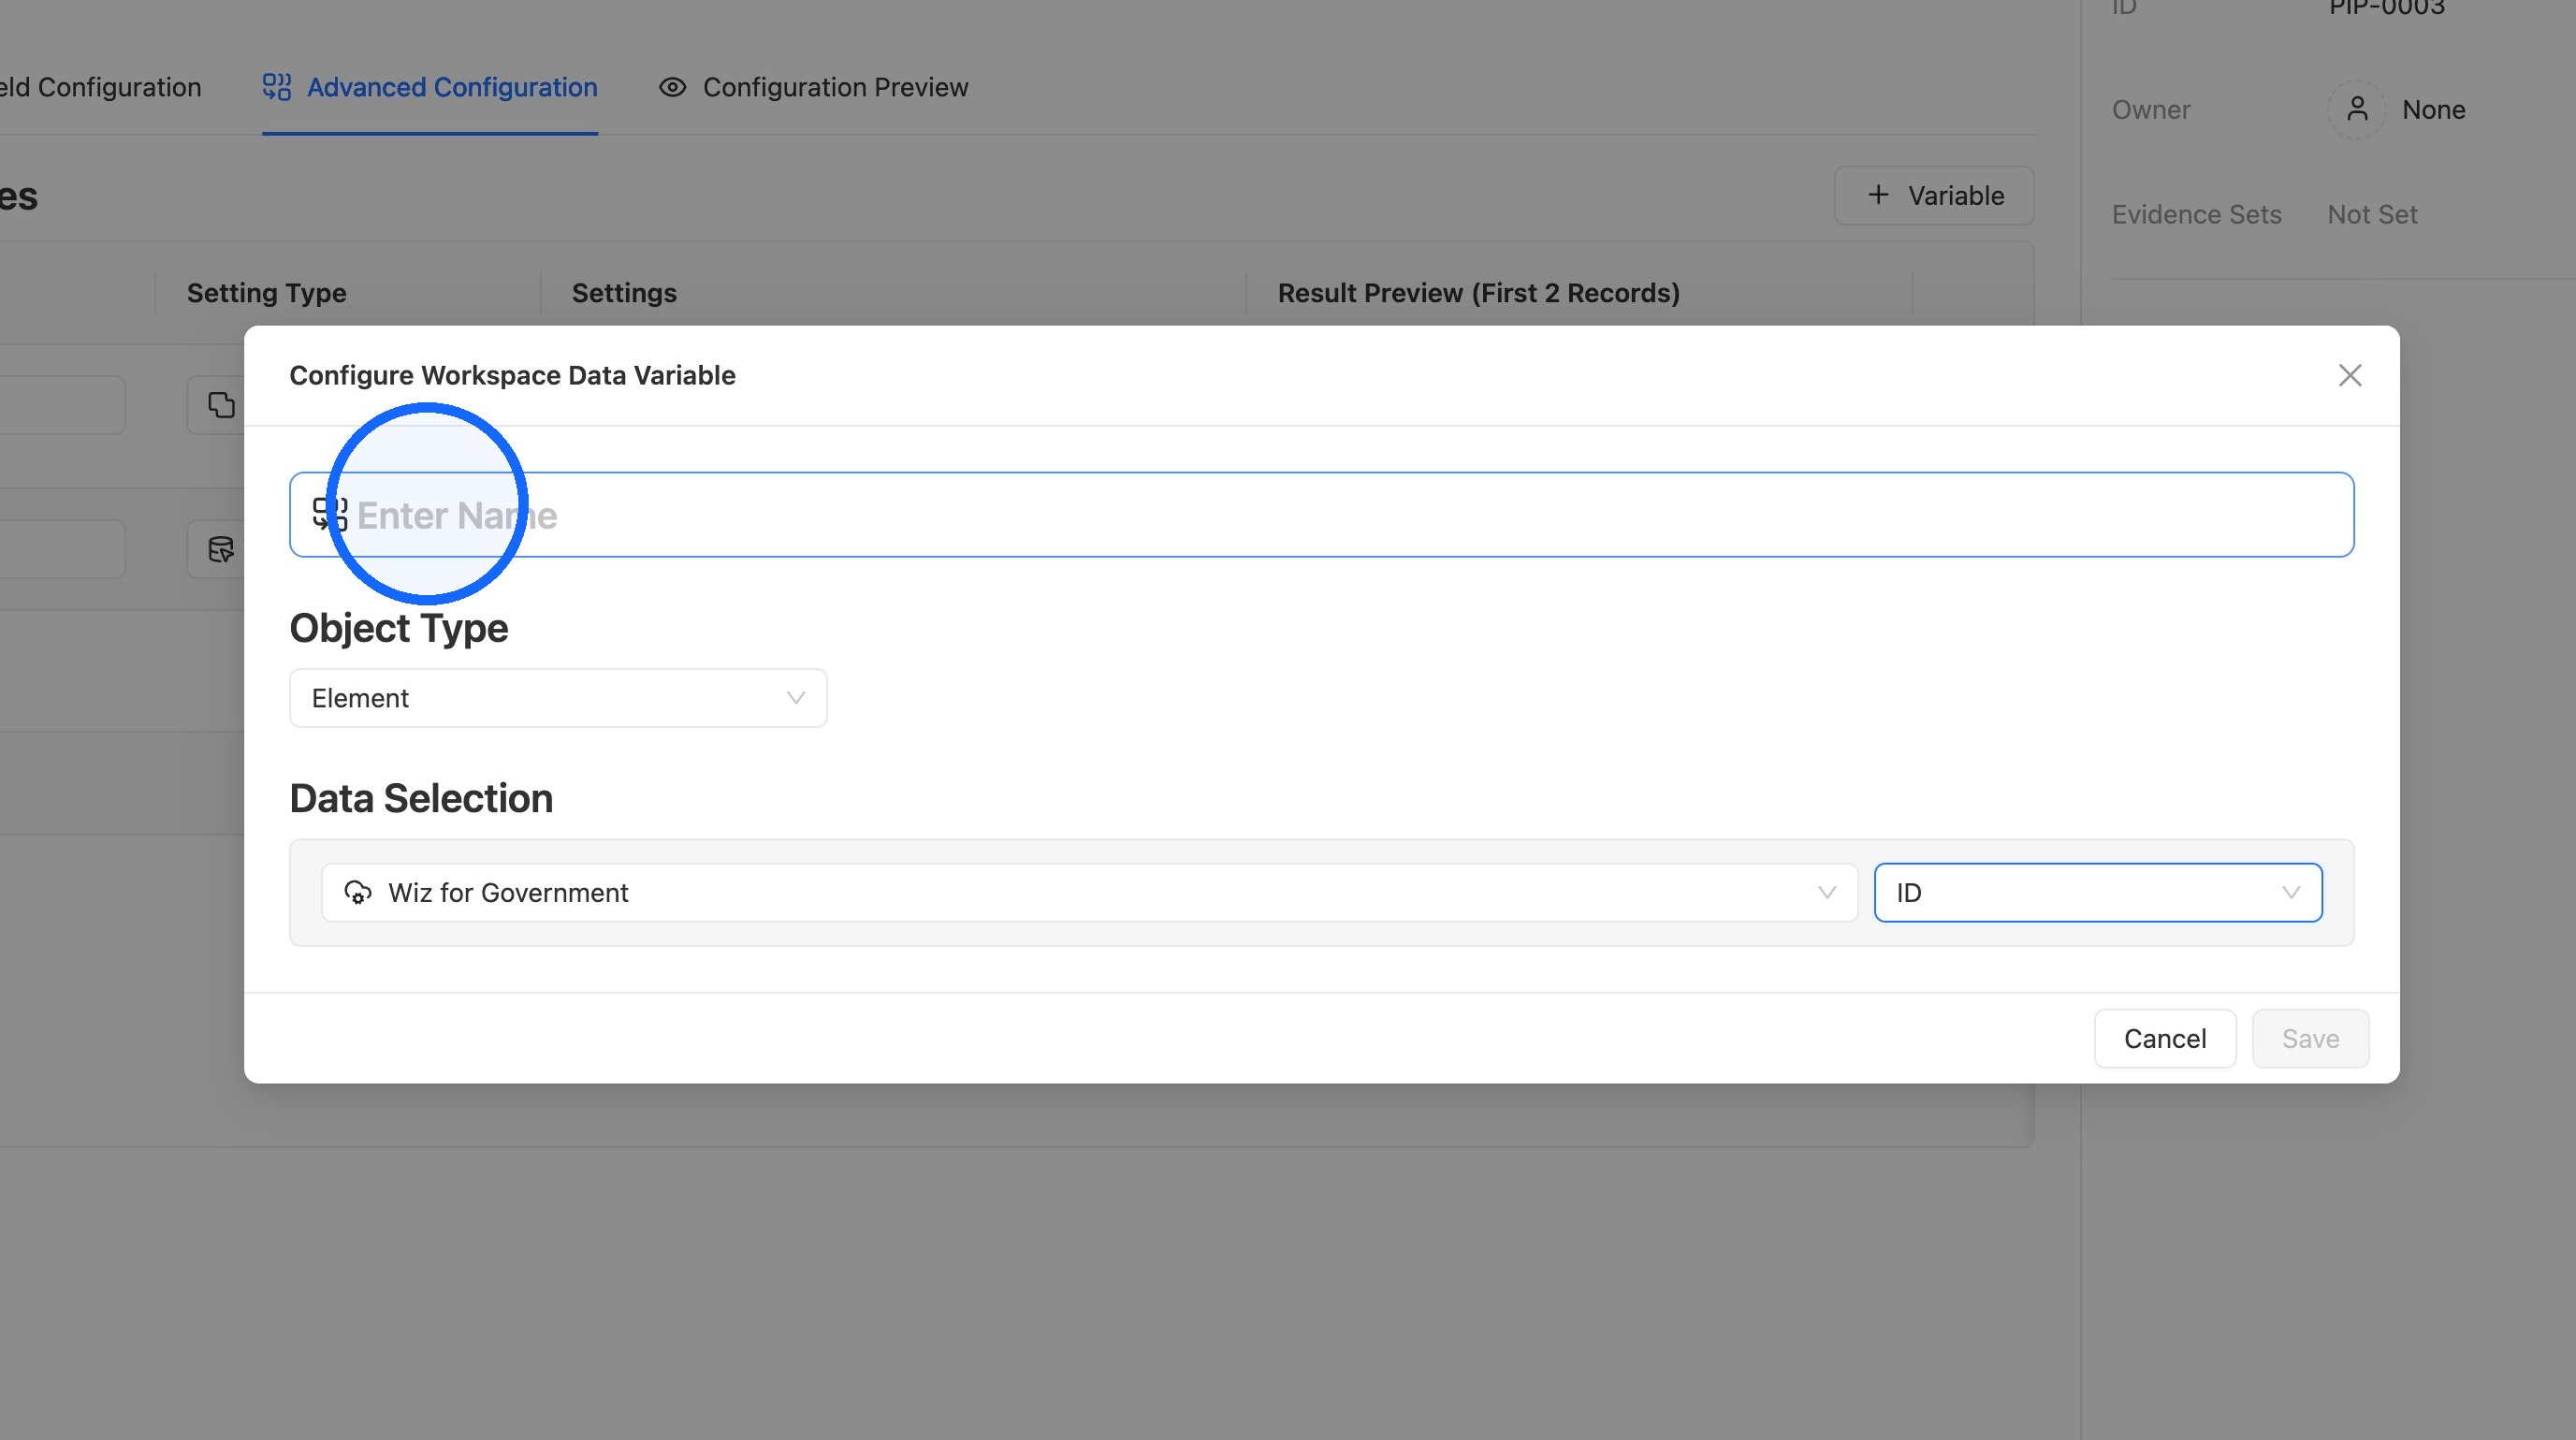
9. Open the Workspace Data settings
Click Configure for the Workspace Data custom variable.
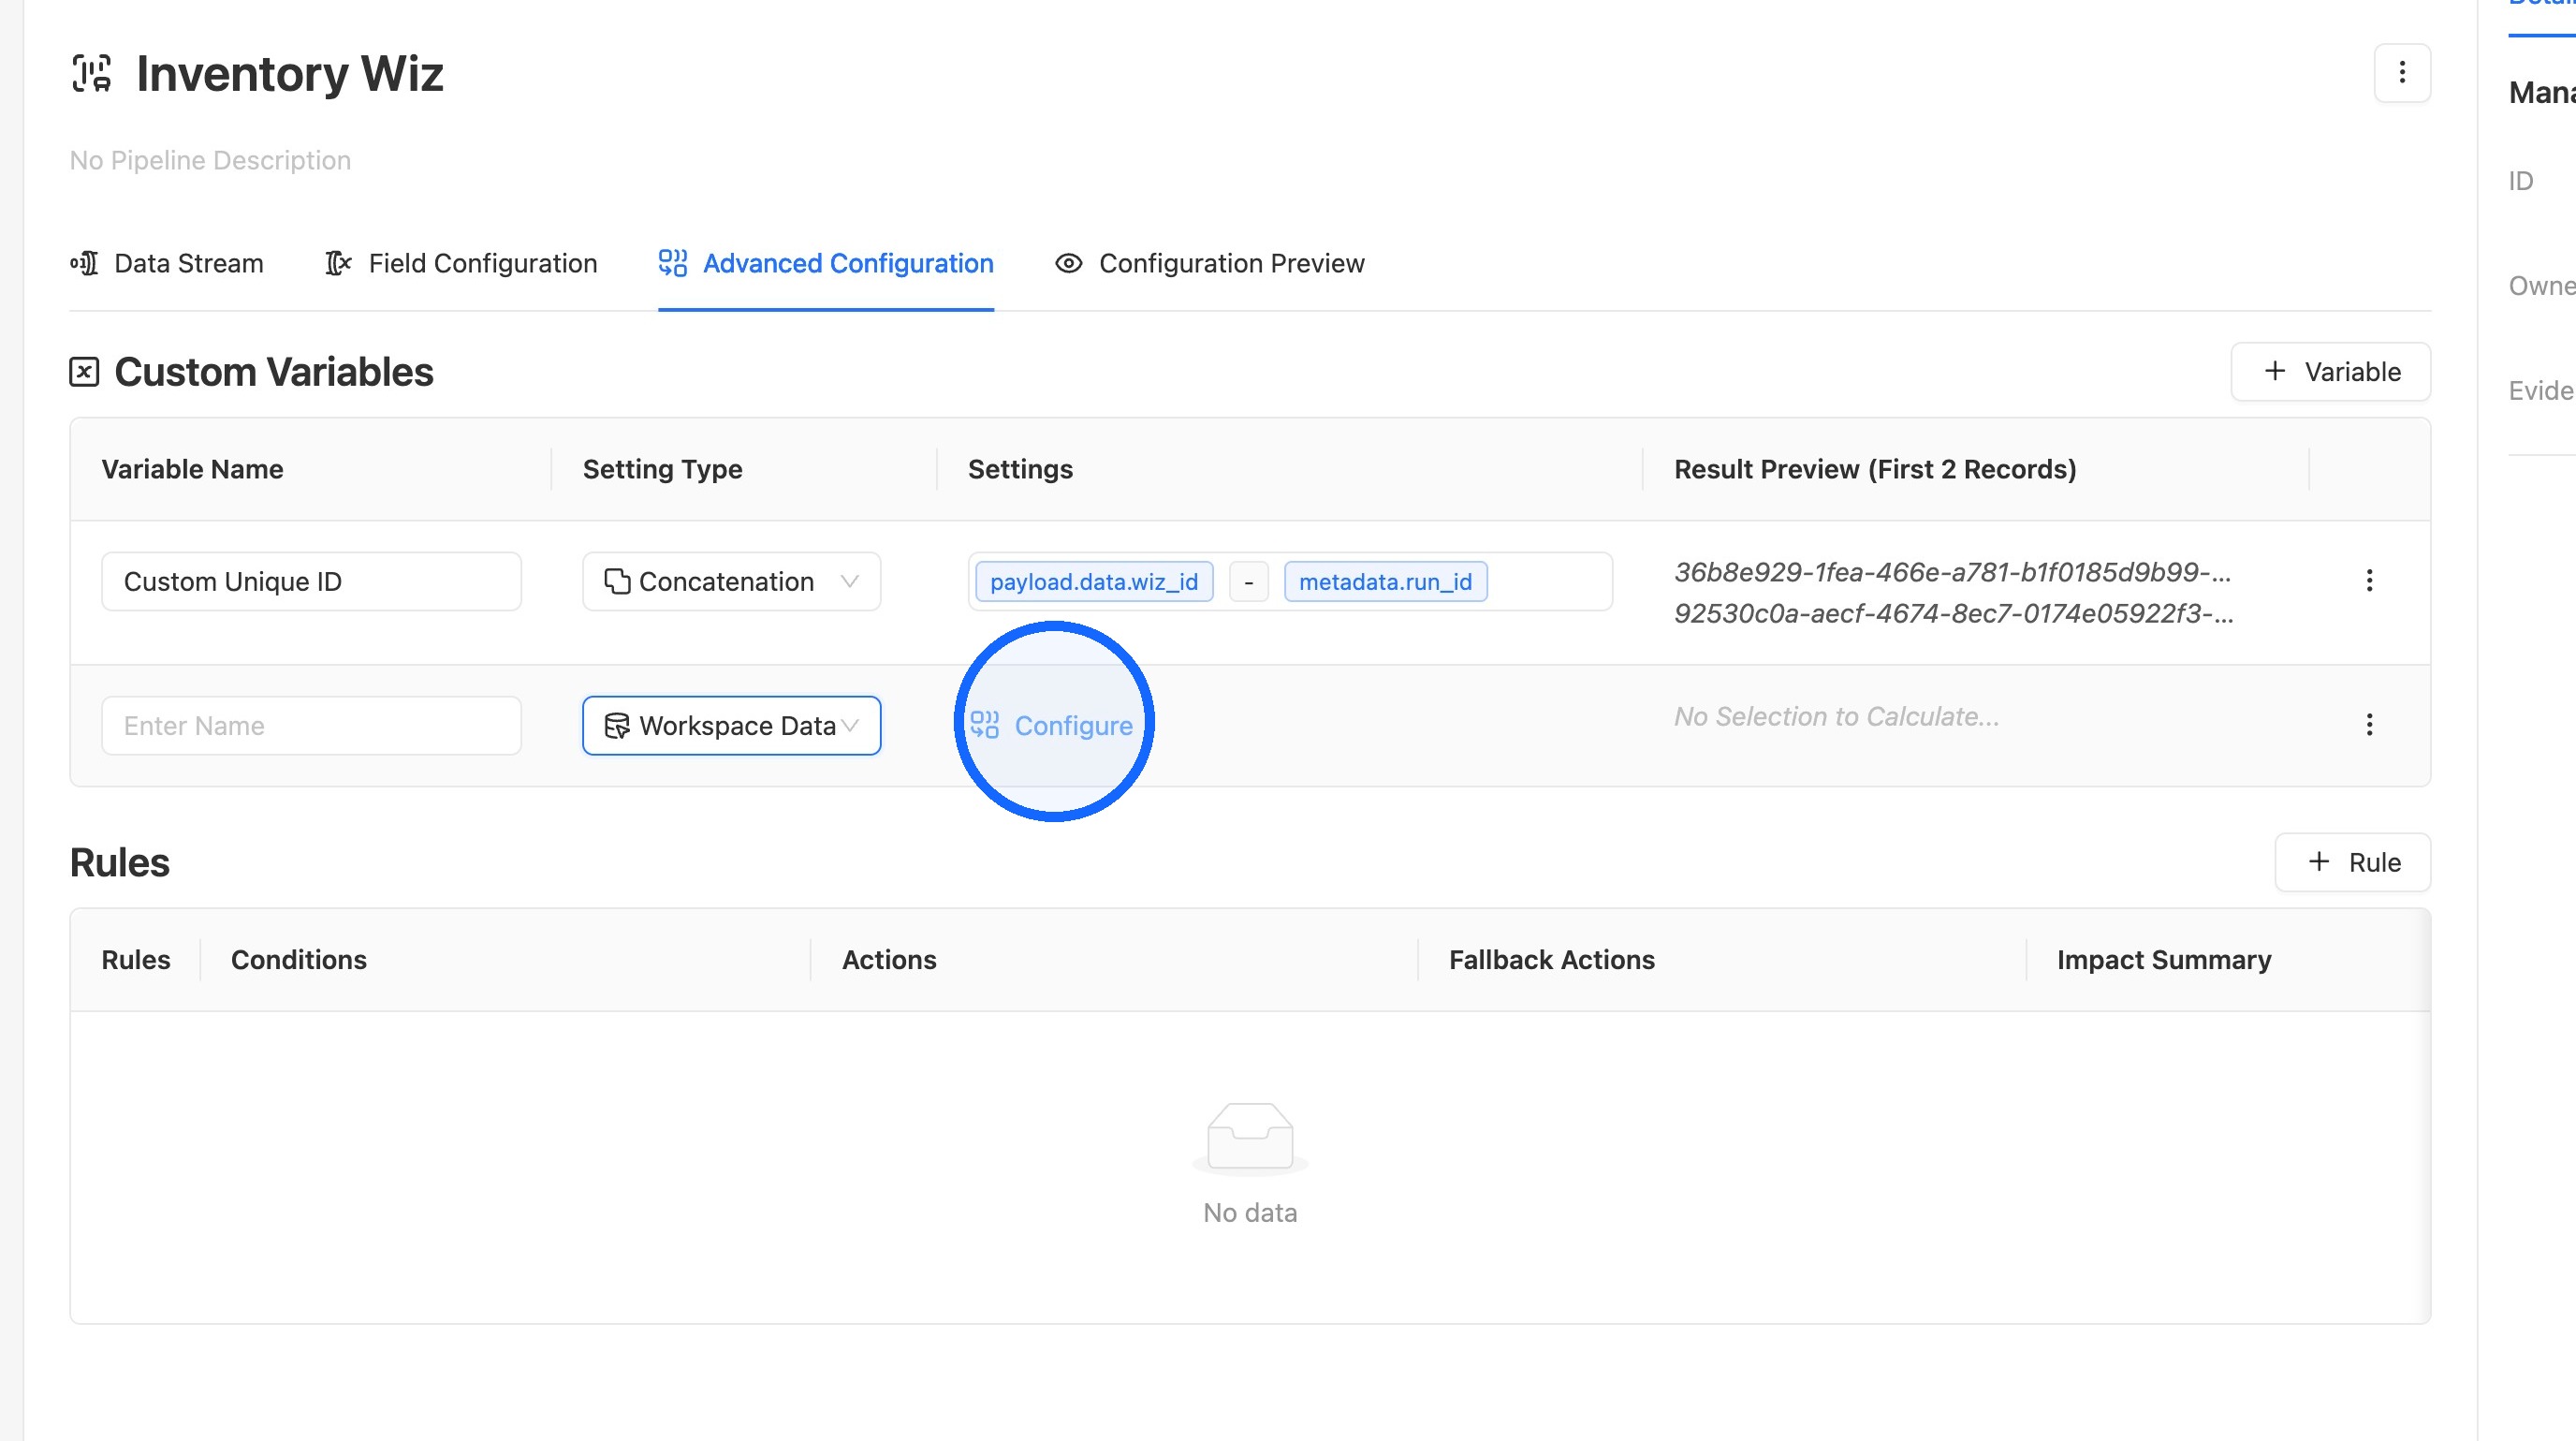
10. Choose the object type
Select User or Element as the object type.
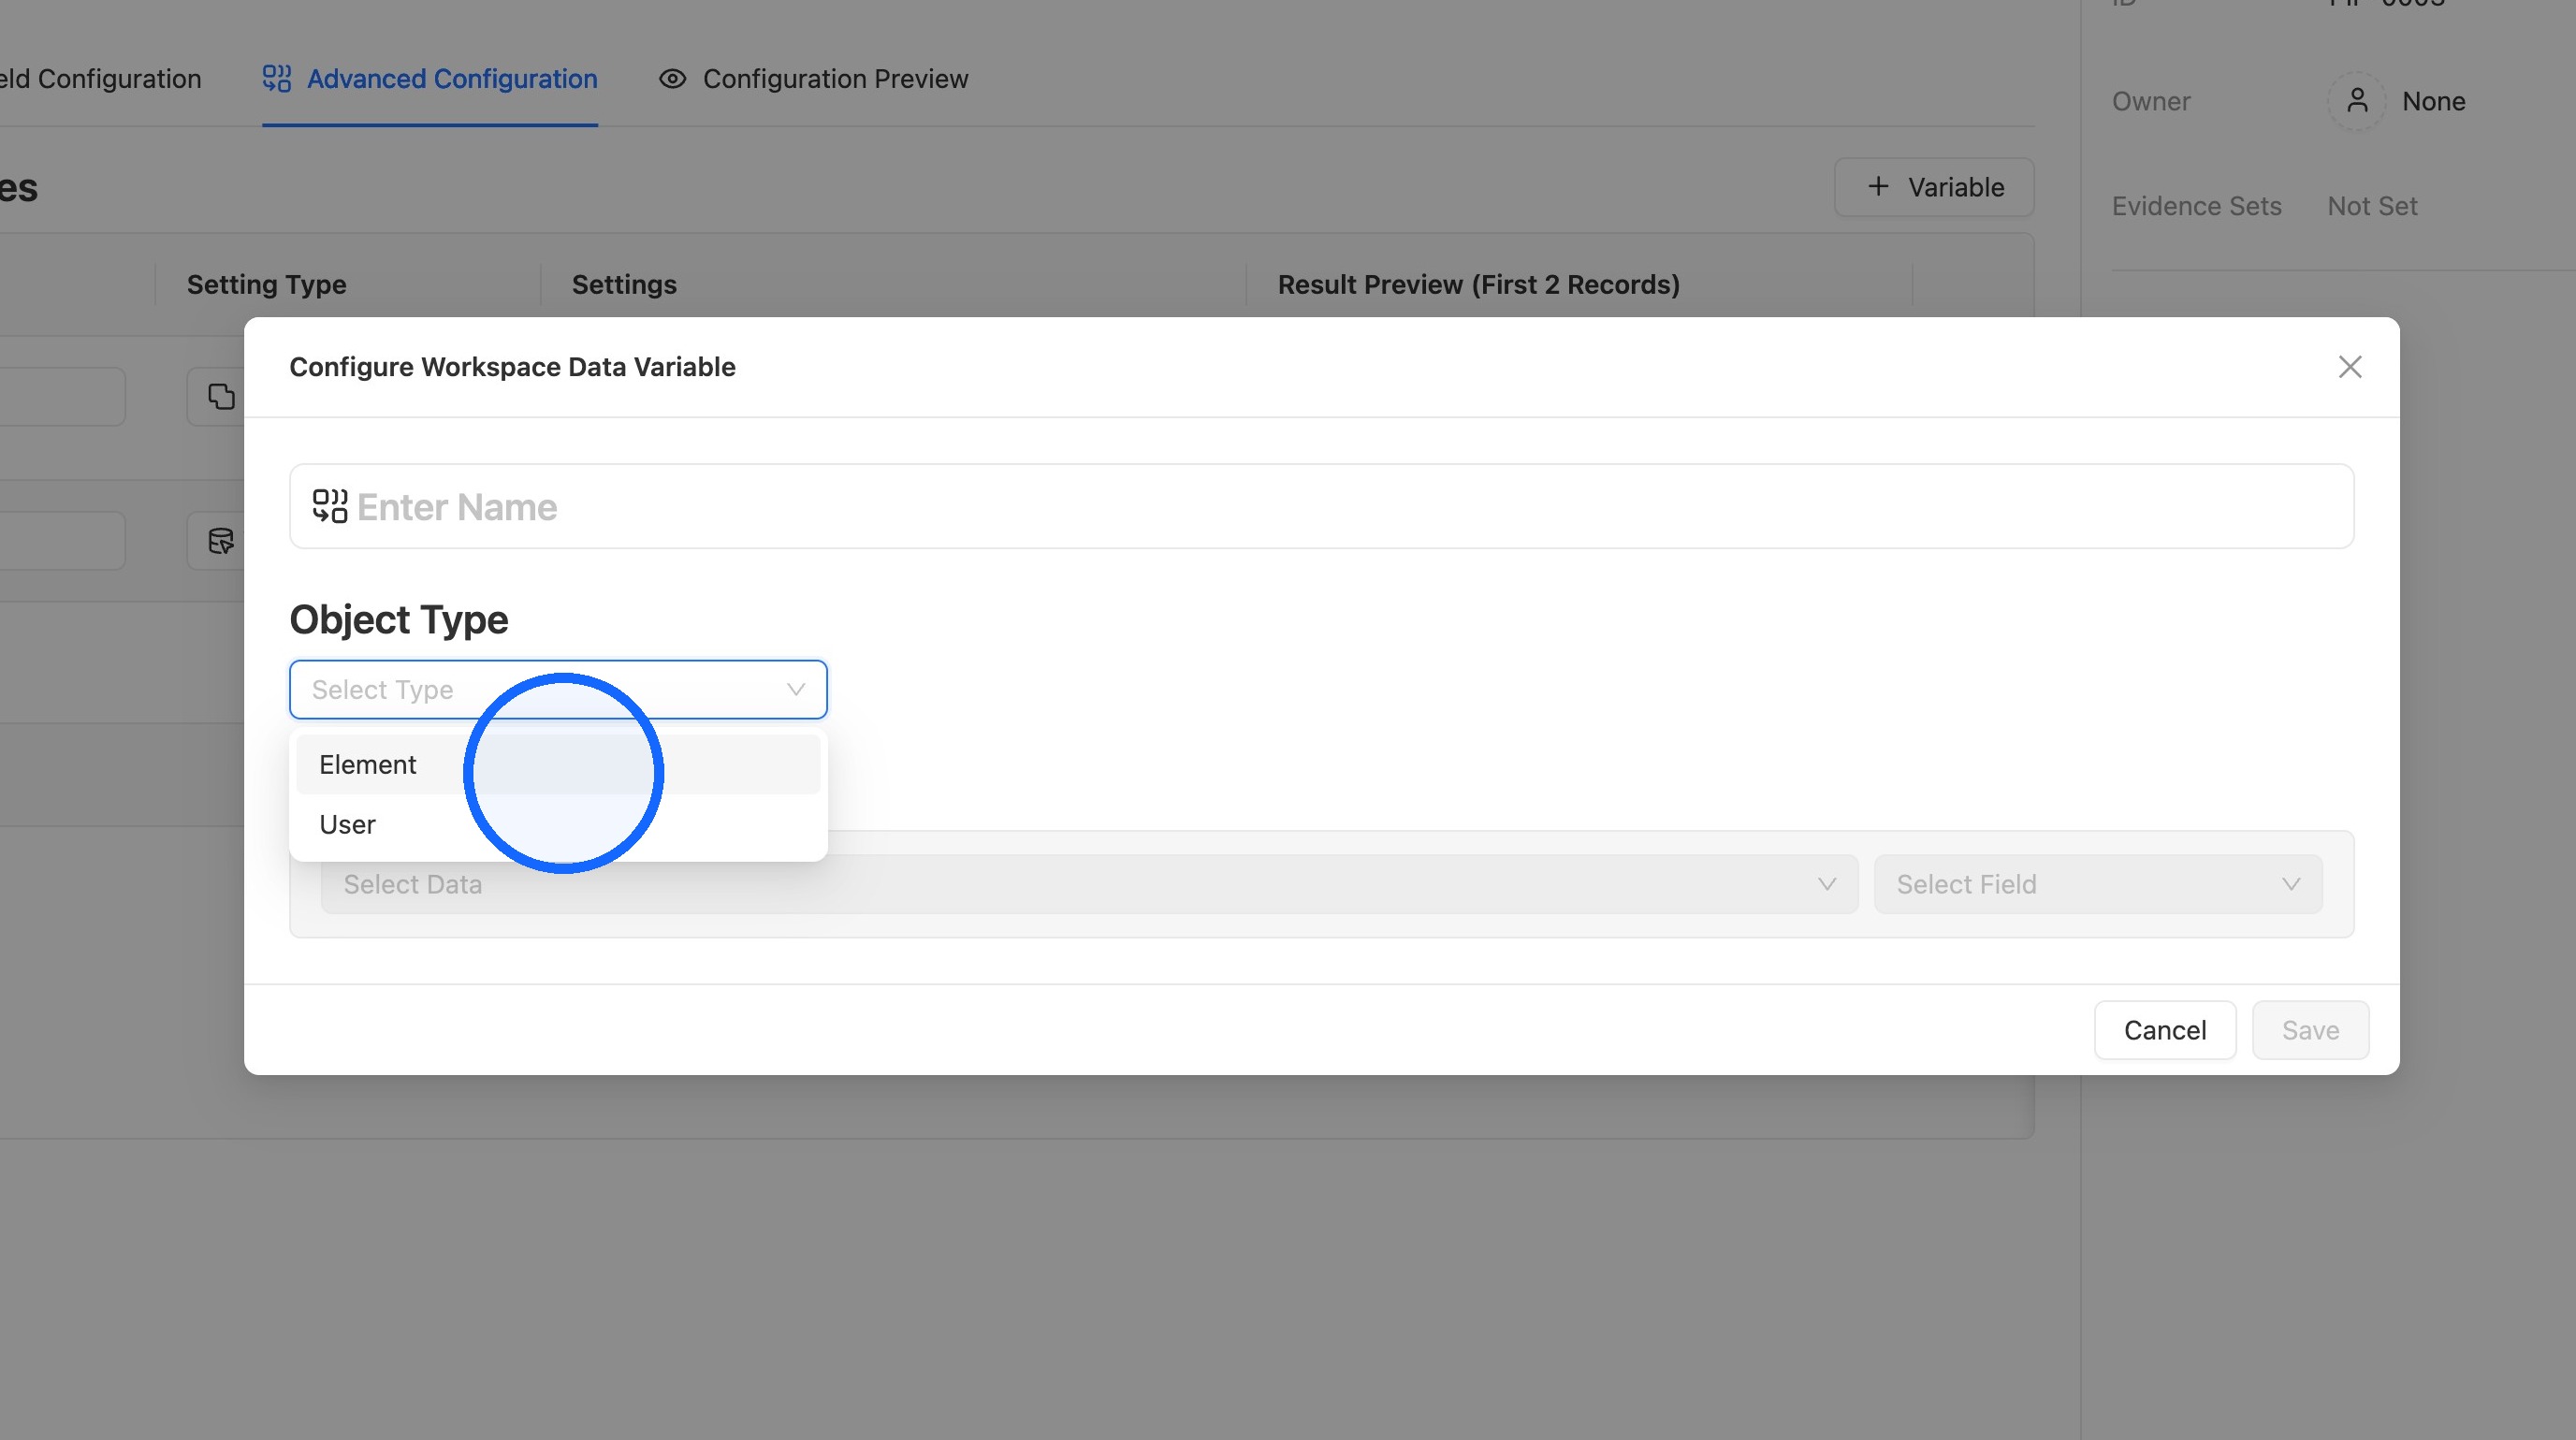
11. Choose the source object
Select the Element or User to pull data from.
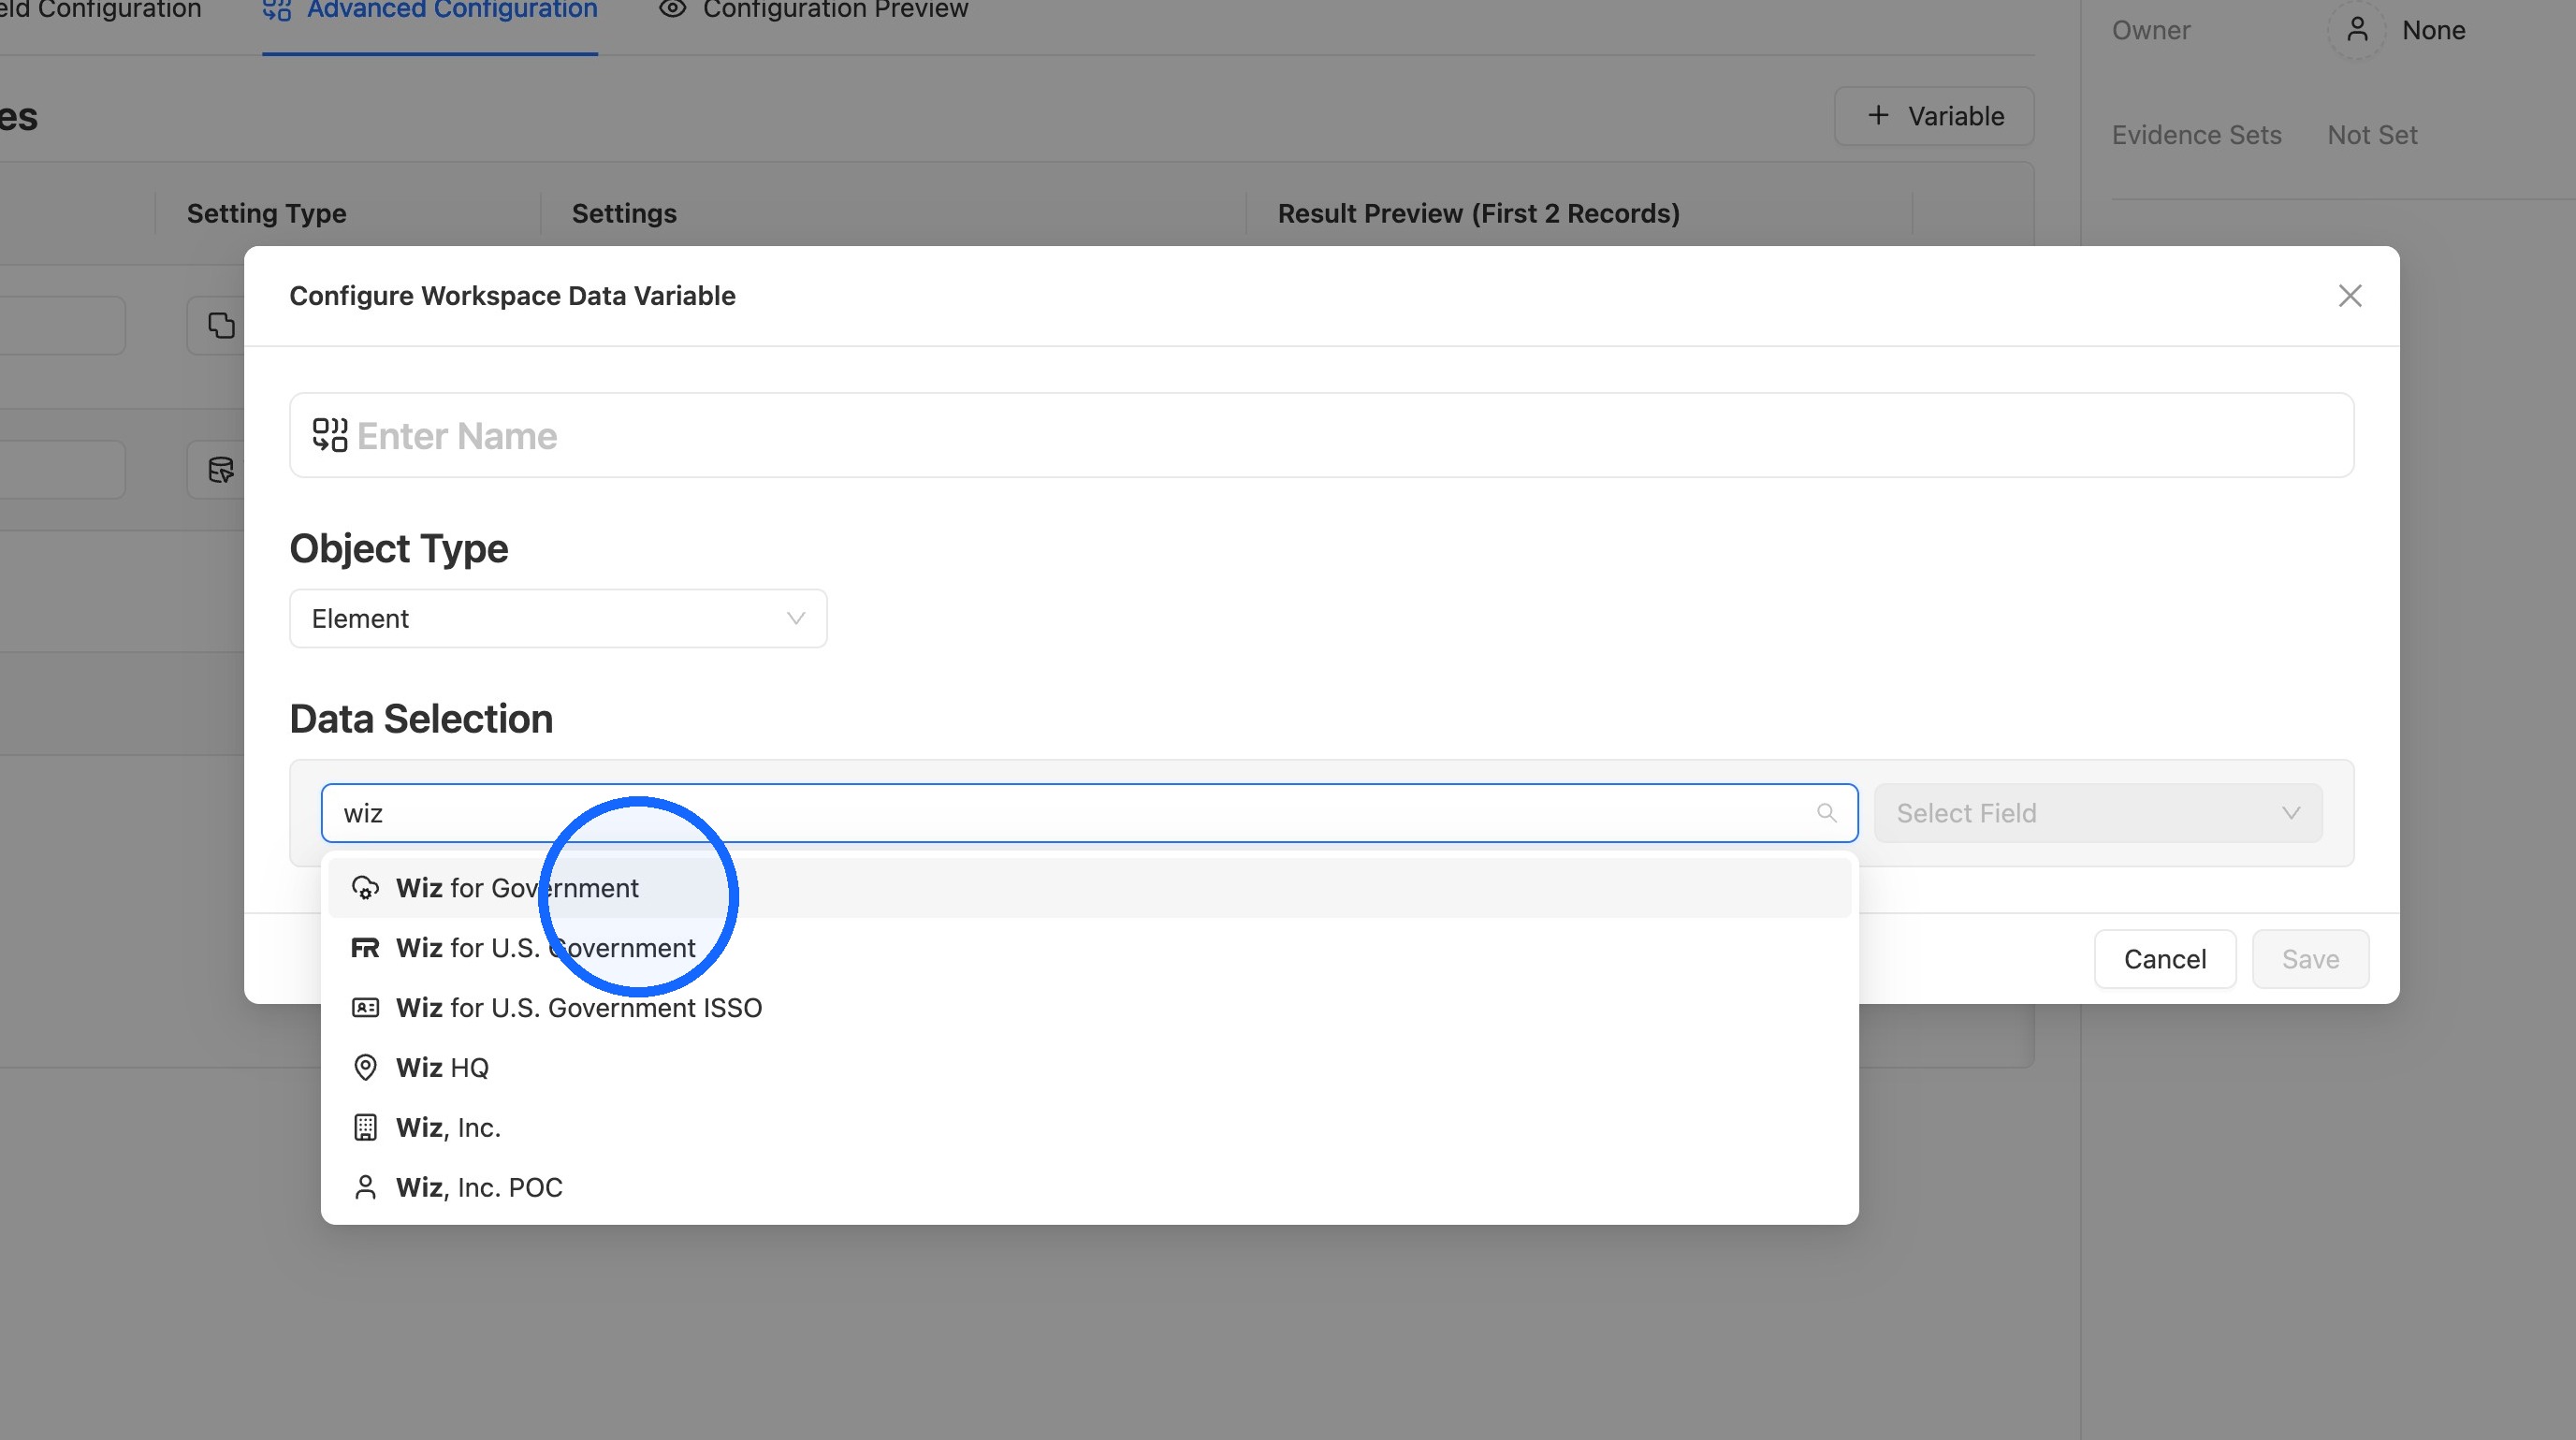
12. Choose the field
Select the field whose value the custom variable should use.
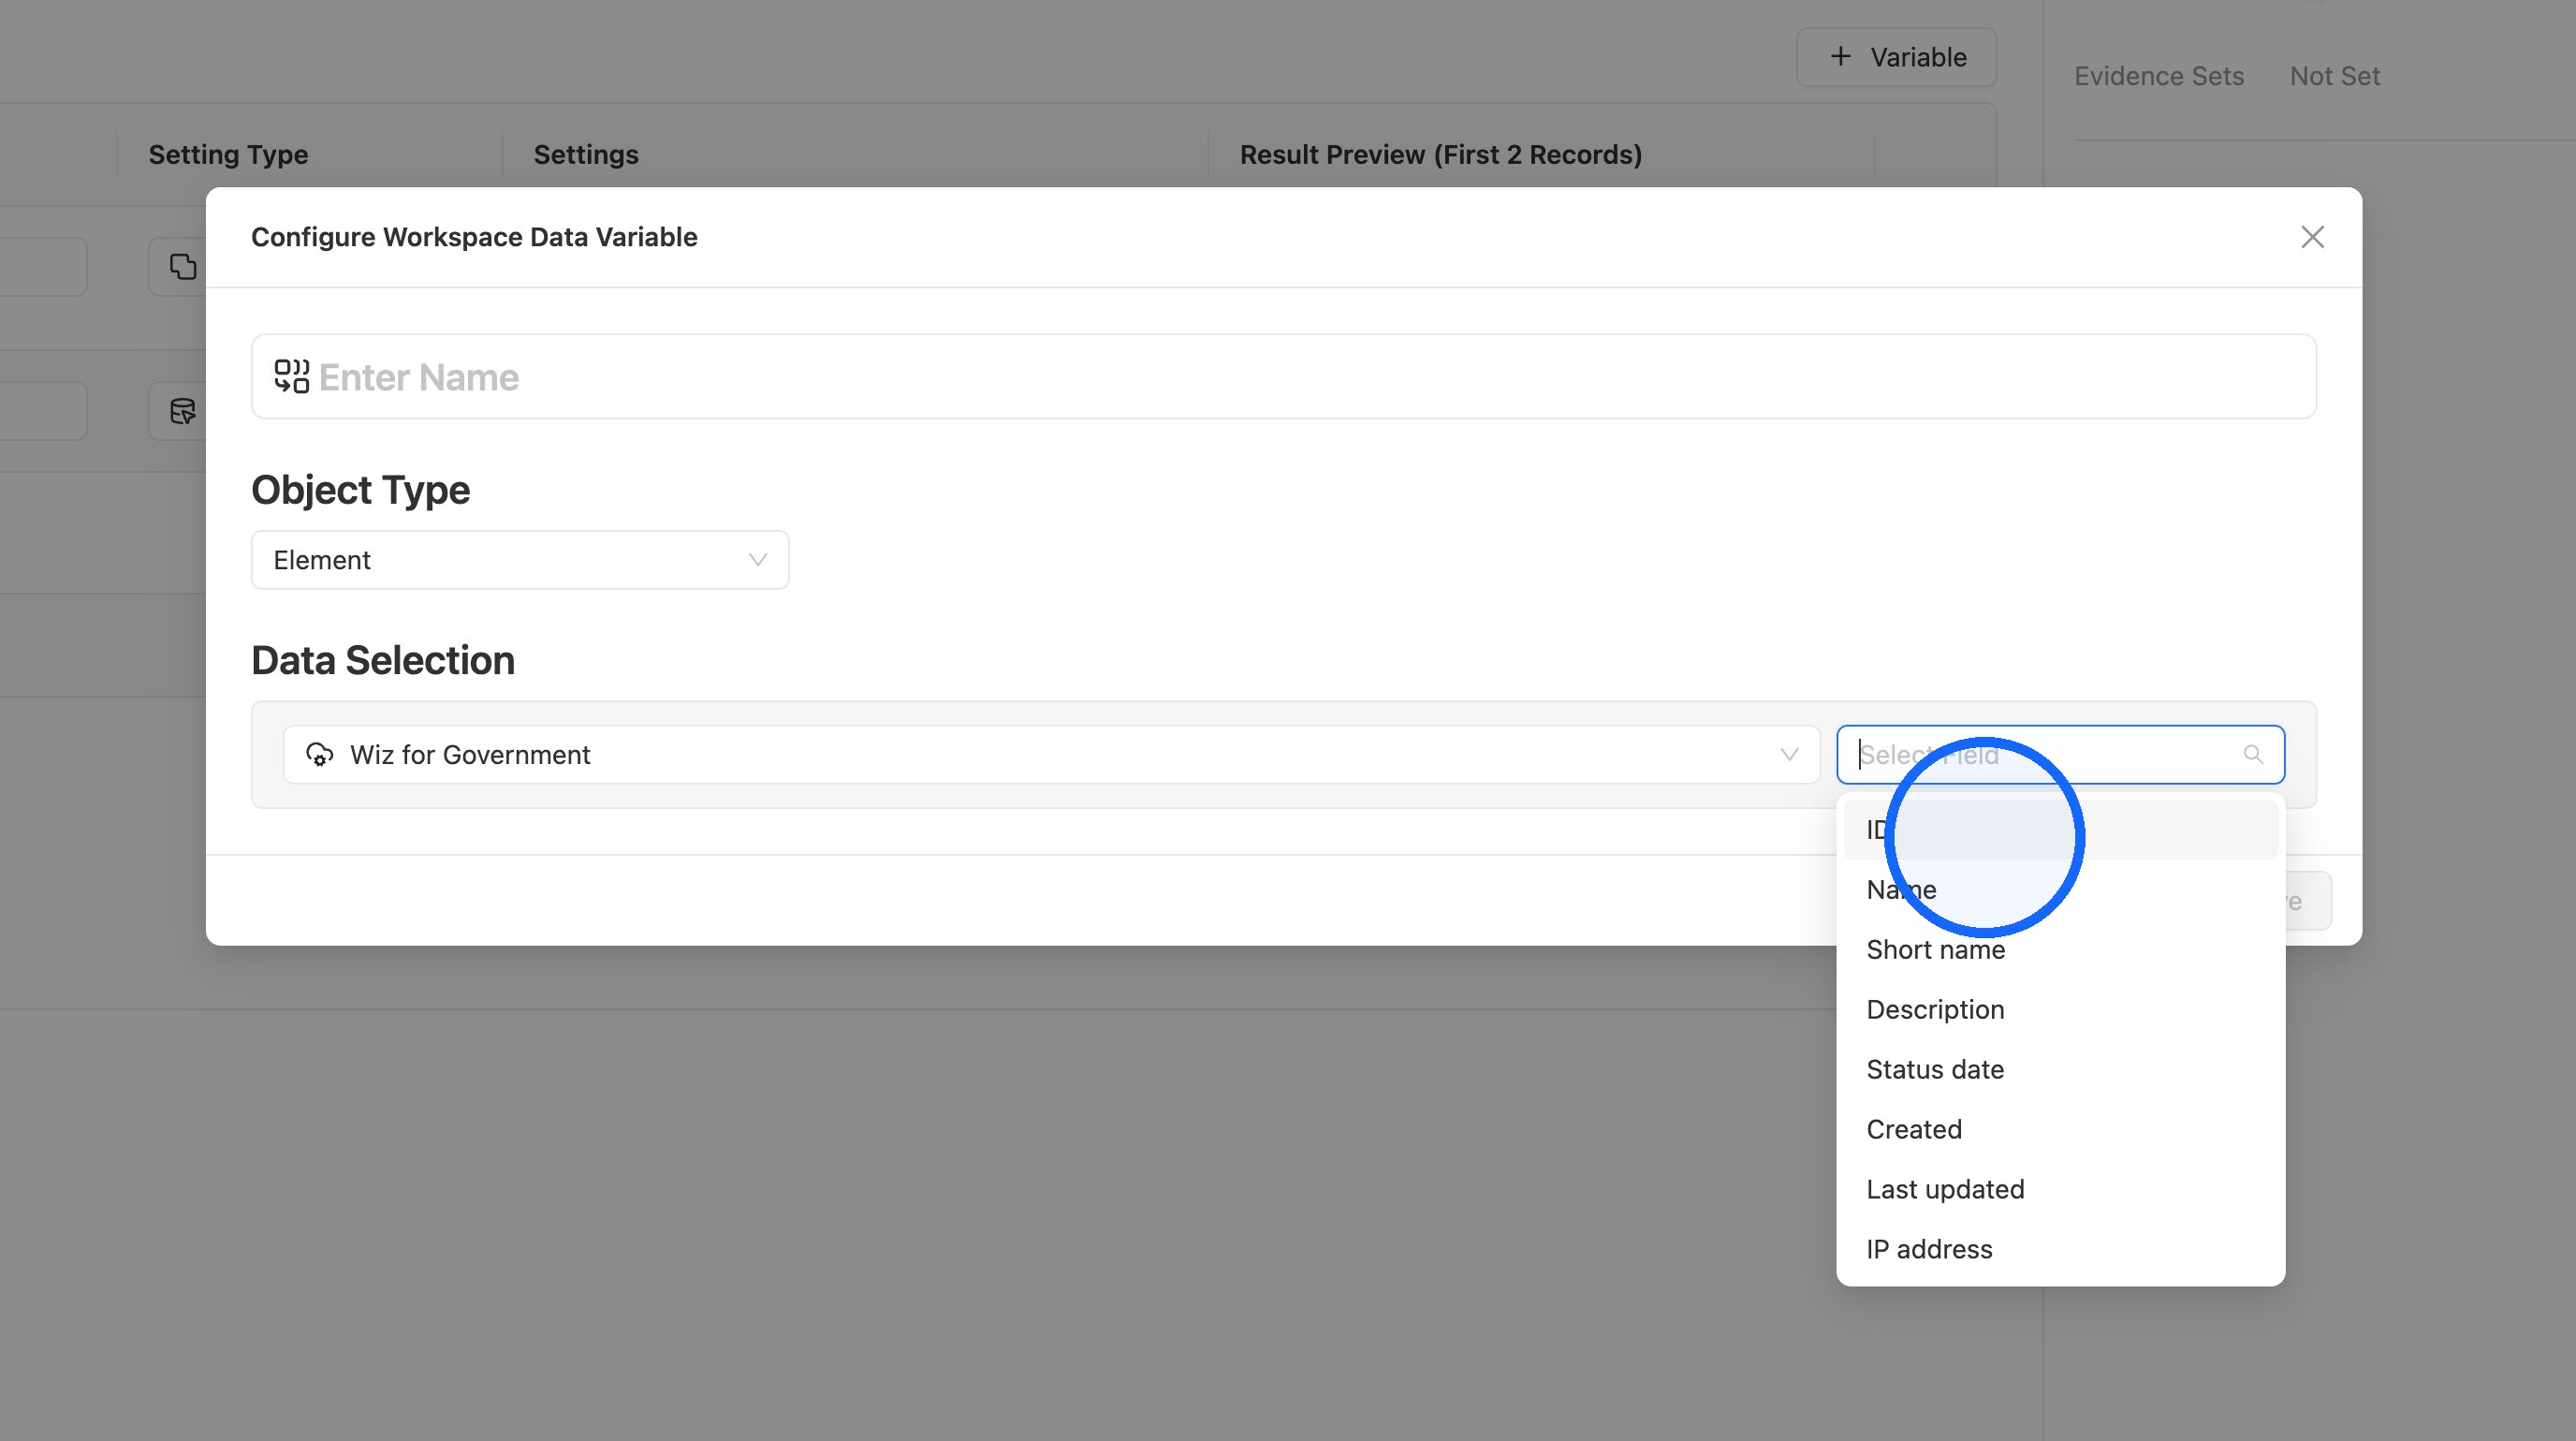
13. Name and save the custom variable
Enter a name for the custom variable and click Save.
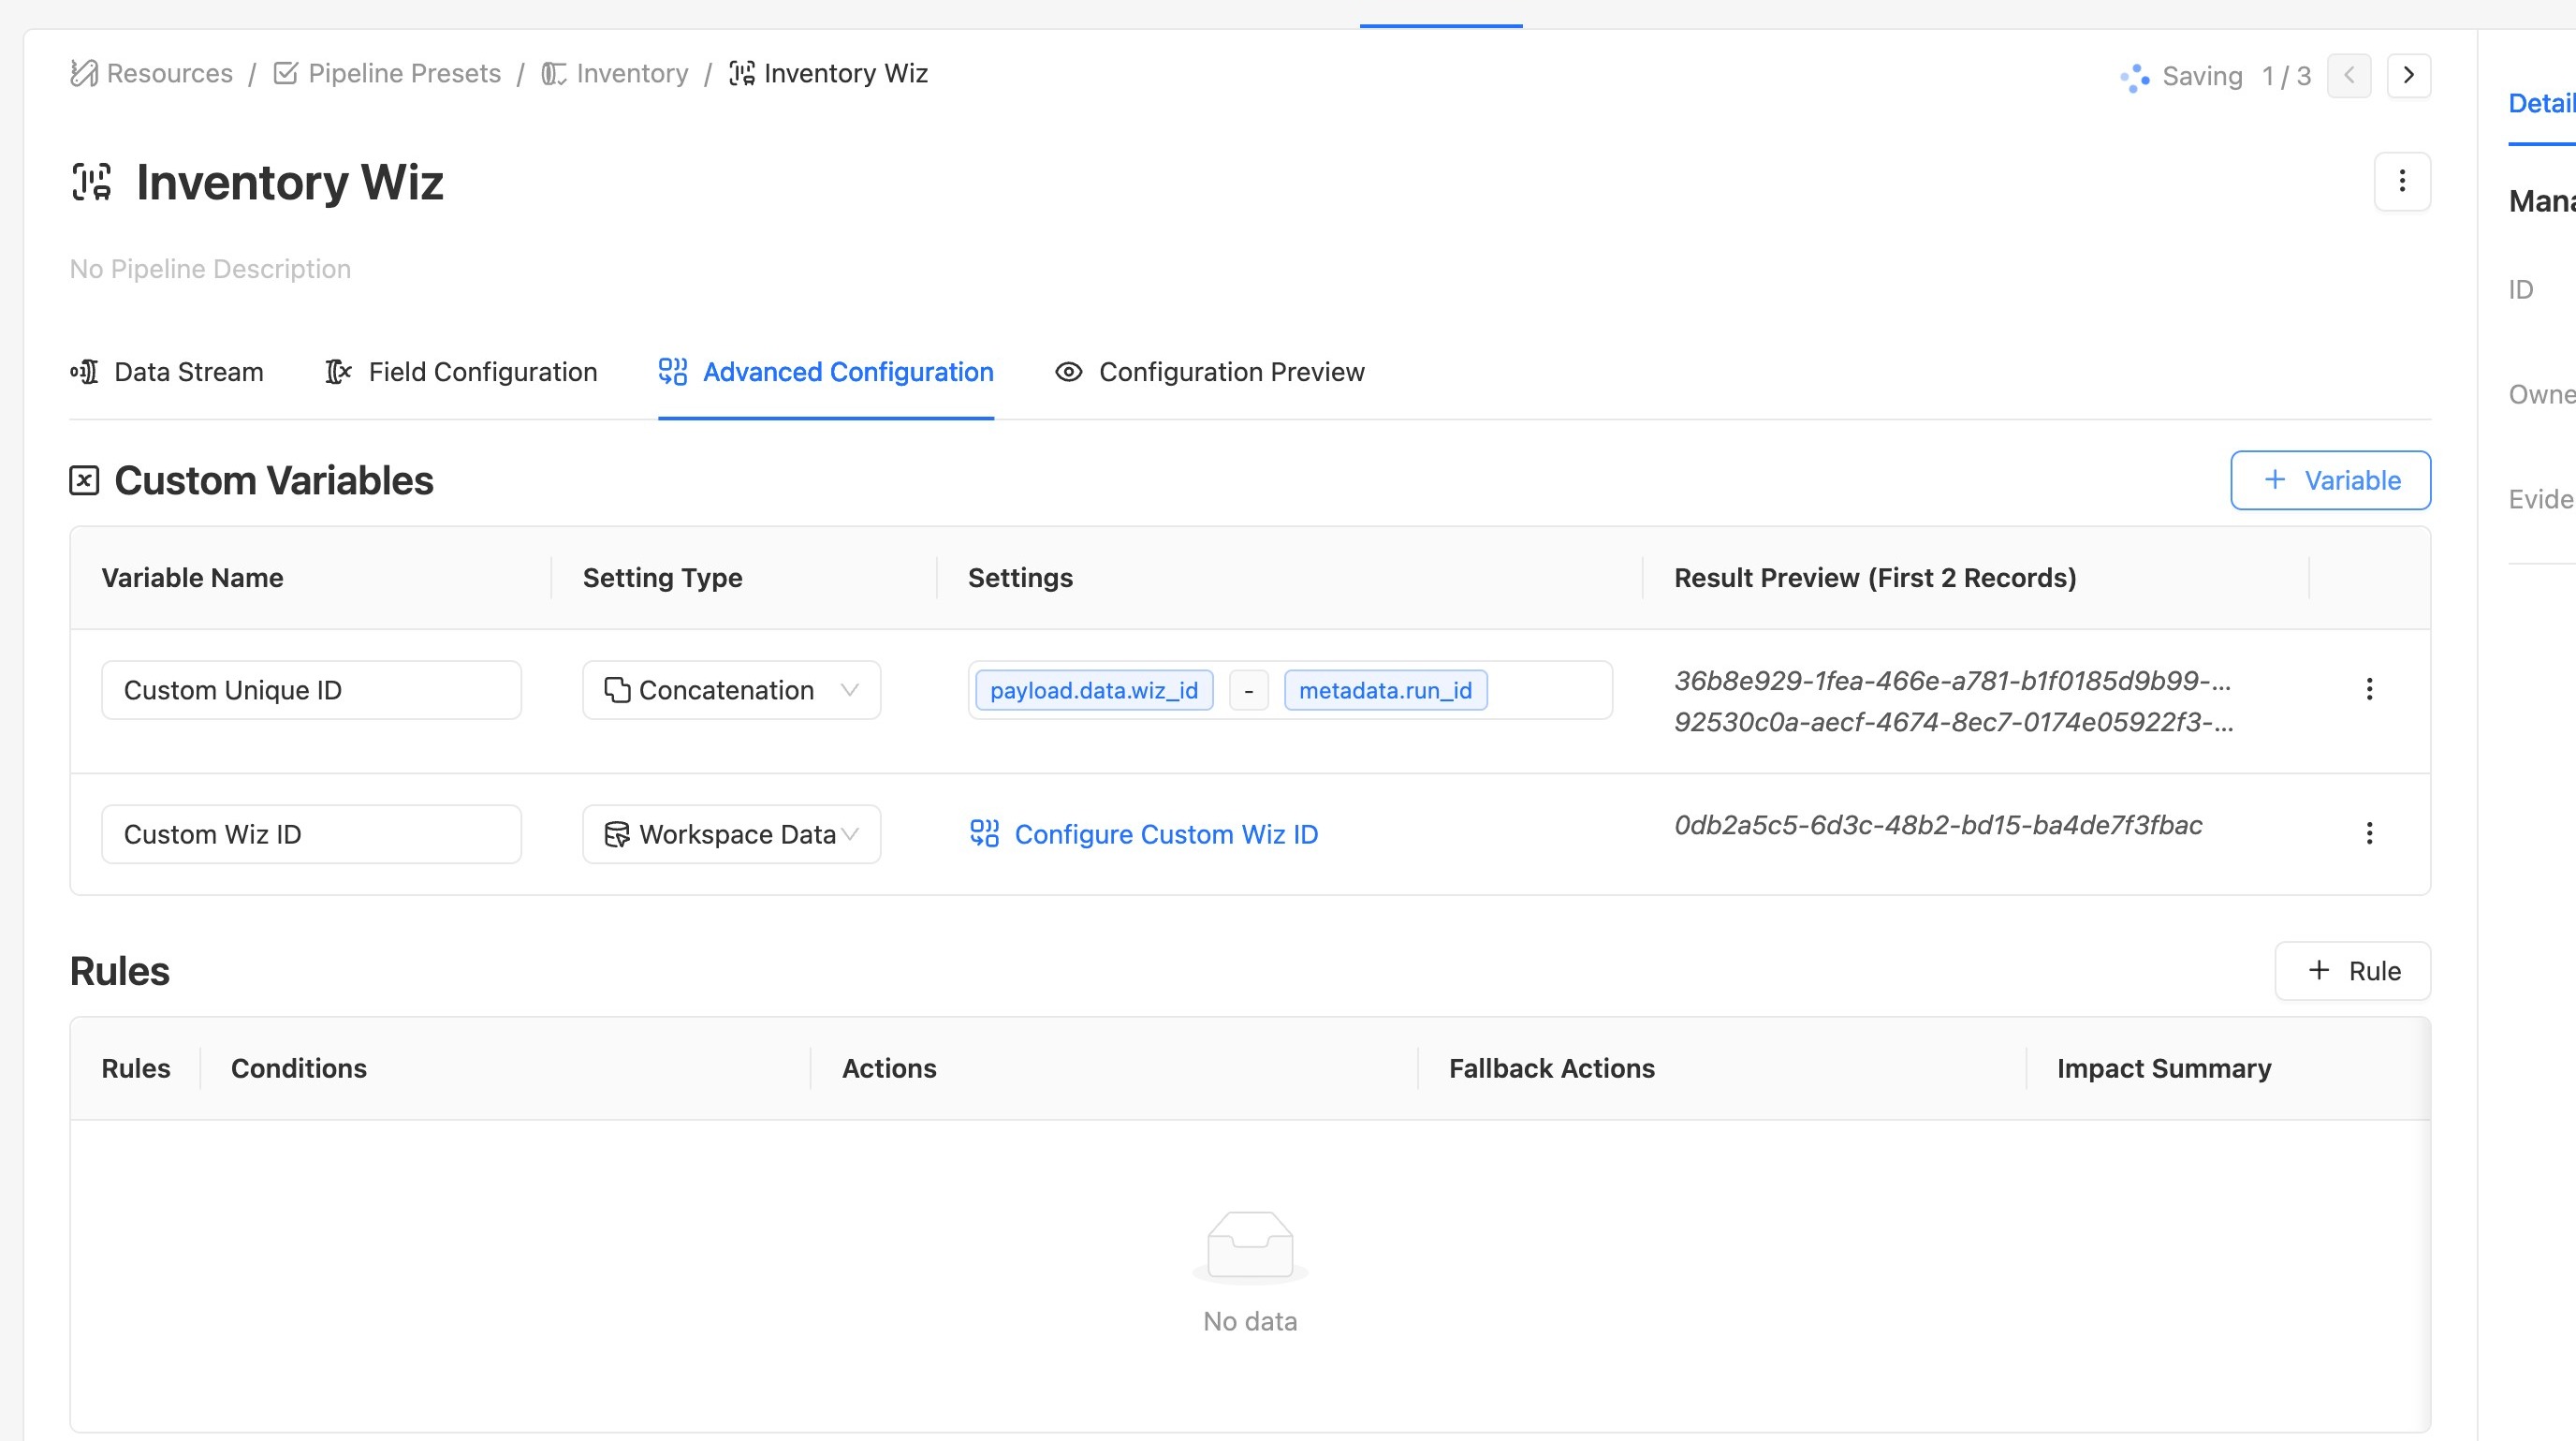
14. Confirm the preview
The preview shows that the custom variable now holds Wiz for Government’s Element ID.
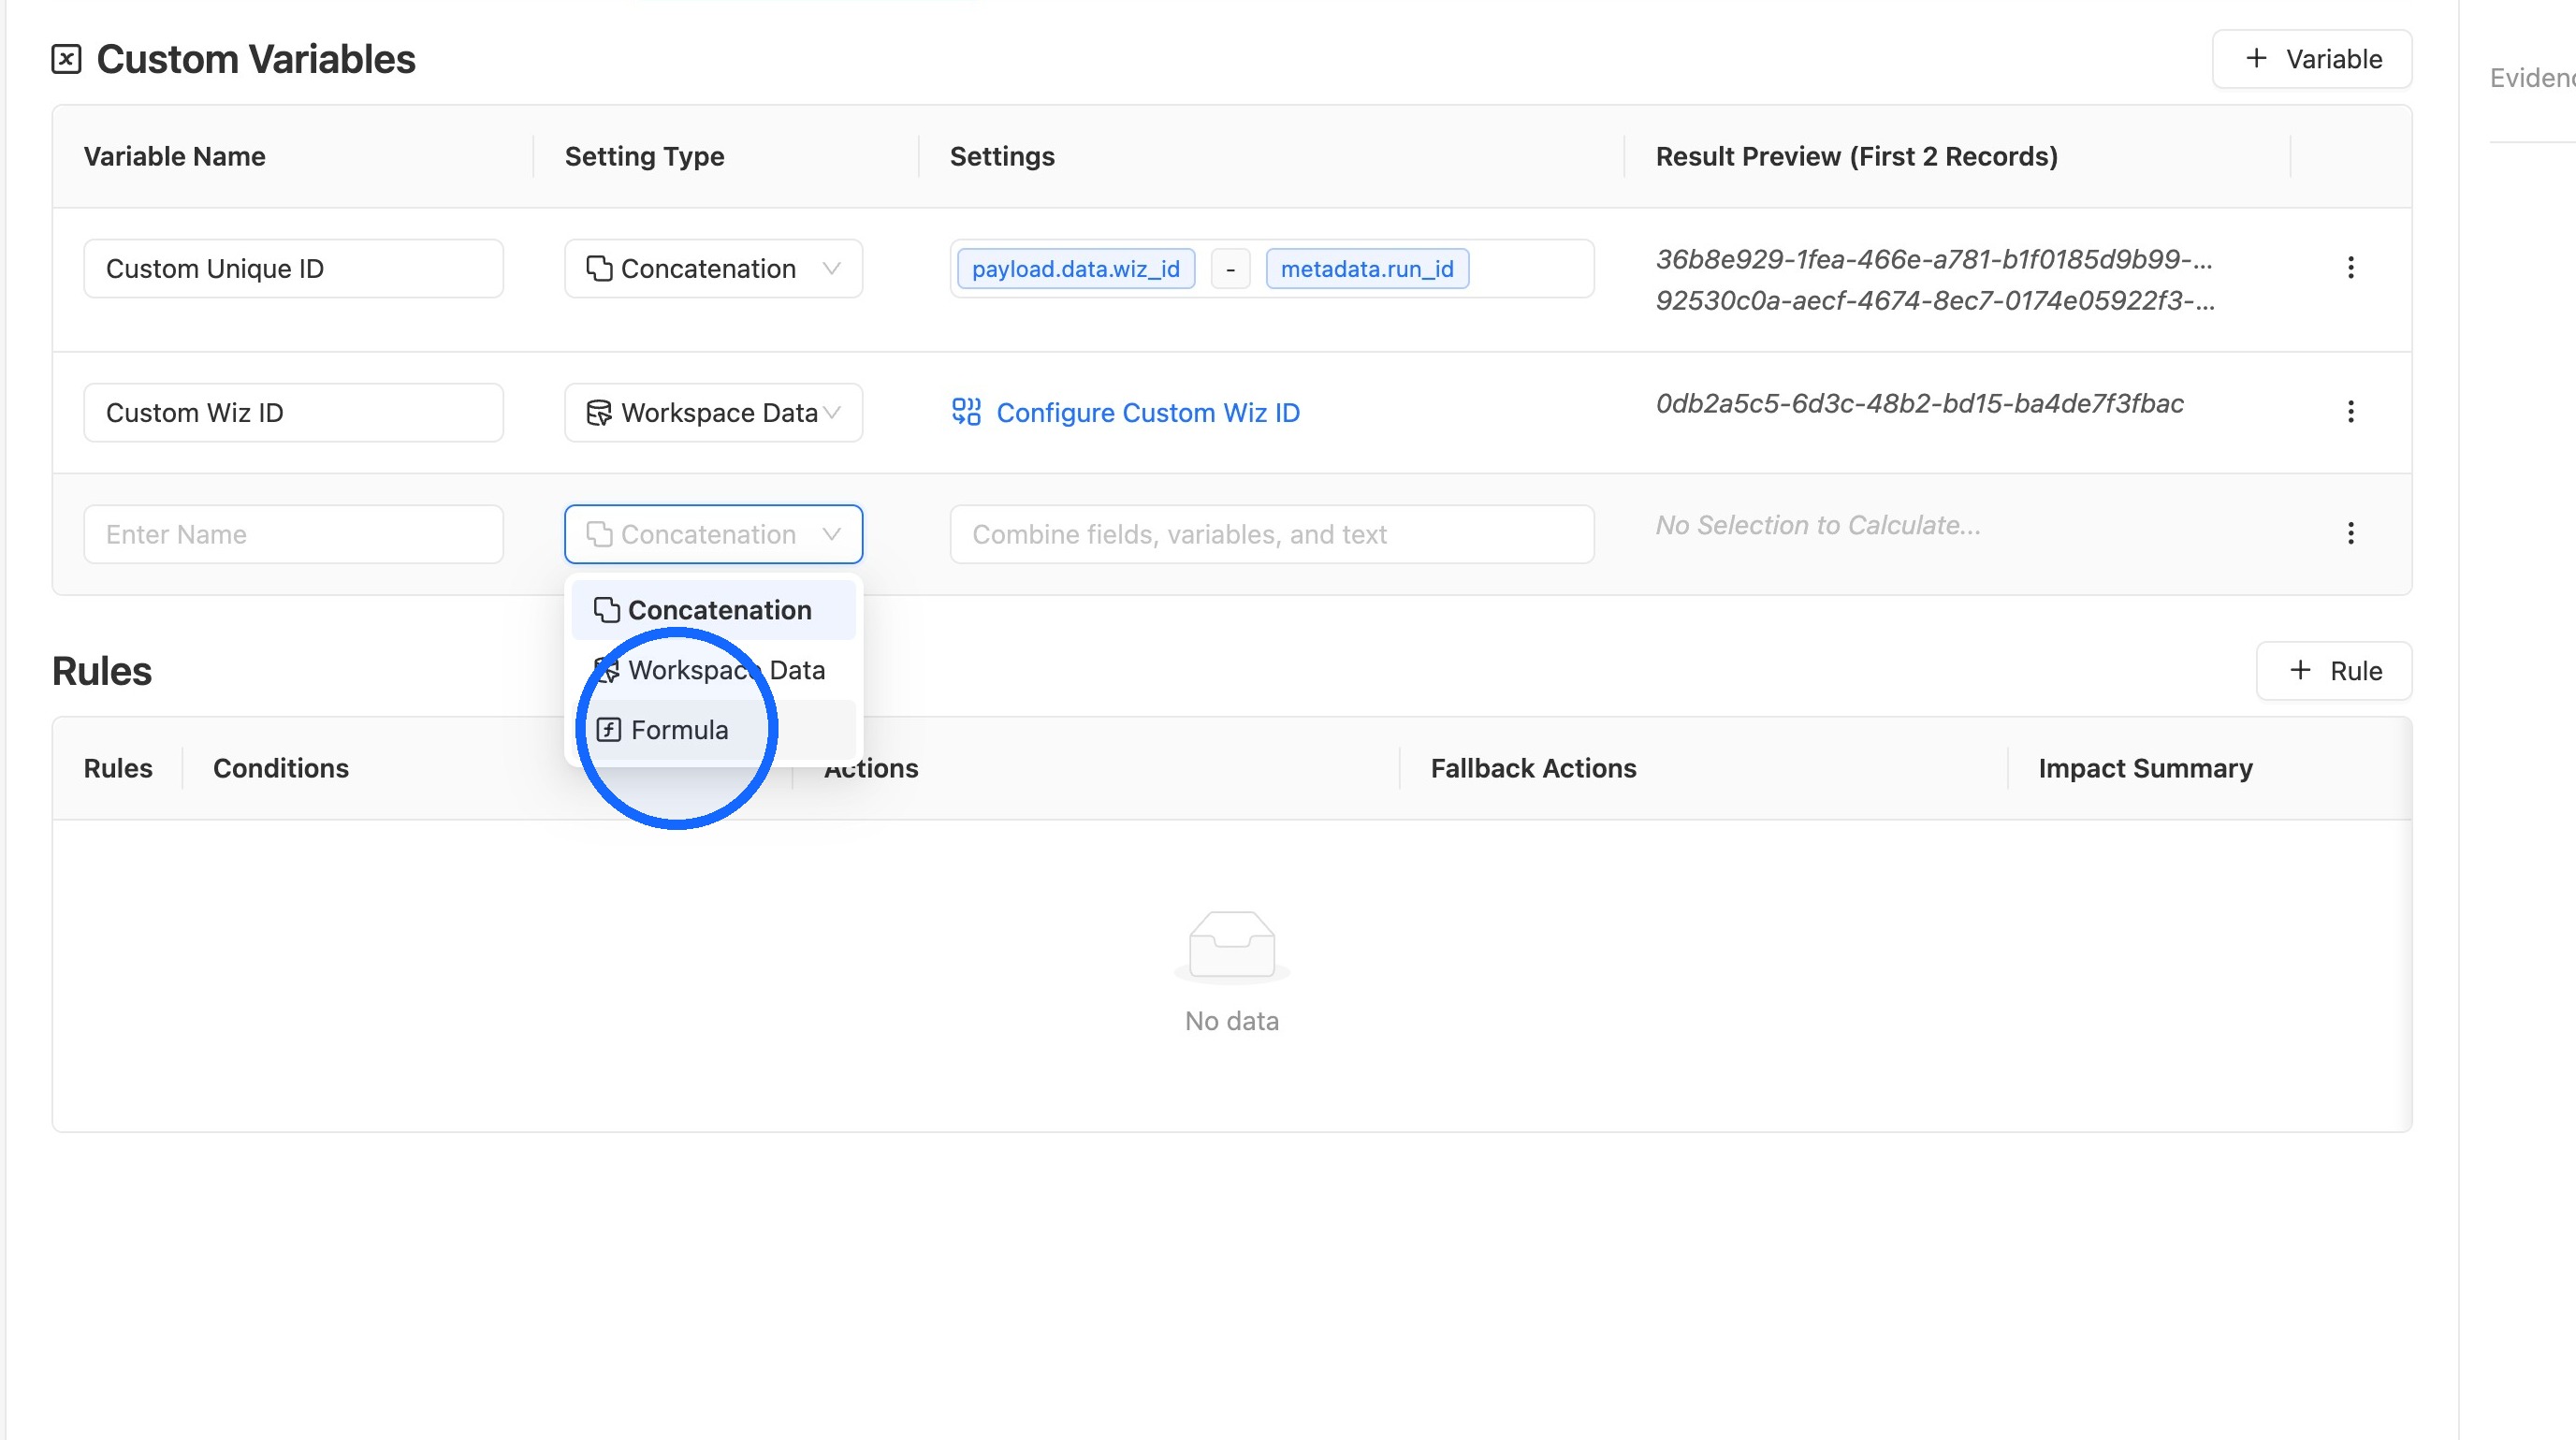
Formula
15. Select Formula as the setting type
Select Formula as the Setting Type for a new custom variable.
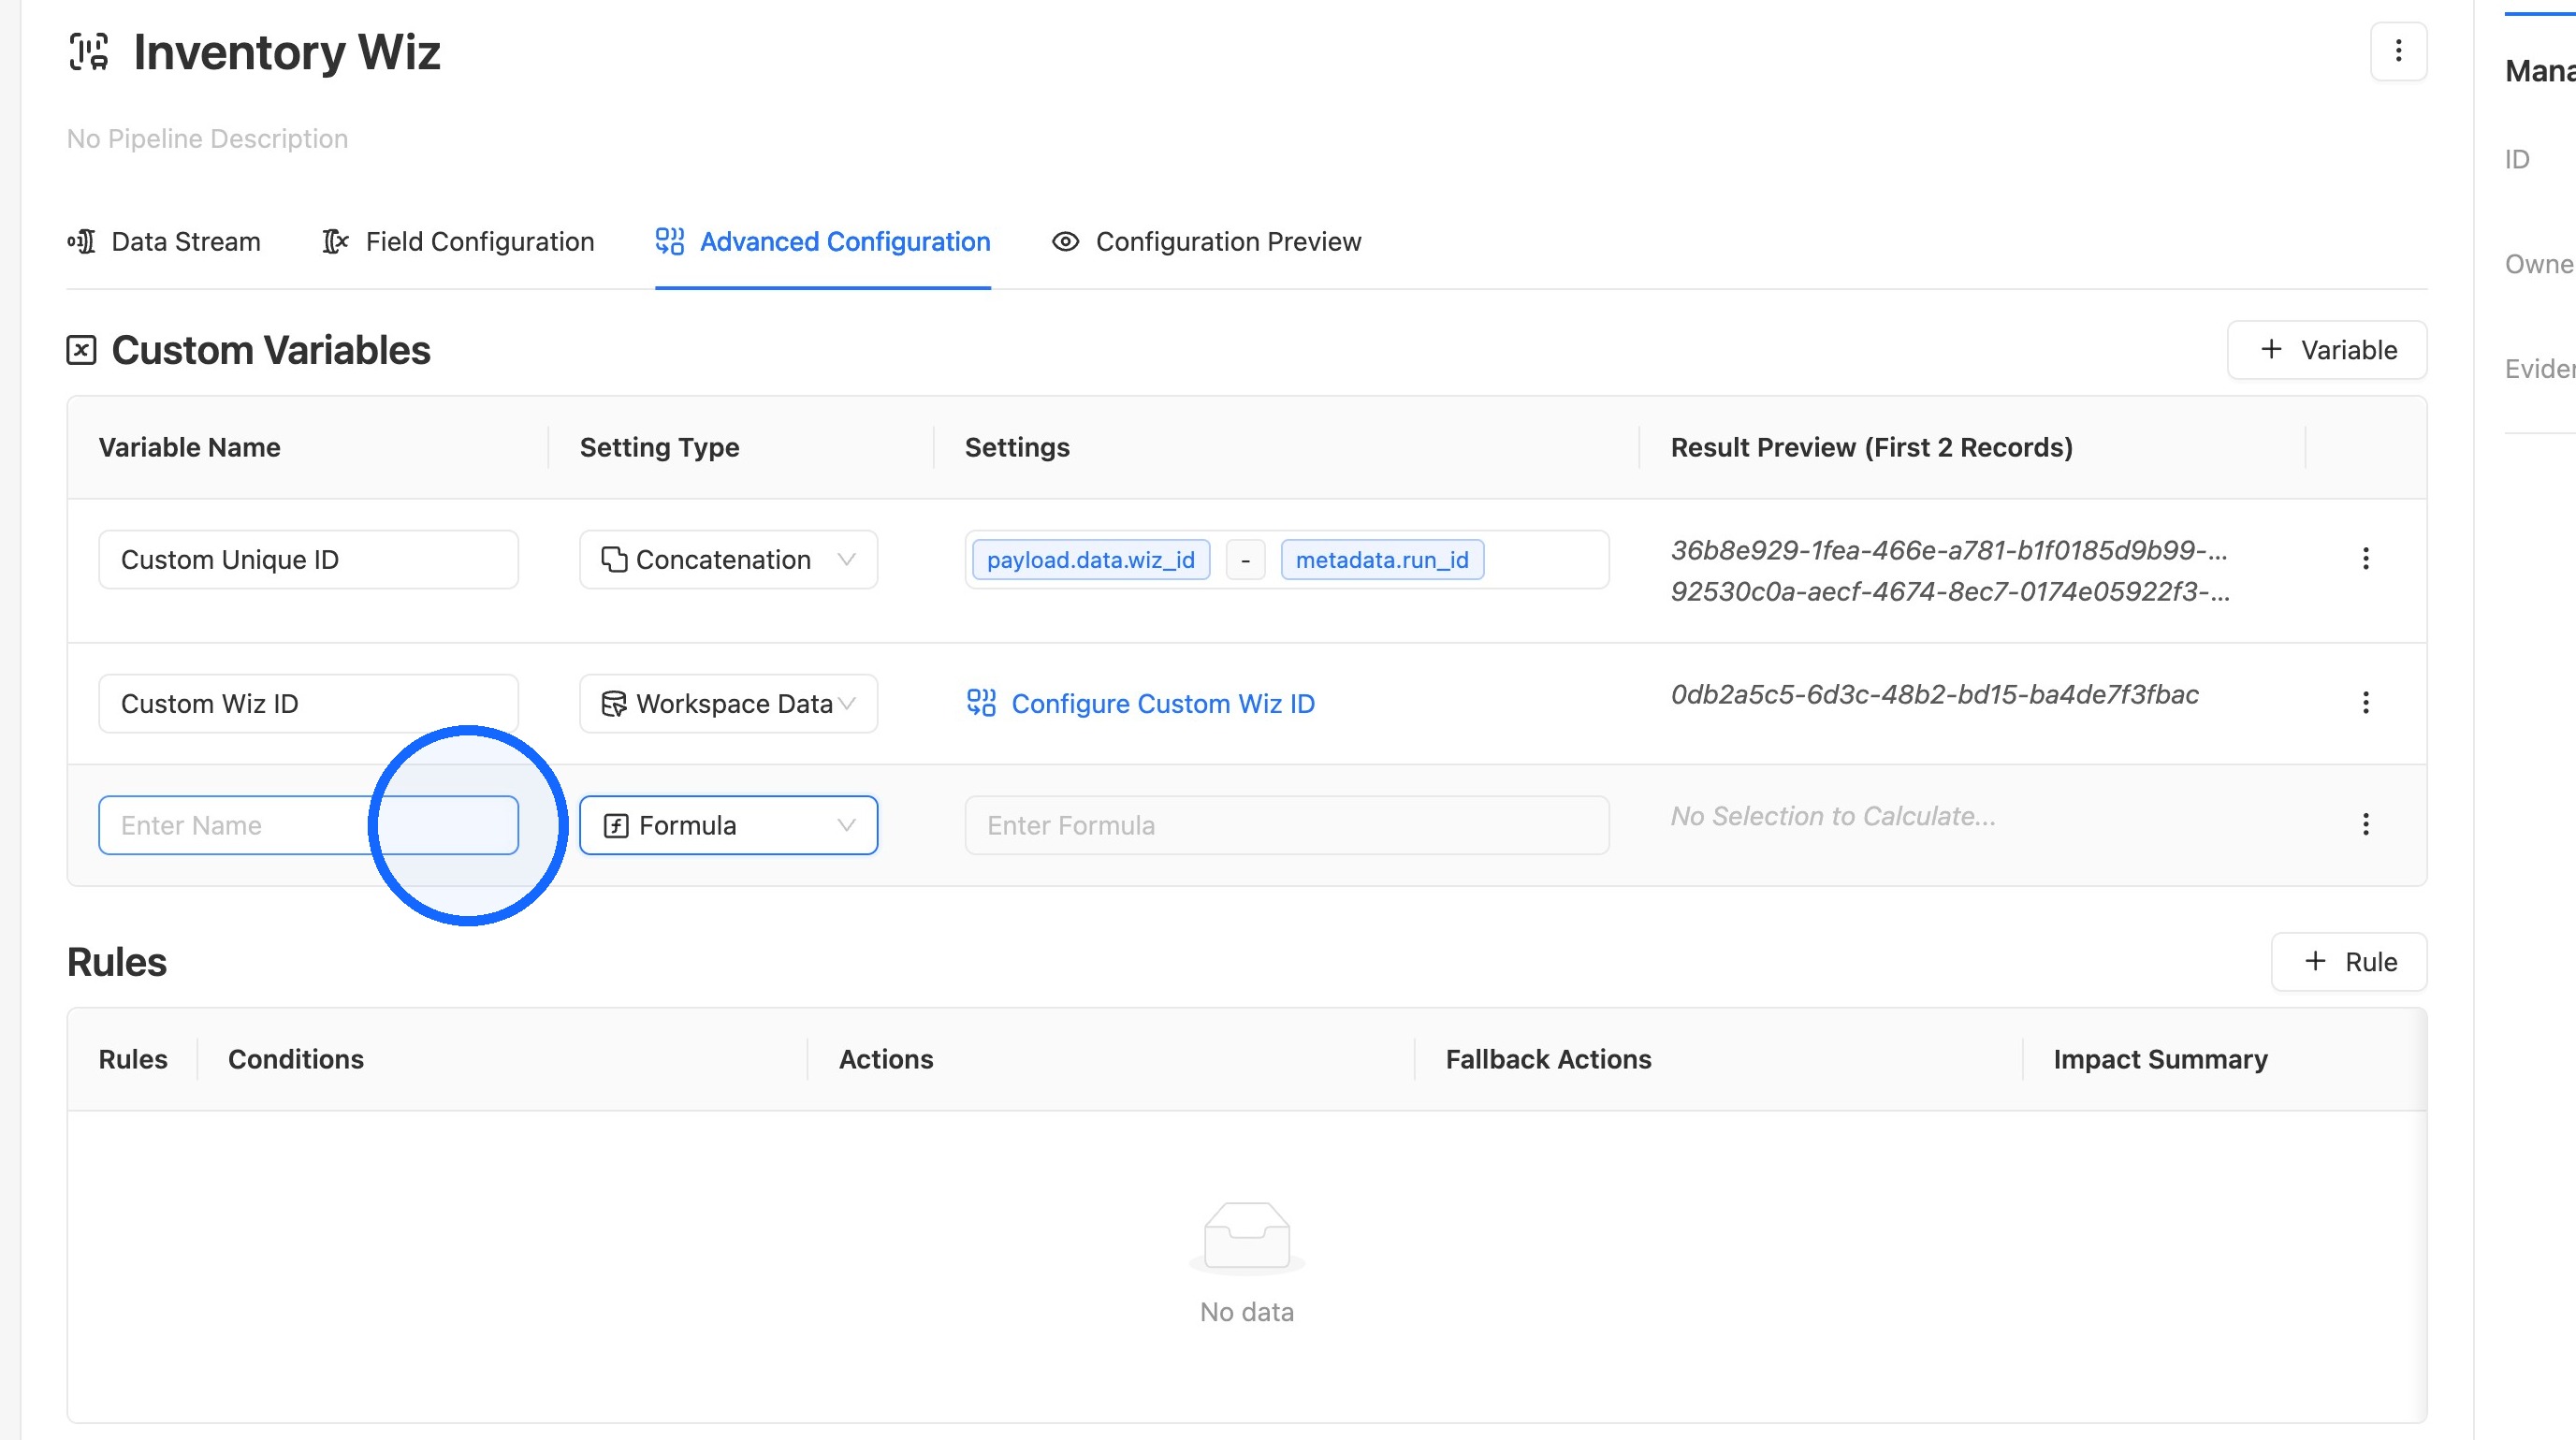
16. Name the formula variable
Enter a name for the Formula custom variable.
17. Select the REGEX_EXTRACT formula
Select REGEX_EXTRACT as the formula, and hover over it to see syntax help.
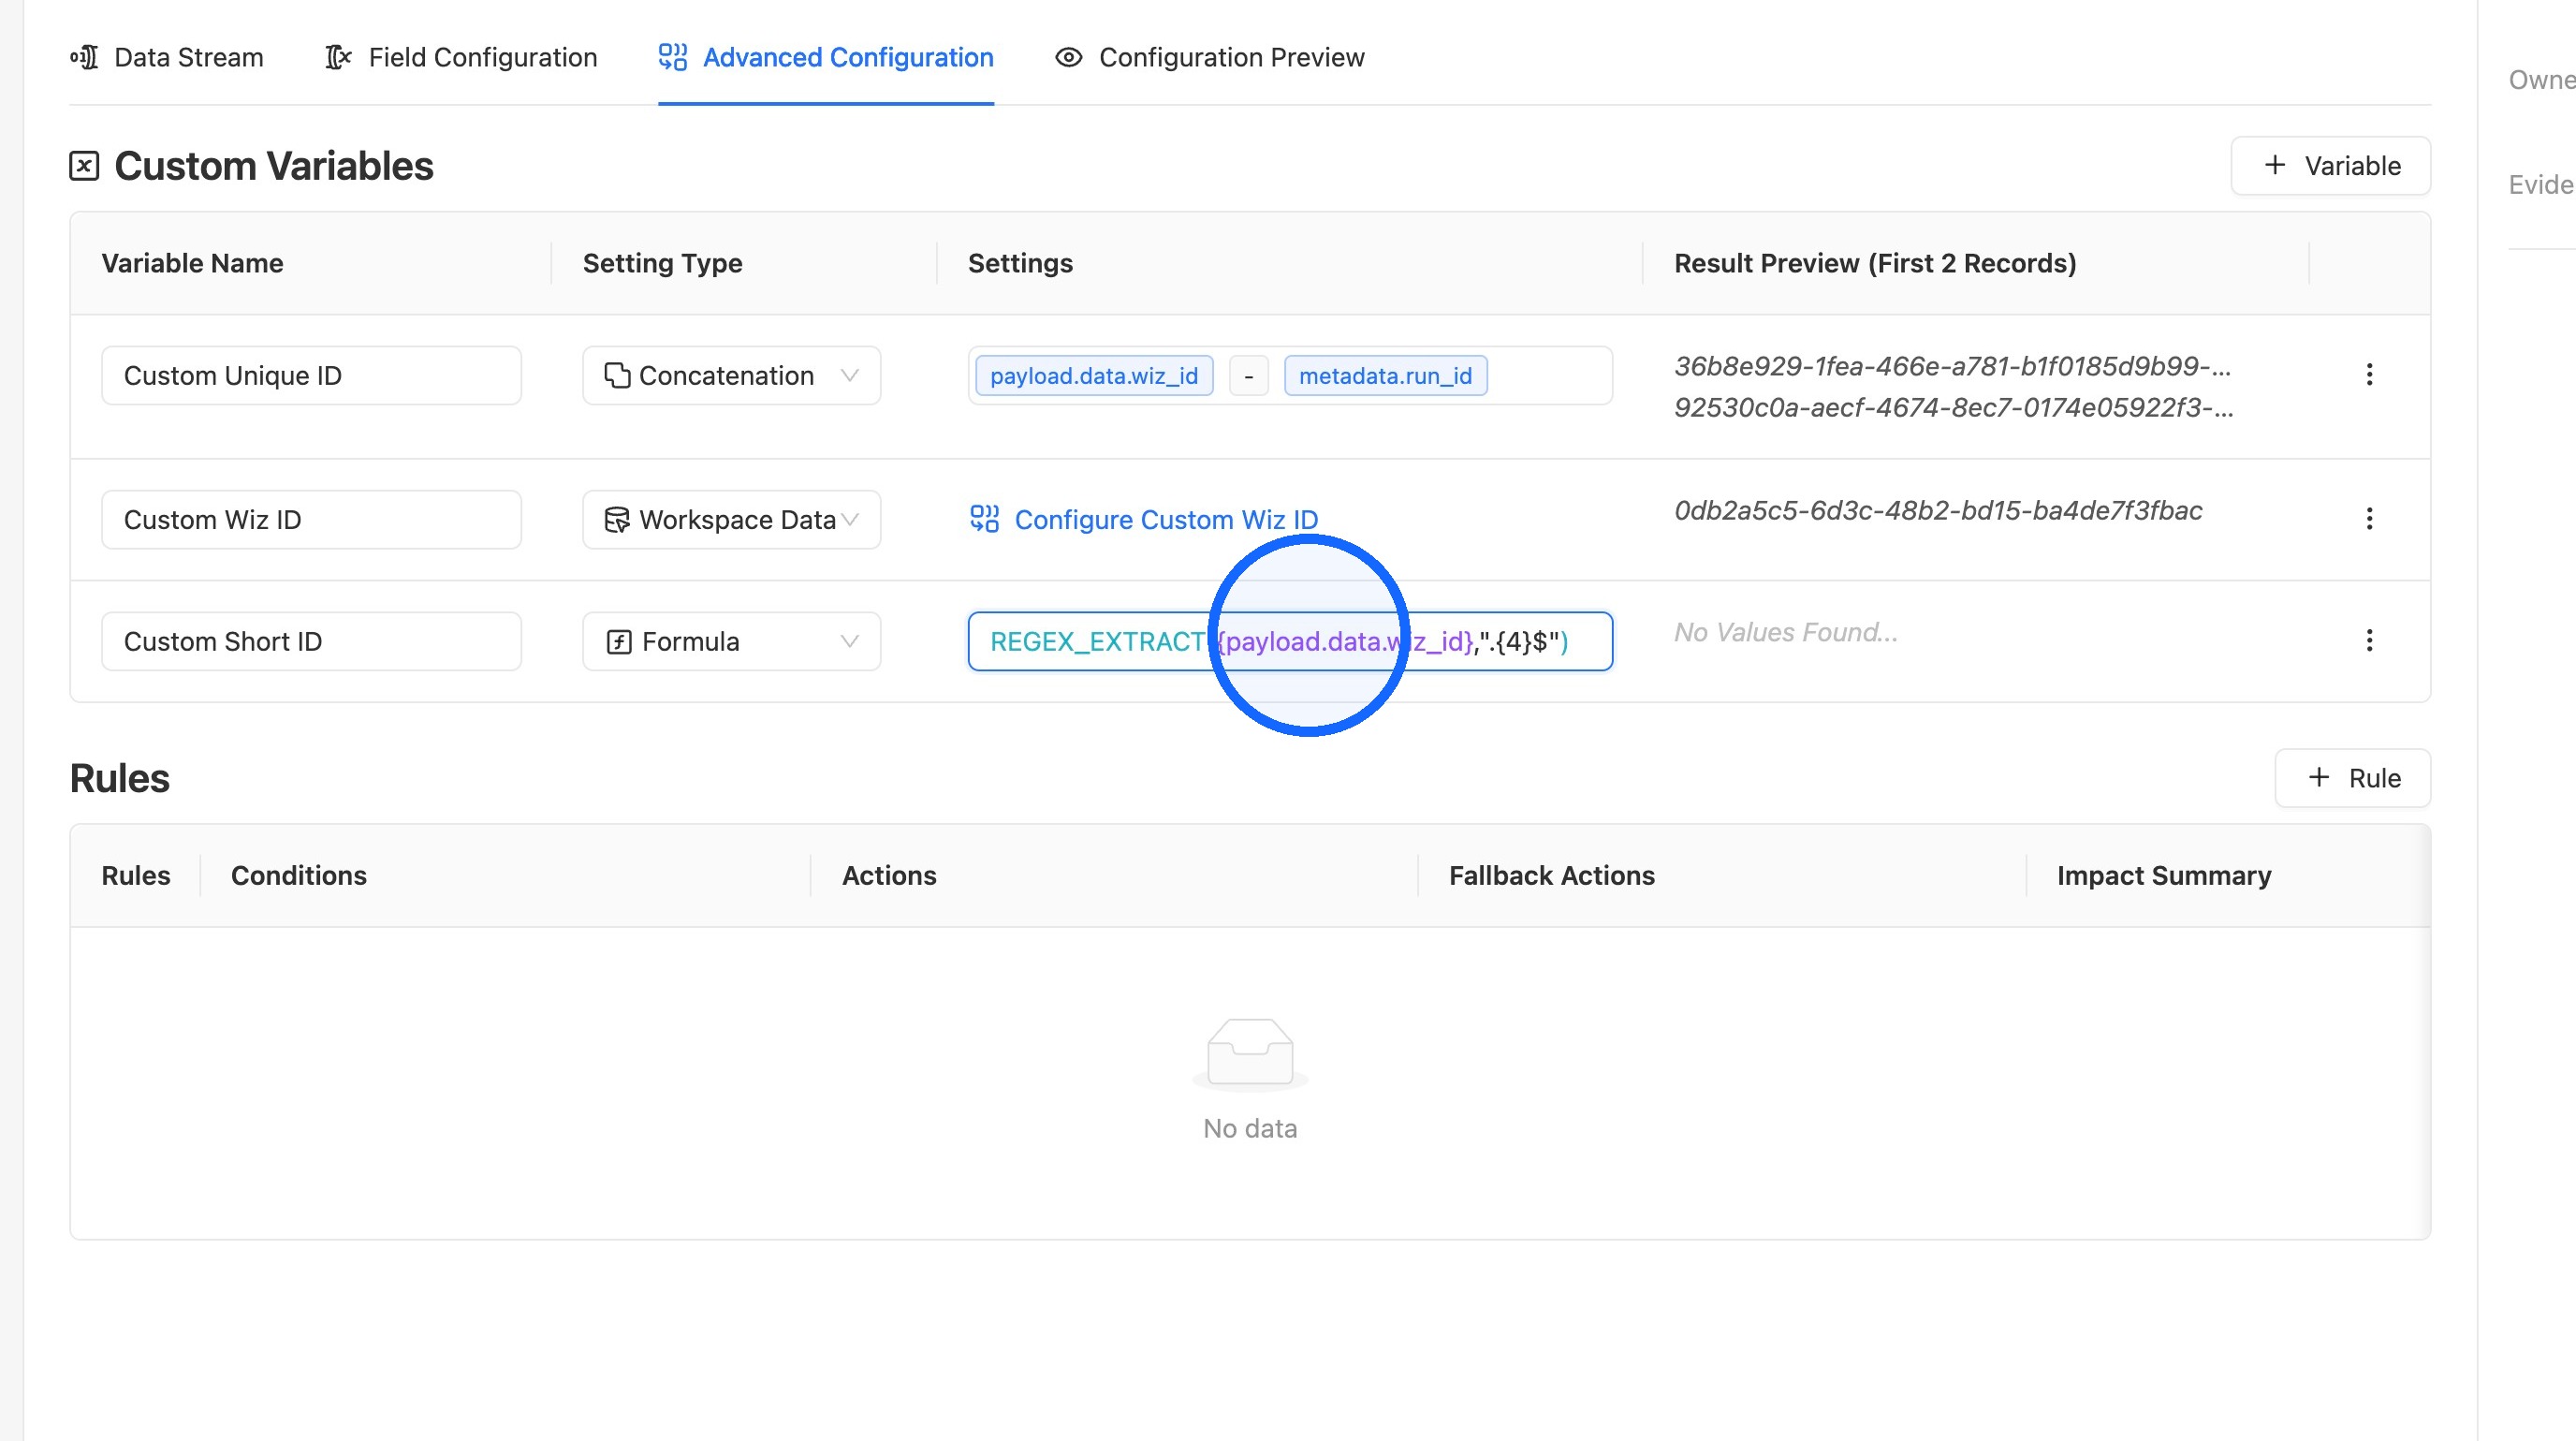
18. Enter the regex pattern
Enter the regex pattern; in this example, it returns the last four characters of the component’s Wiz ID.
Rule Configuration
Rules are what actually set the variable’s value. Setting a variable to Advanced Configuration isn’t enough on its own. If no rule sets the variable, it won’t receive a value. A rule can use a custom variable, but it doesn’t have to.
Each rule has three parts:
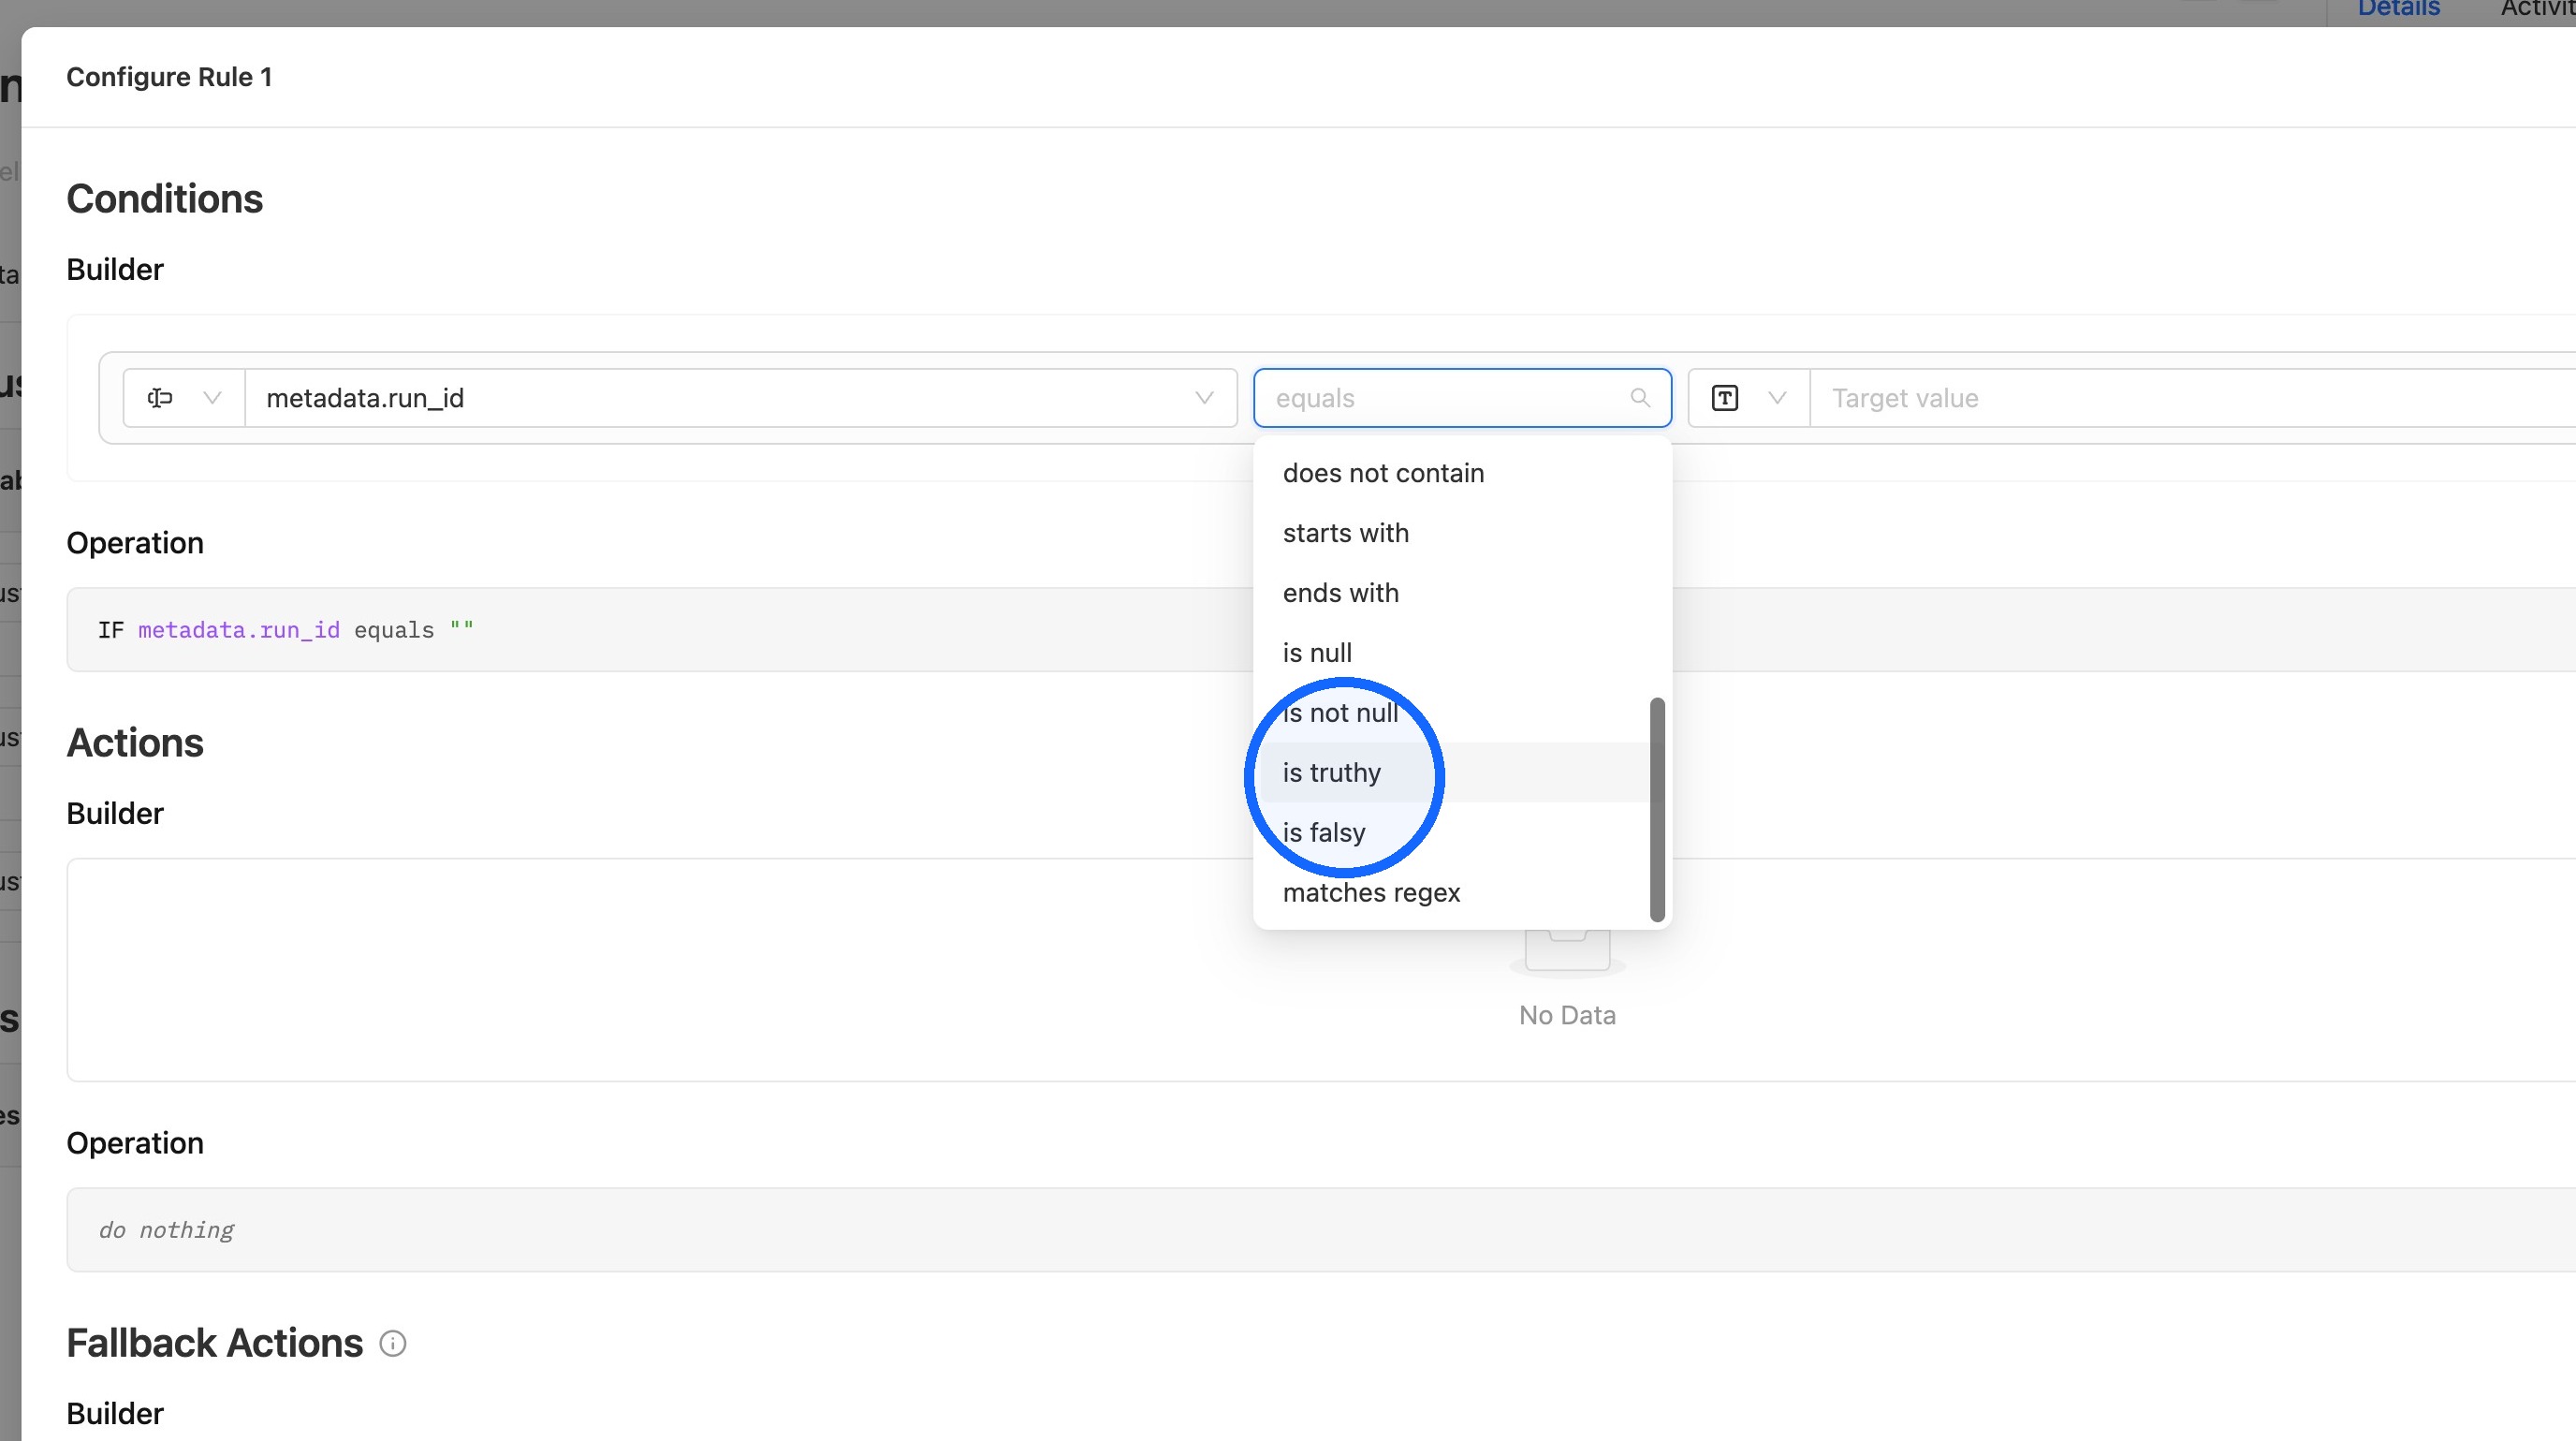
- Condition: Defines which objects the rule applies to, such as any object that has a run_id.
- Action: Sets the variable to a chosen value, like a custom variable, for every object that meets the condition.
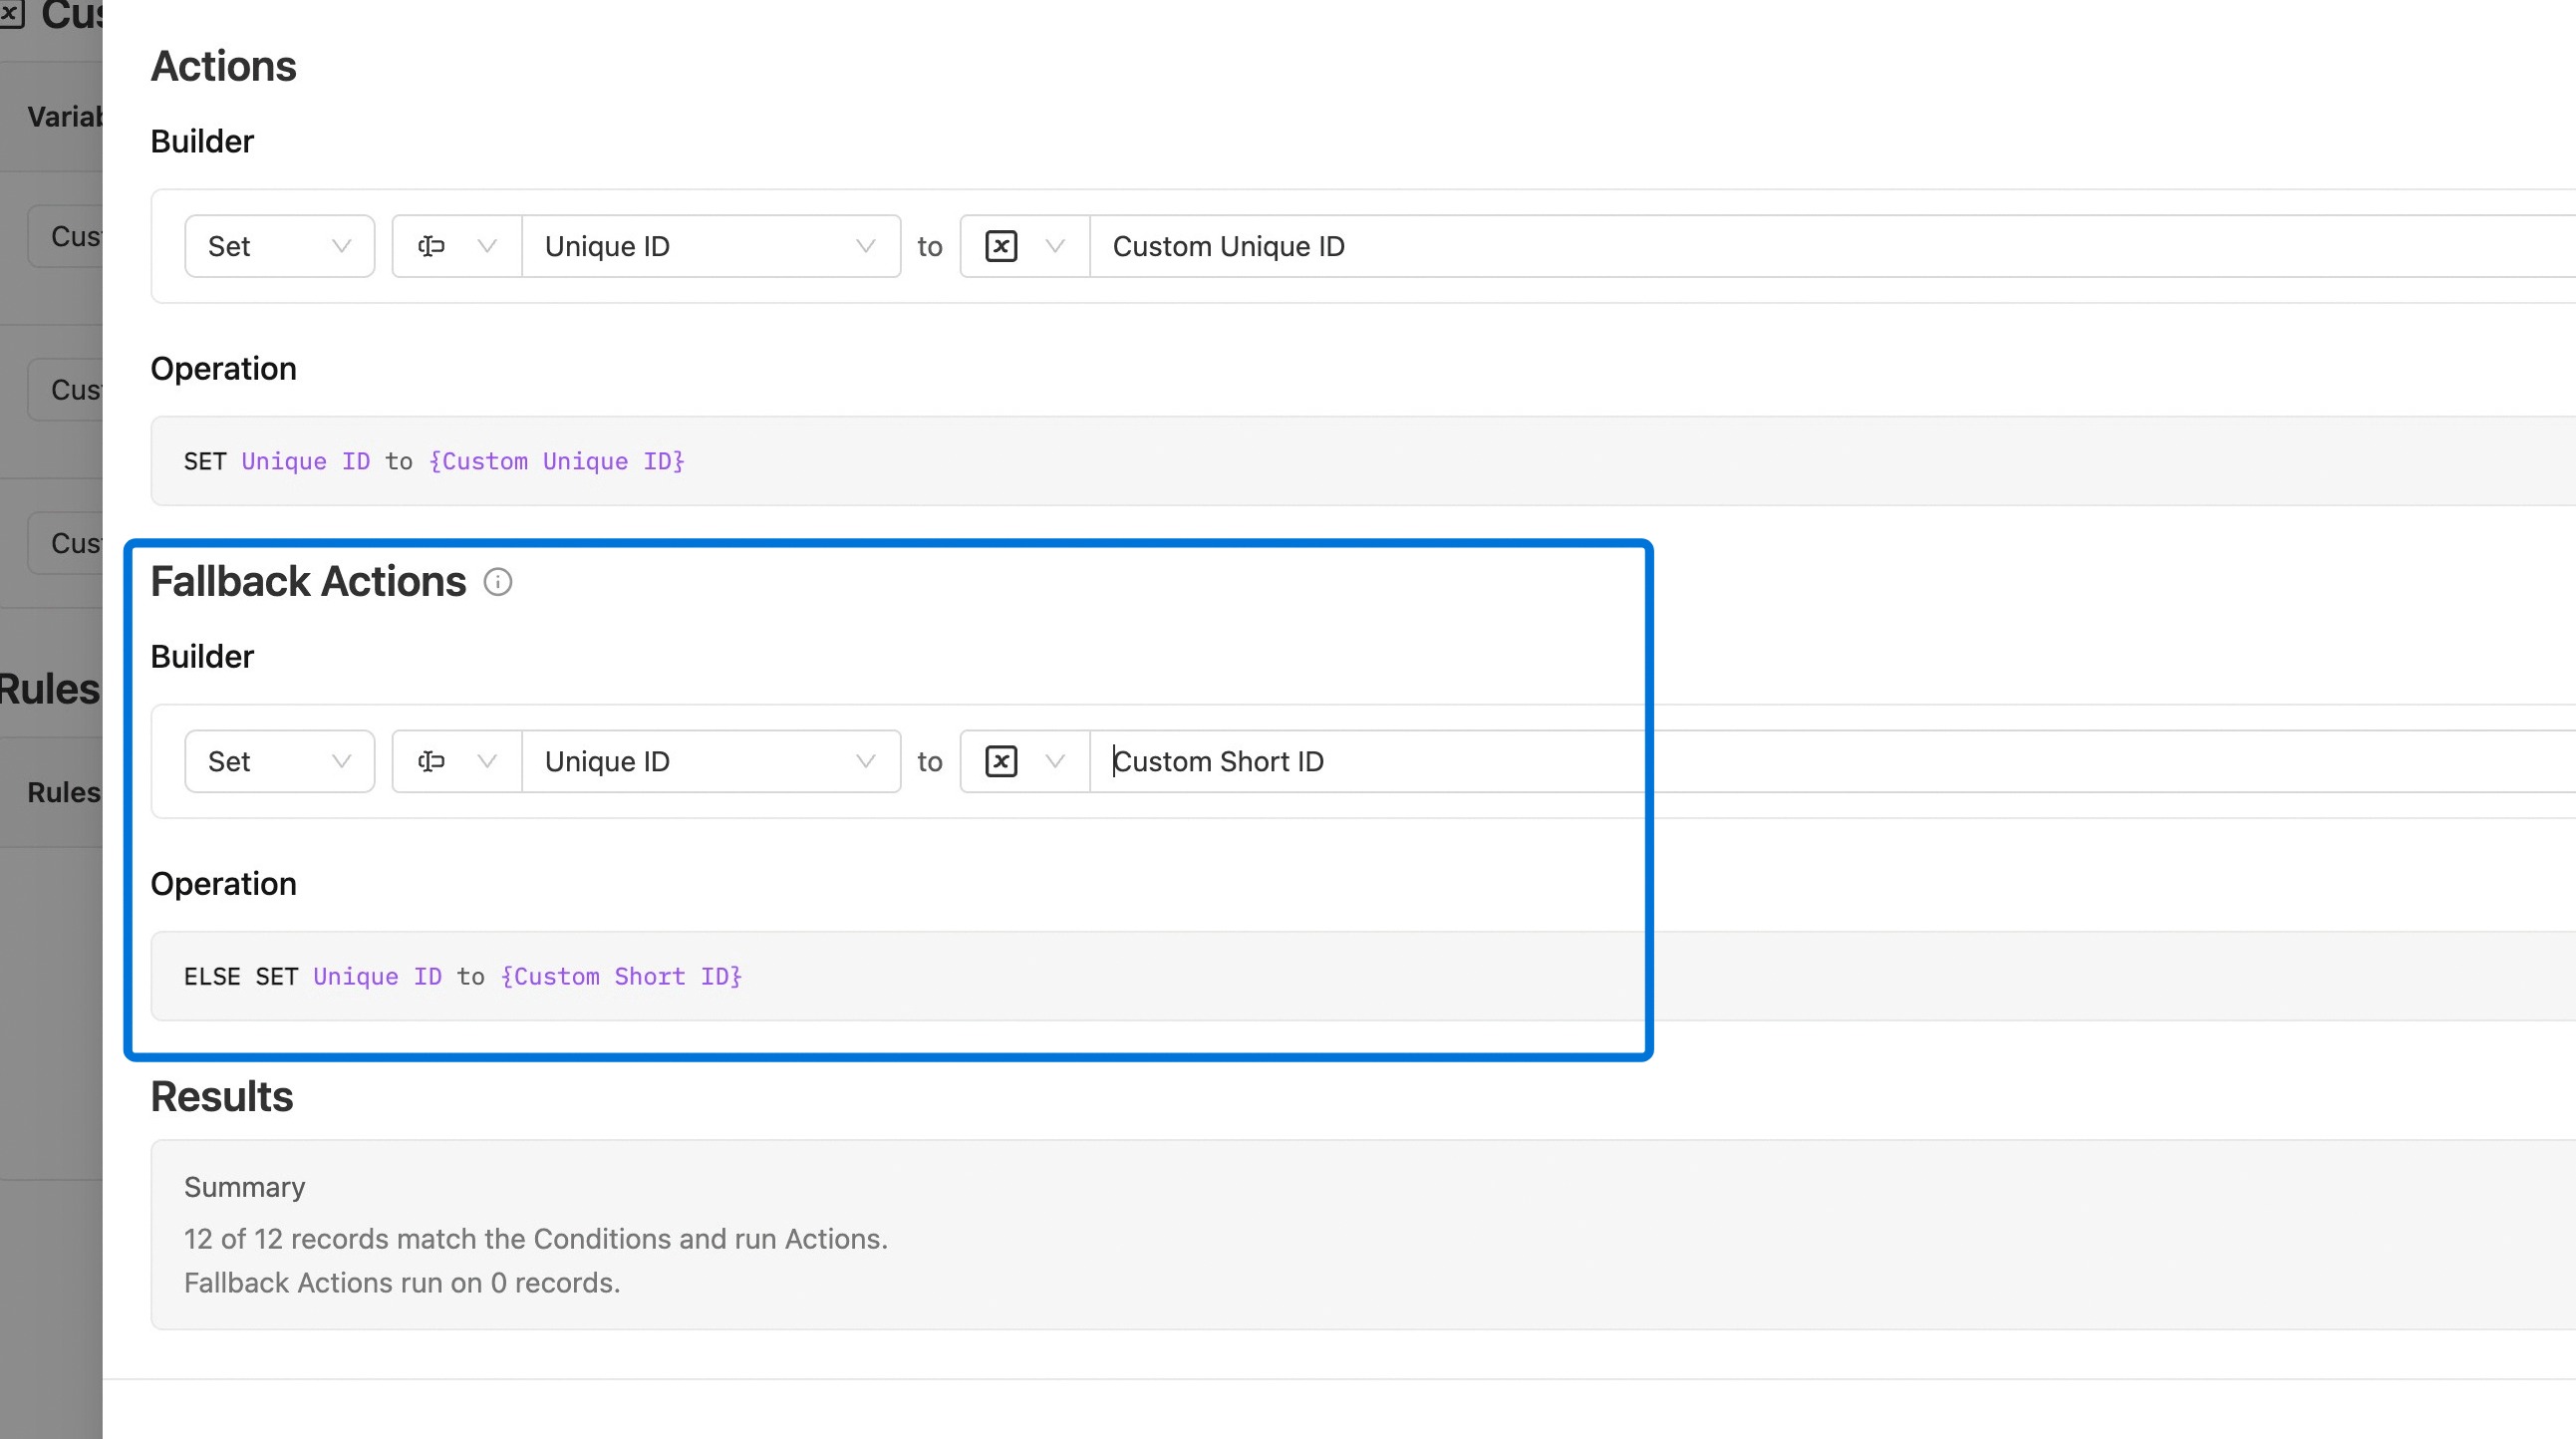
- Fallback Action: Sets a value for any object that does not meet the condition, so no object is left without one.
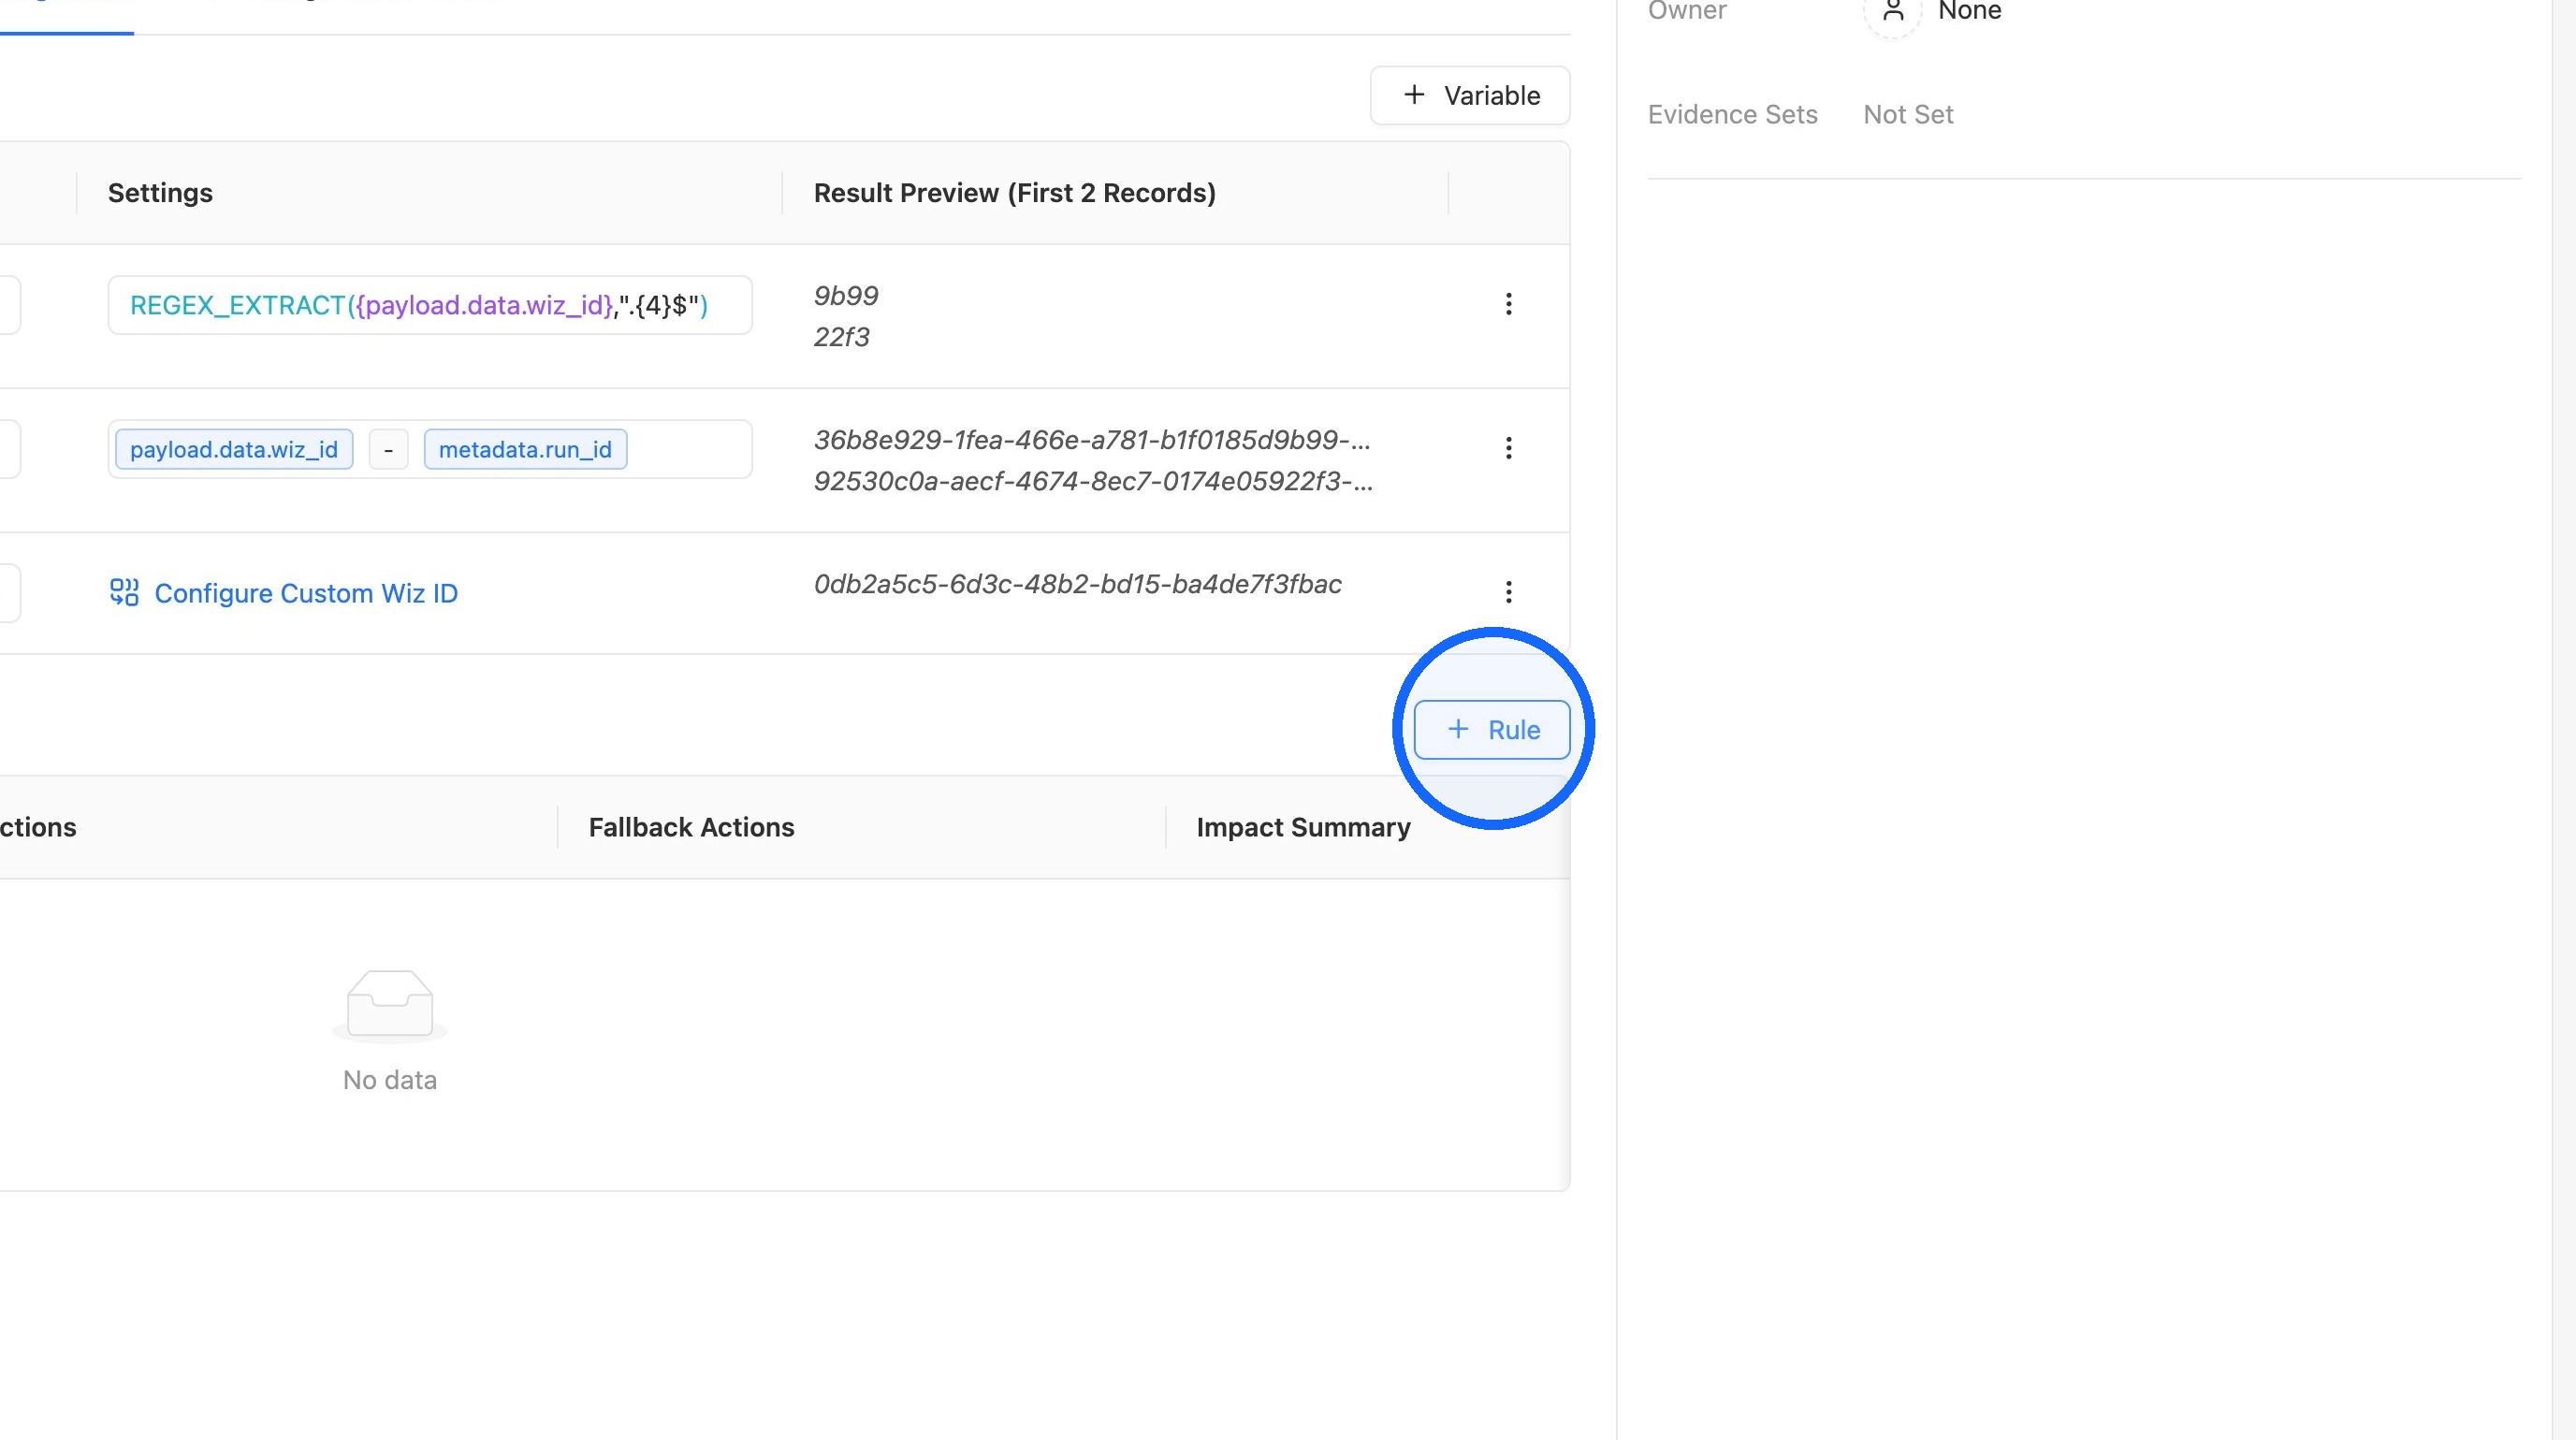
19. Add a rule
Click + Rule to add a rule.
20. Add the condition
Add the condition that determines which objects the rule applies to; this example uses any object that has a run_id, but conditions can be built in several ways to fit different use cases.
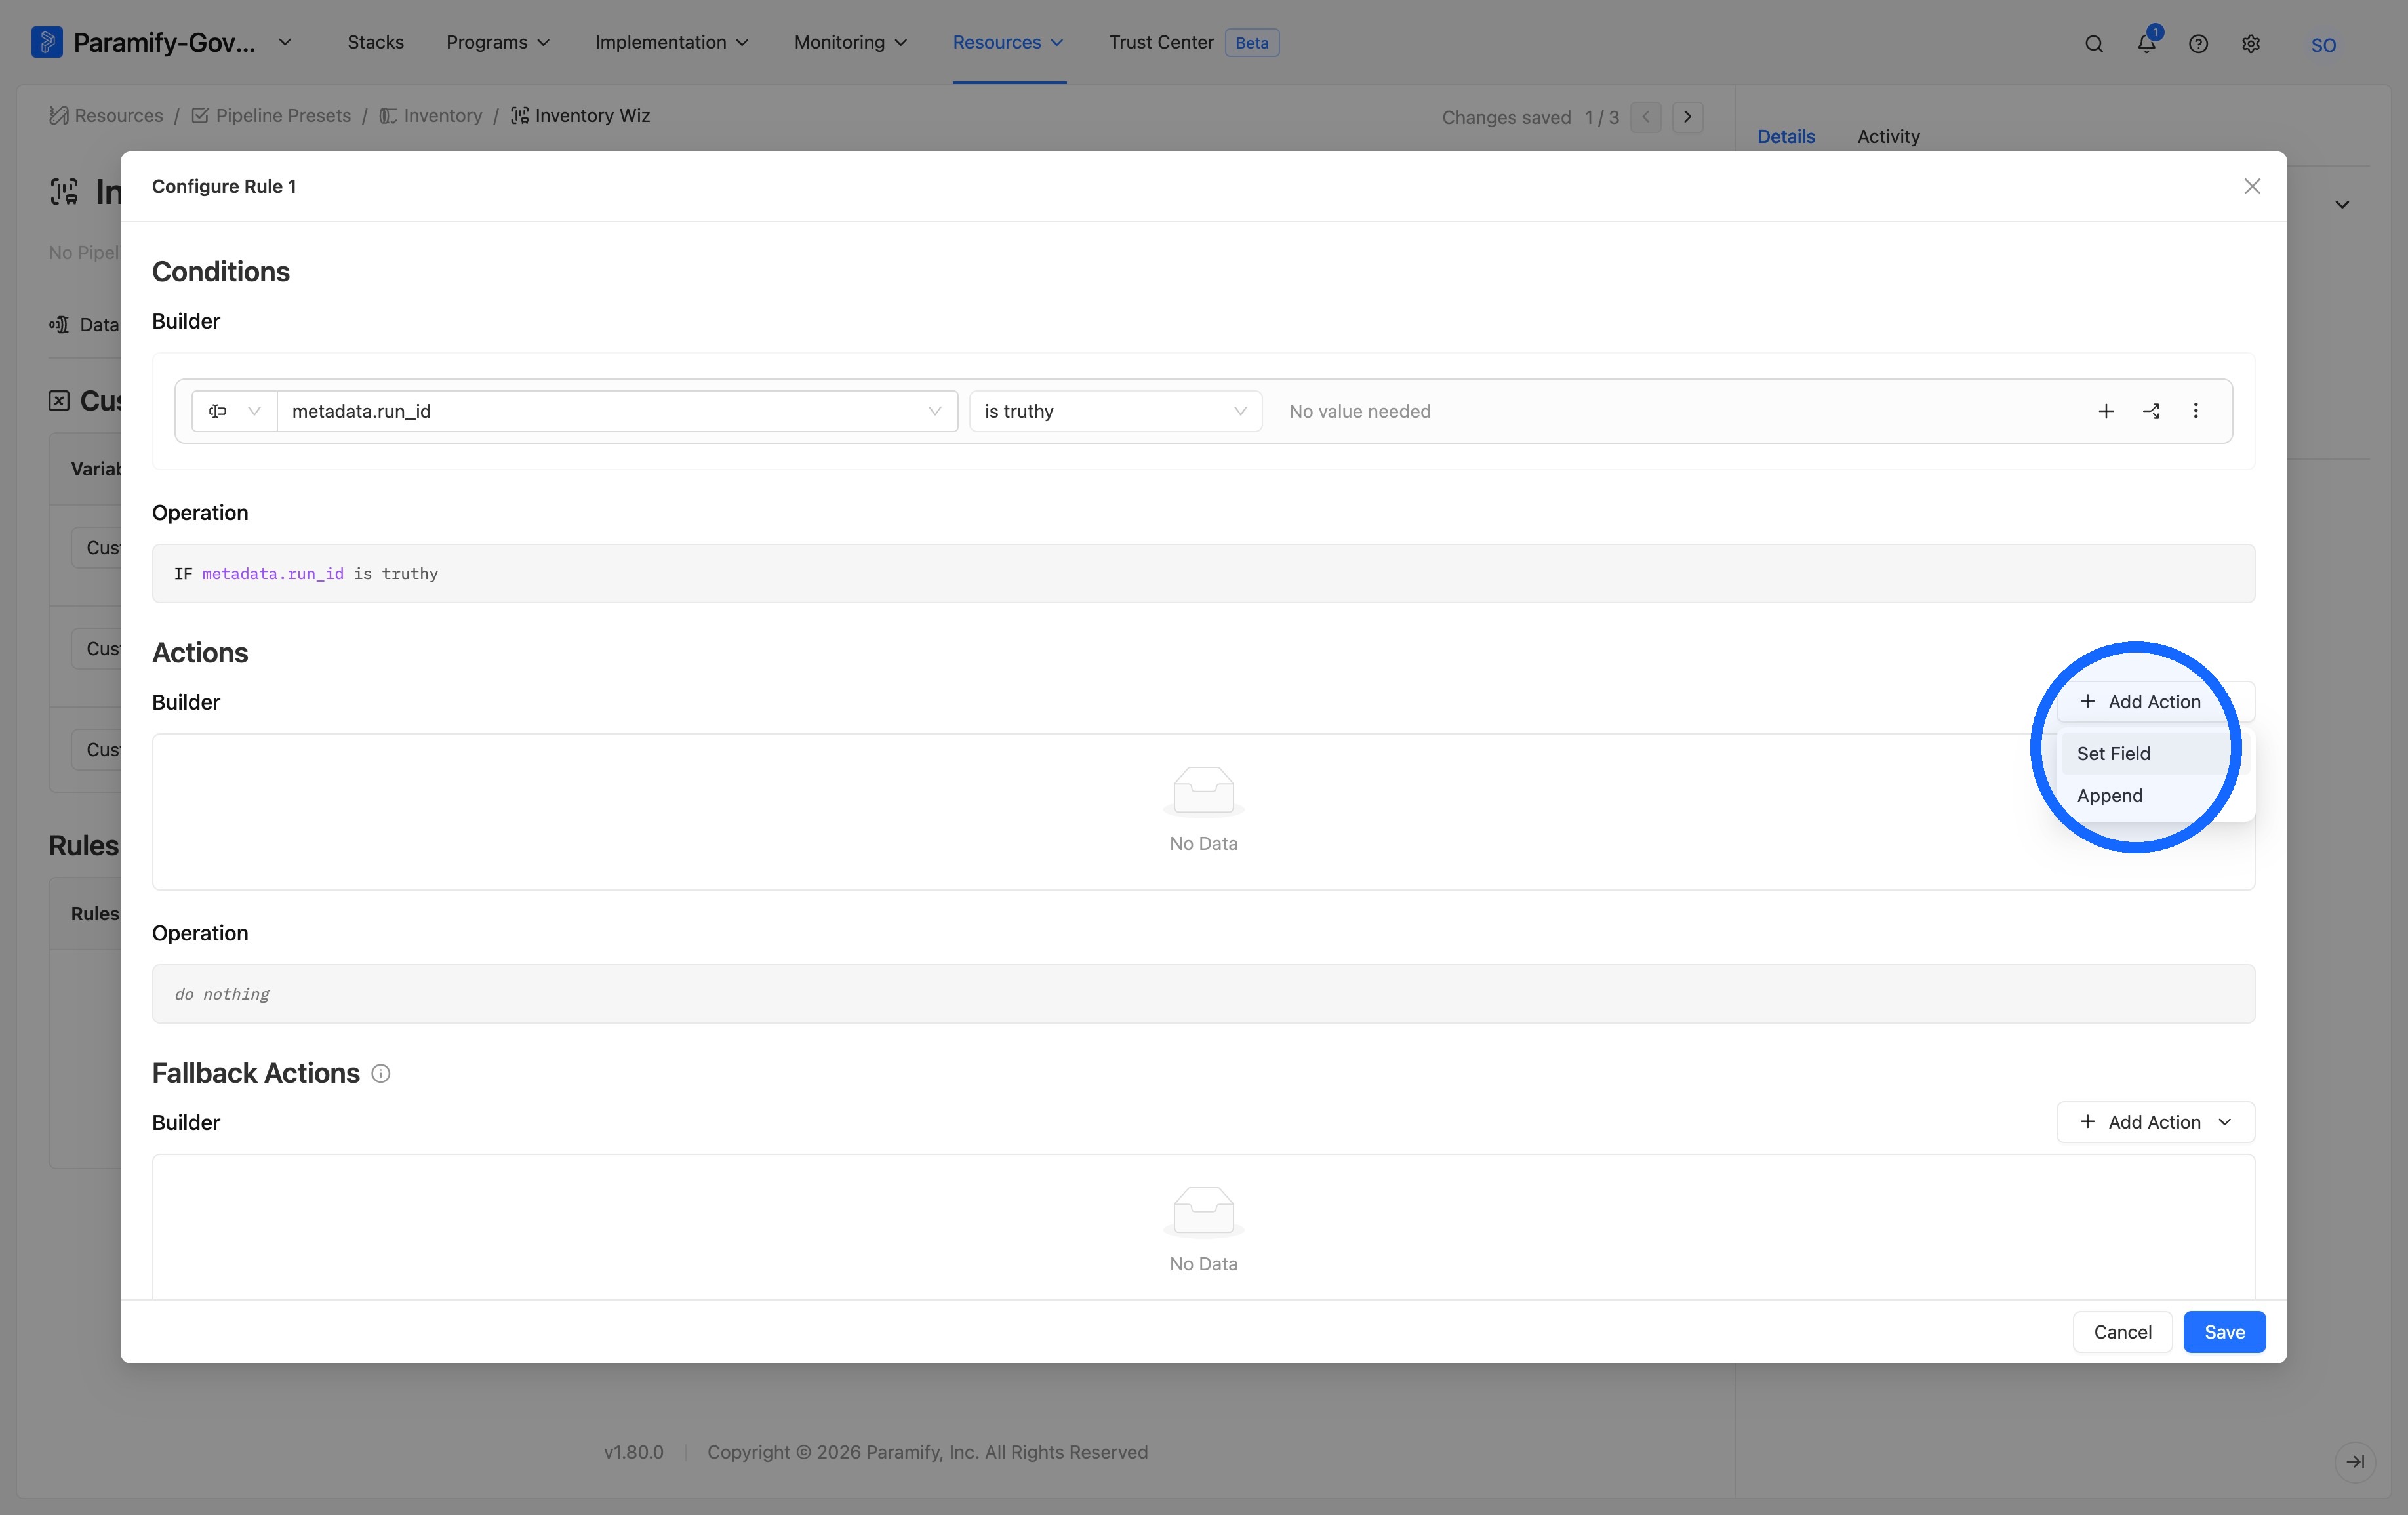
21. Add a Set Field action
Click + Add Action, then select Set Field.
TIP
The Append option adds the value to the field’s existing contents instead of replacing them.
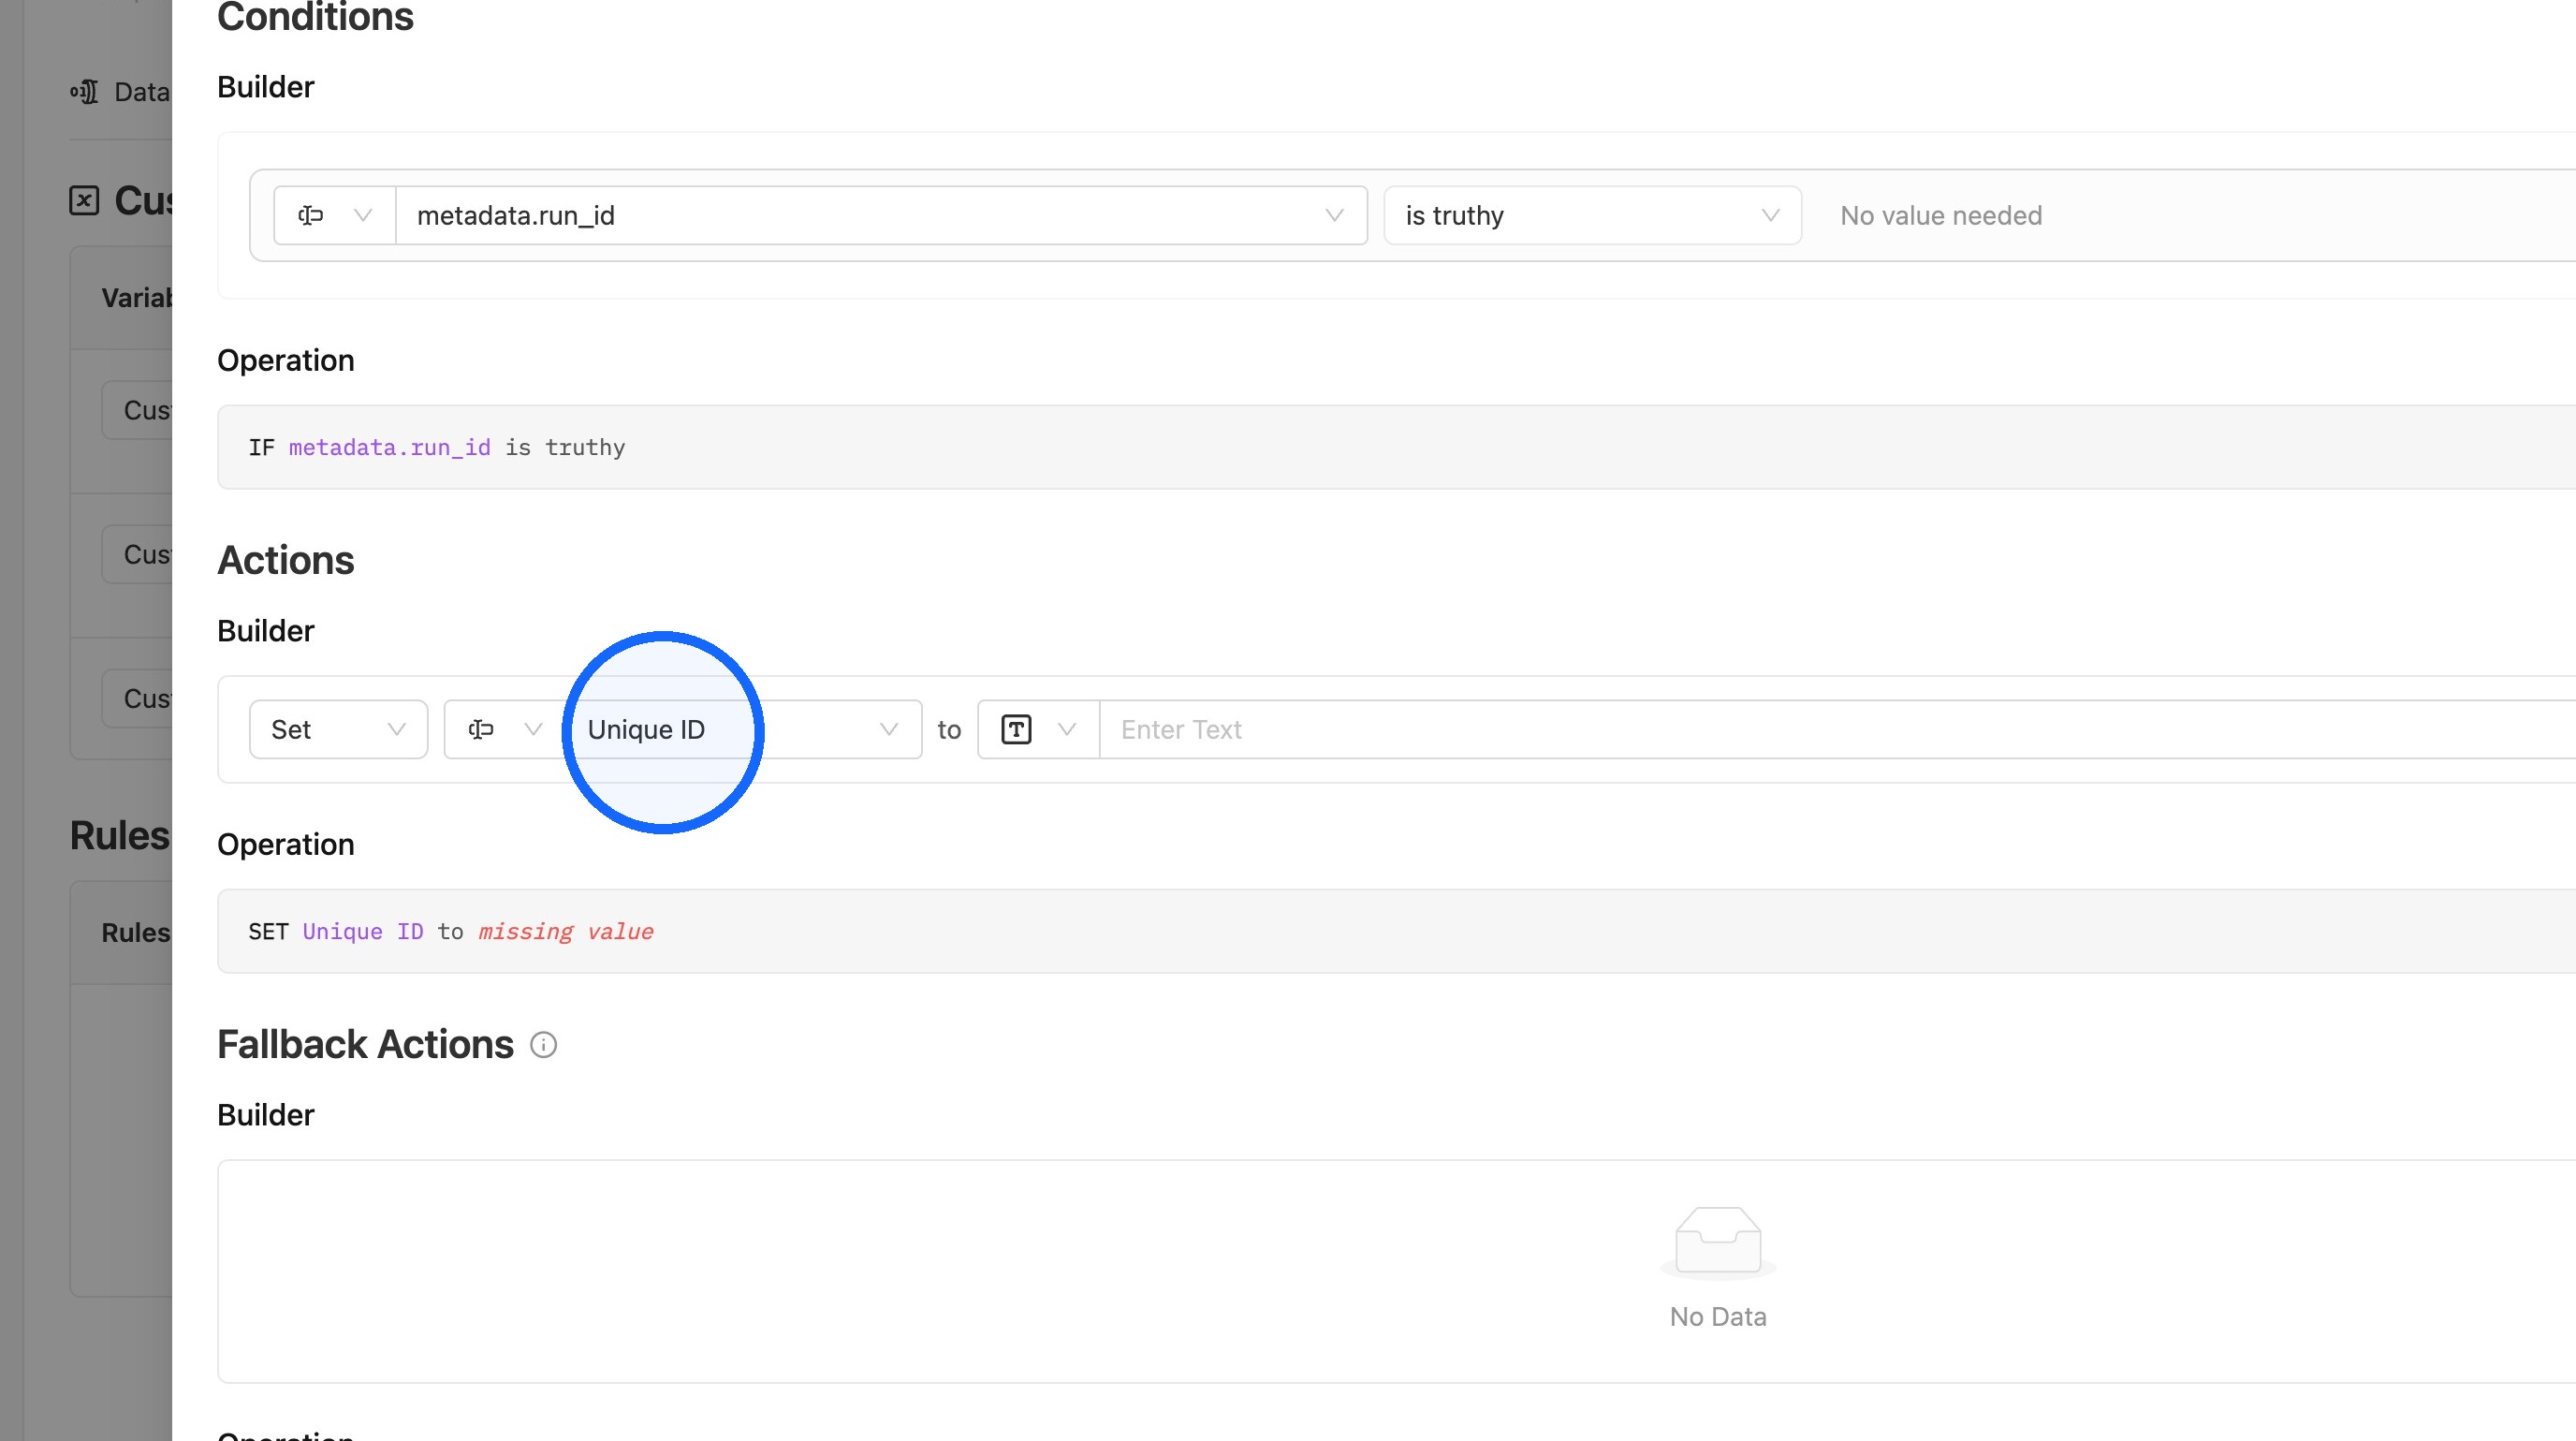
22. Select the field to set
Click Select Field and choose the variable set to Advanced Configuration (Unique ID in this example).
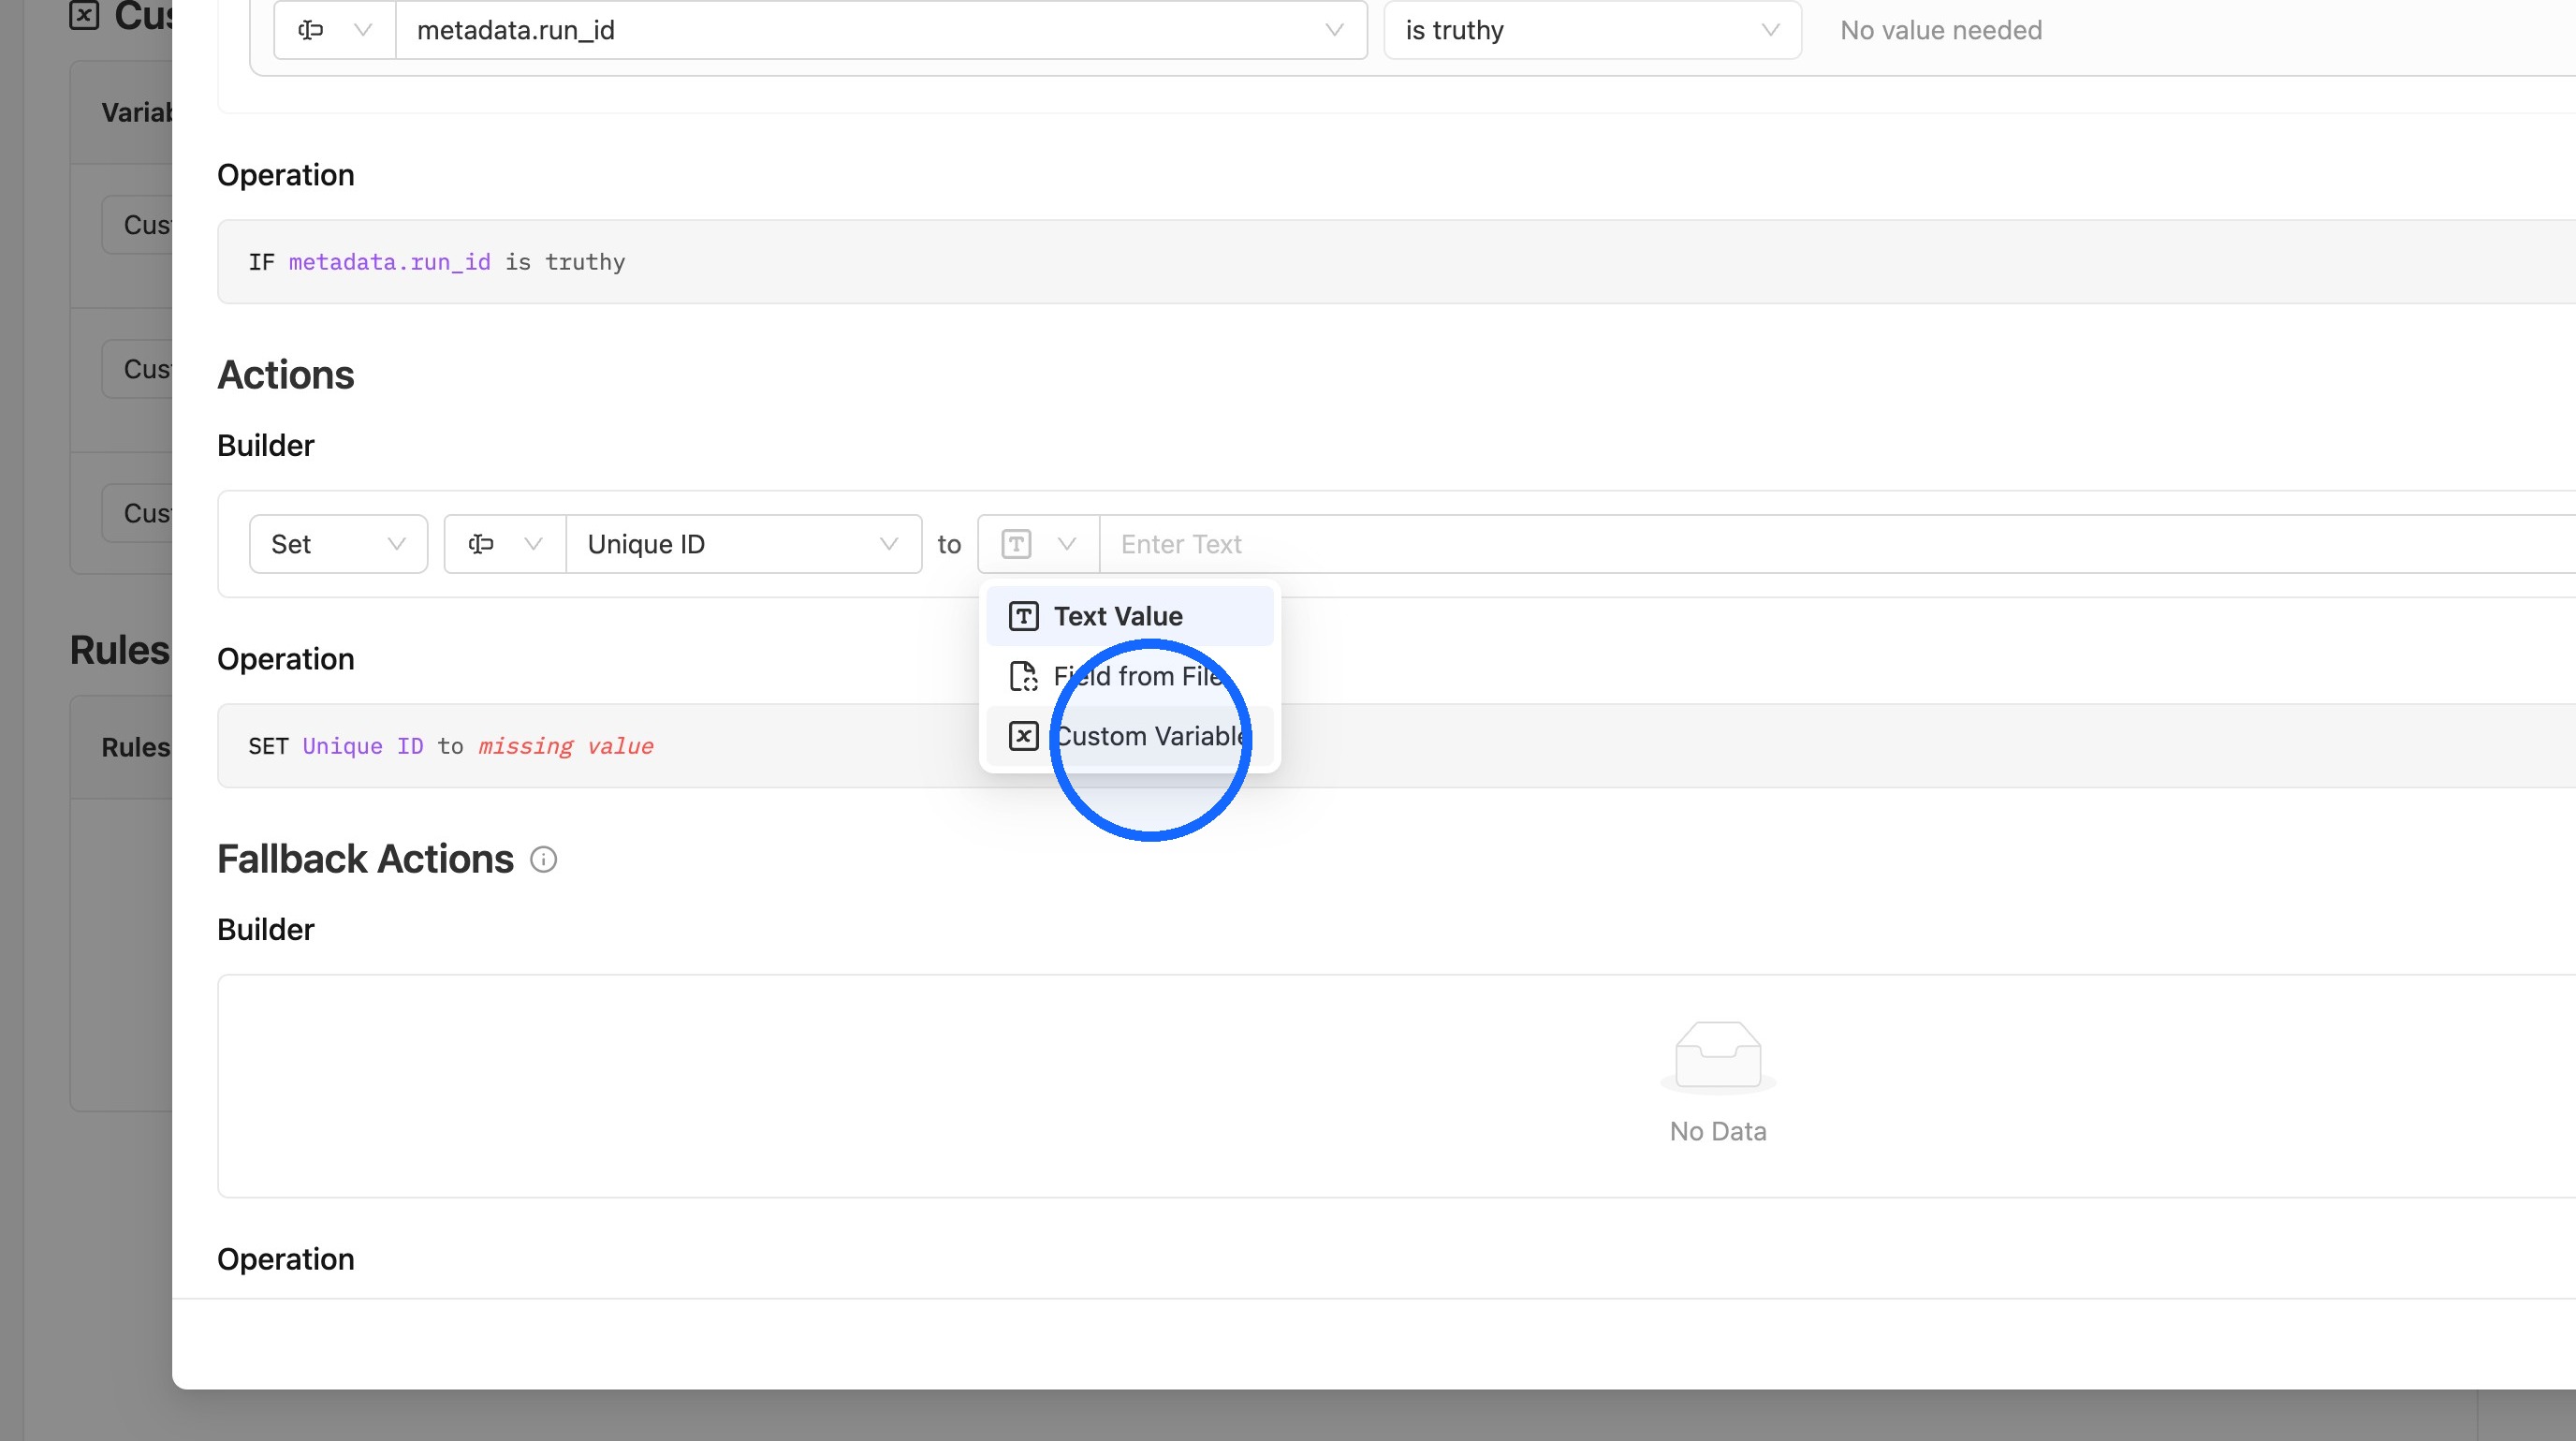
23. Choose Custom Variable as the value type
Select Custom Variable as the value type.
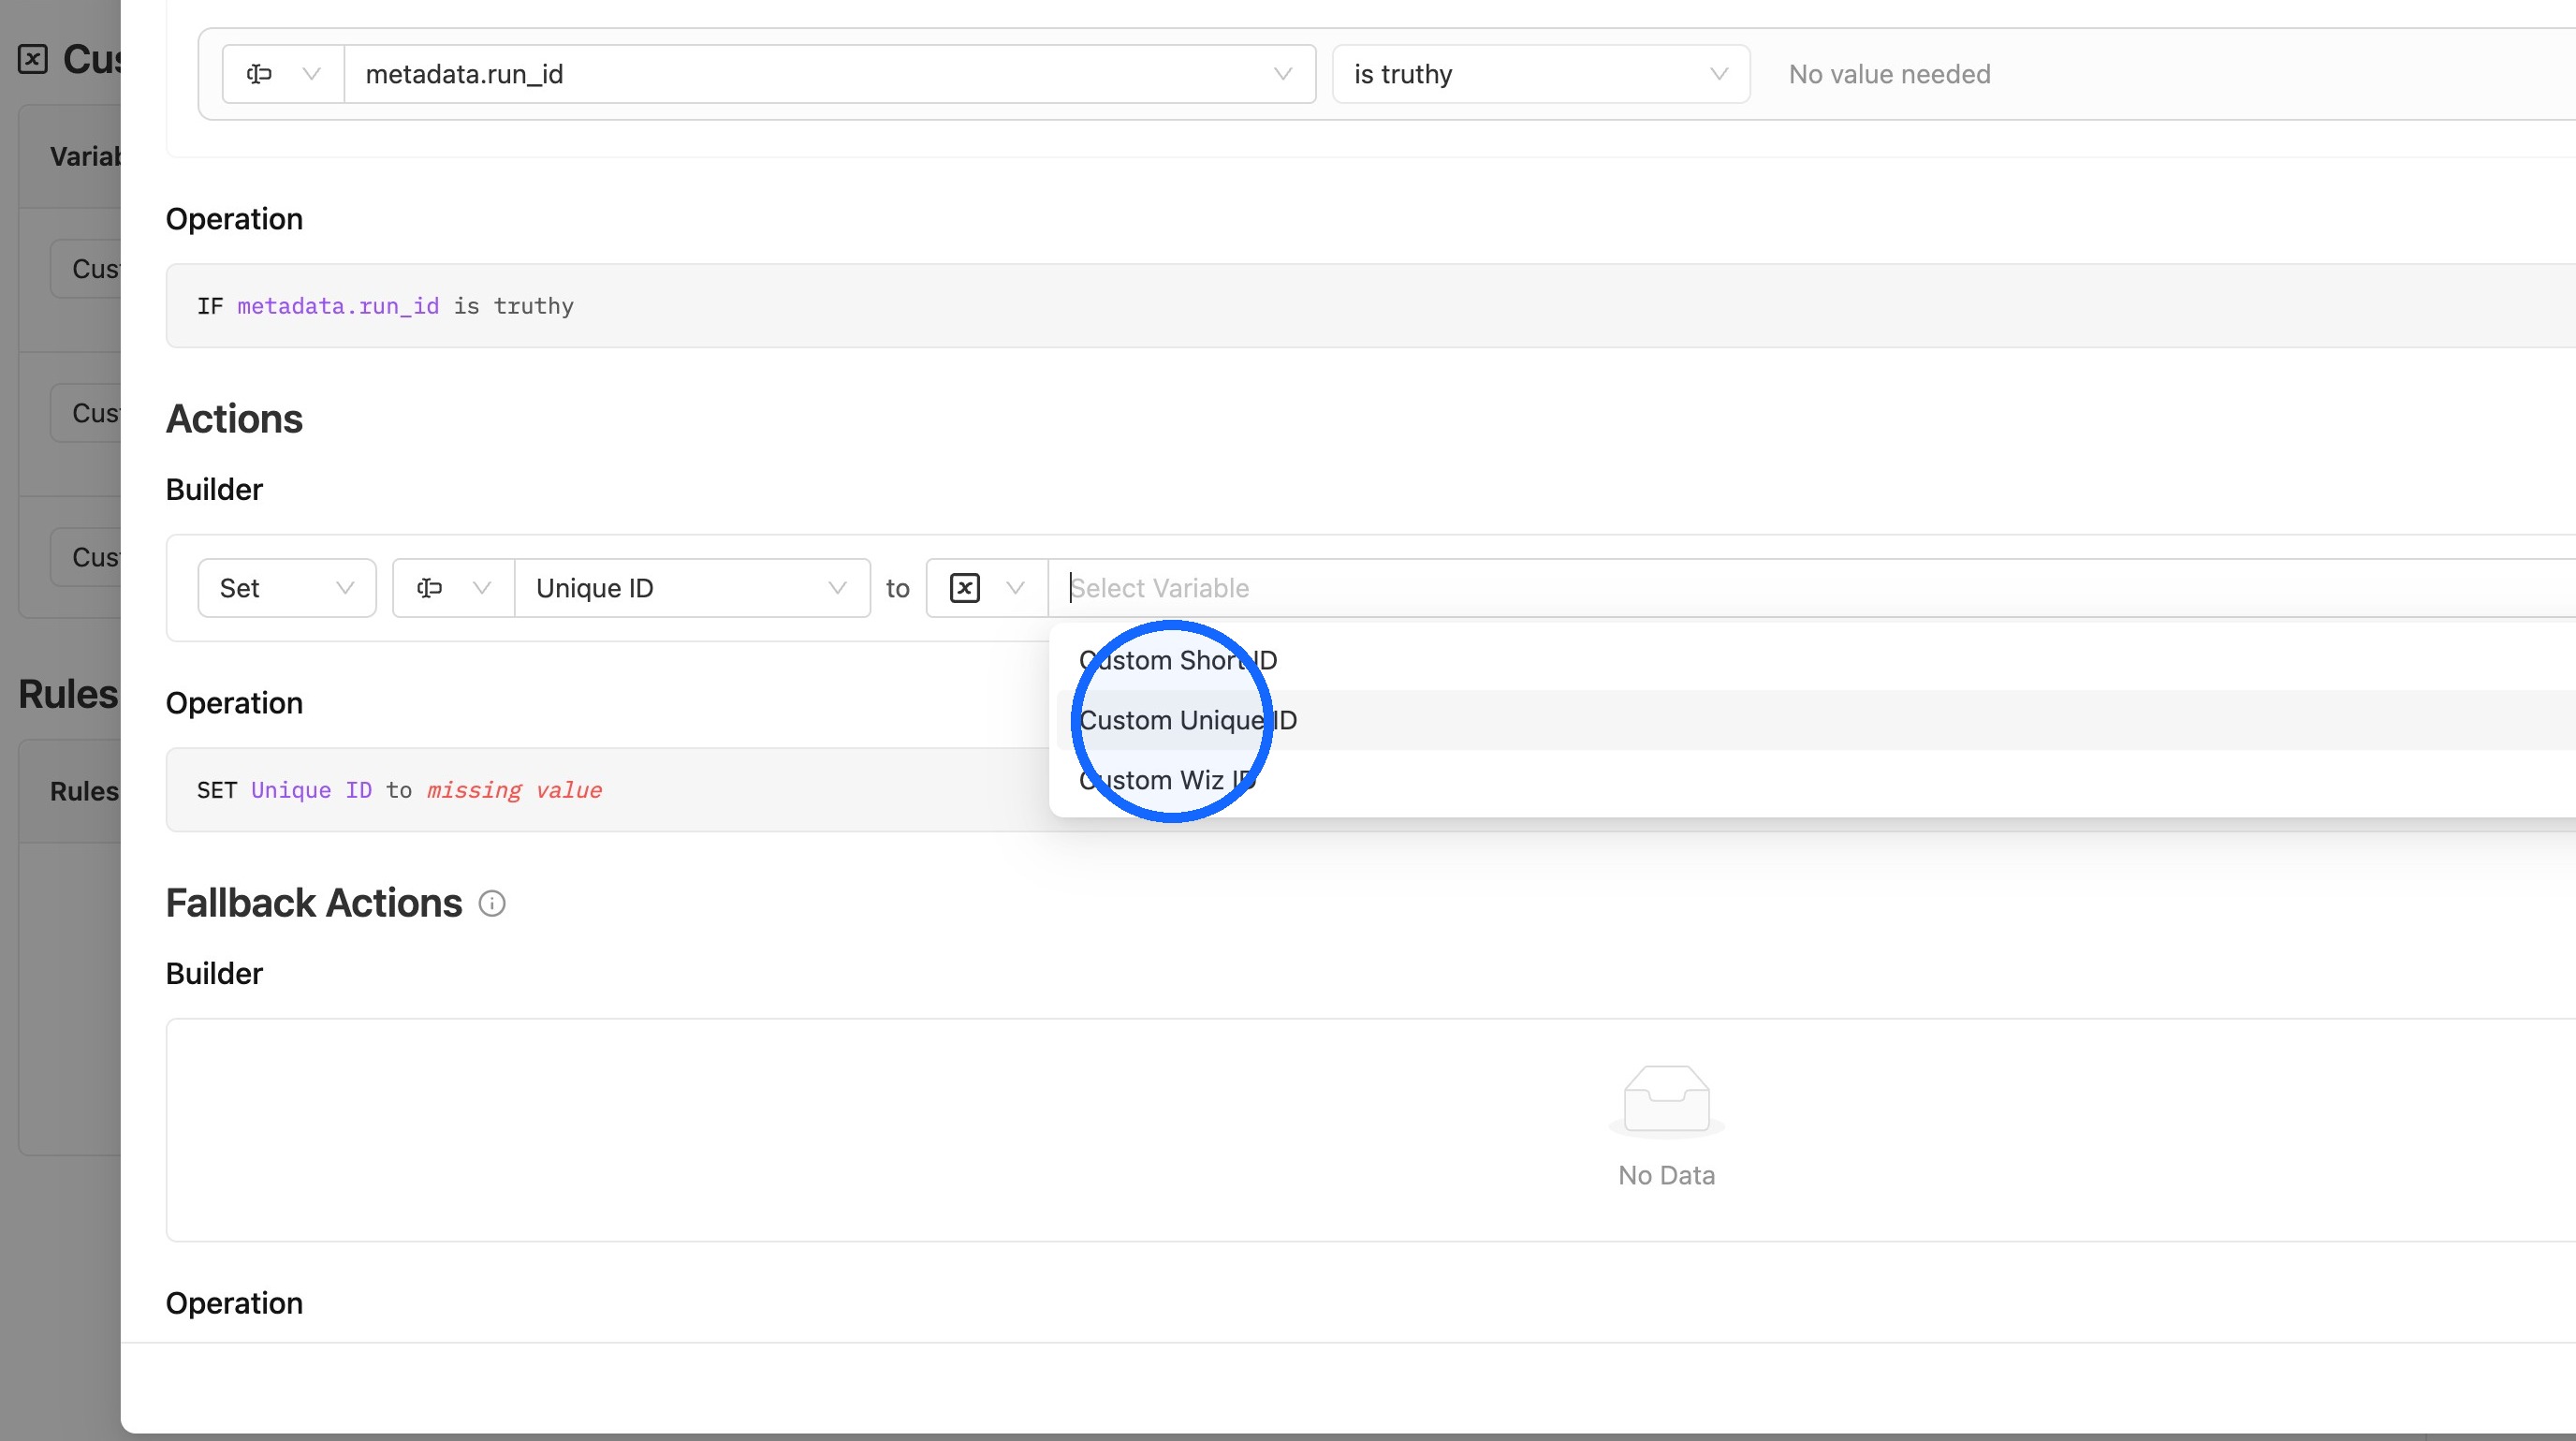
24. Select the custom variable
Select Custom Unique ID to set the Unique ID variable to the Concatenation custom variable created earlier.
25. Set the fallback action
Under Fallback Action, repeat steps 21–24 to set a value for any object that doesn’t meet the condition; this example uses the Regex Short ID custom variable.
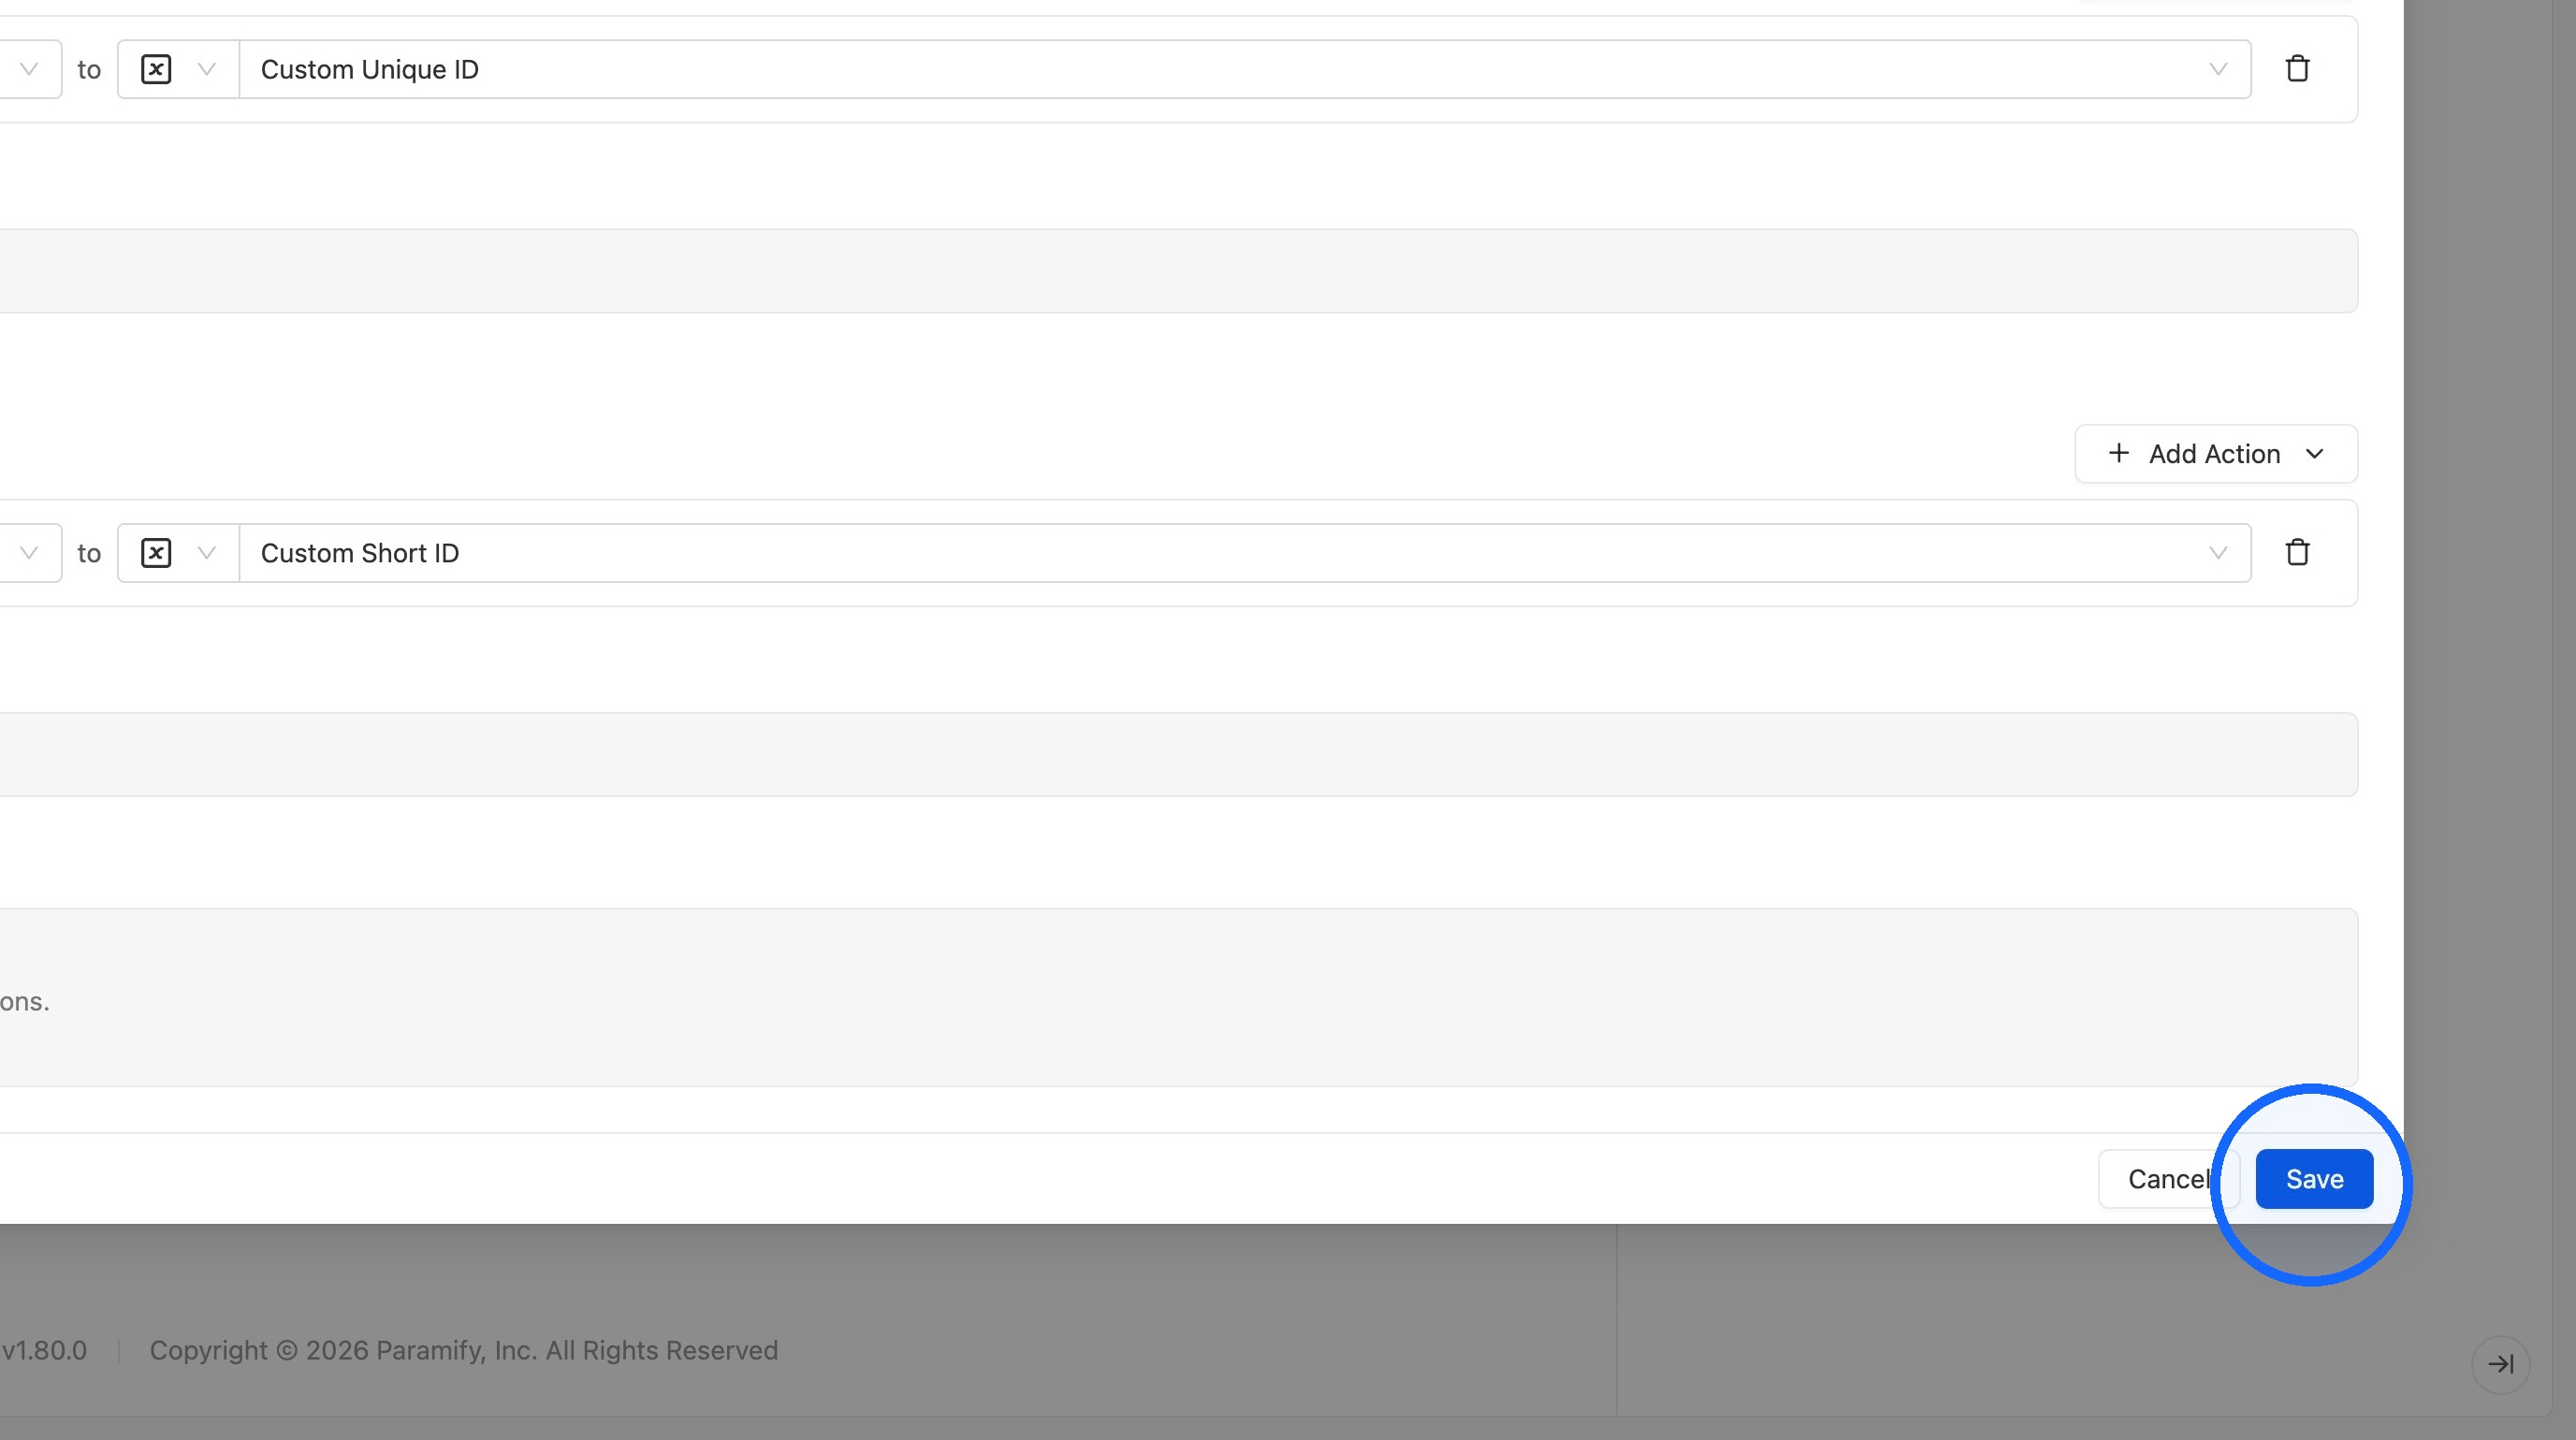
26. Save the rule
Click Save to save the rule.
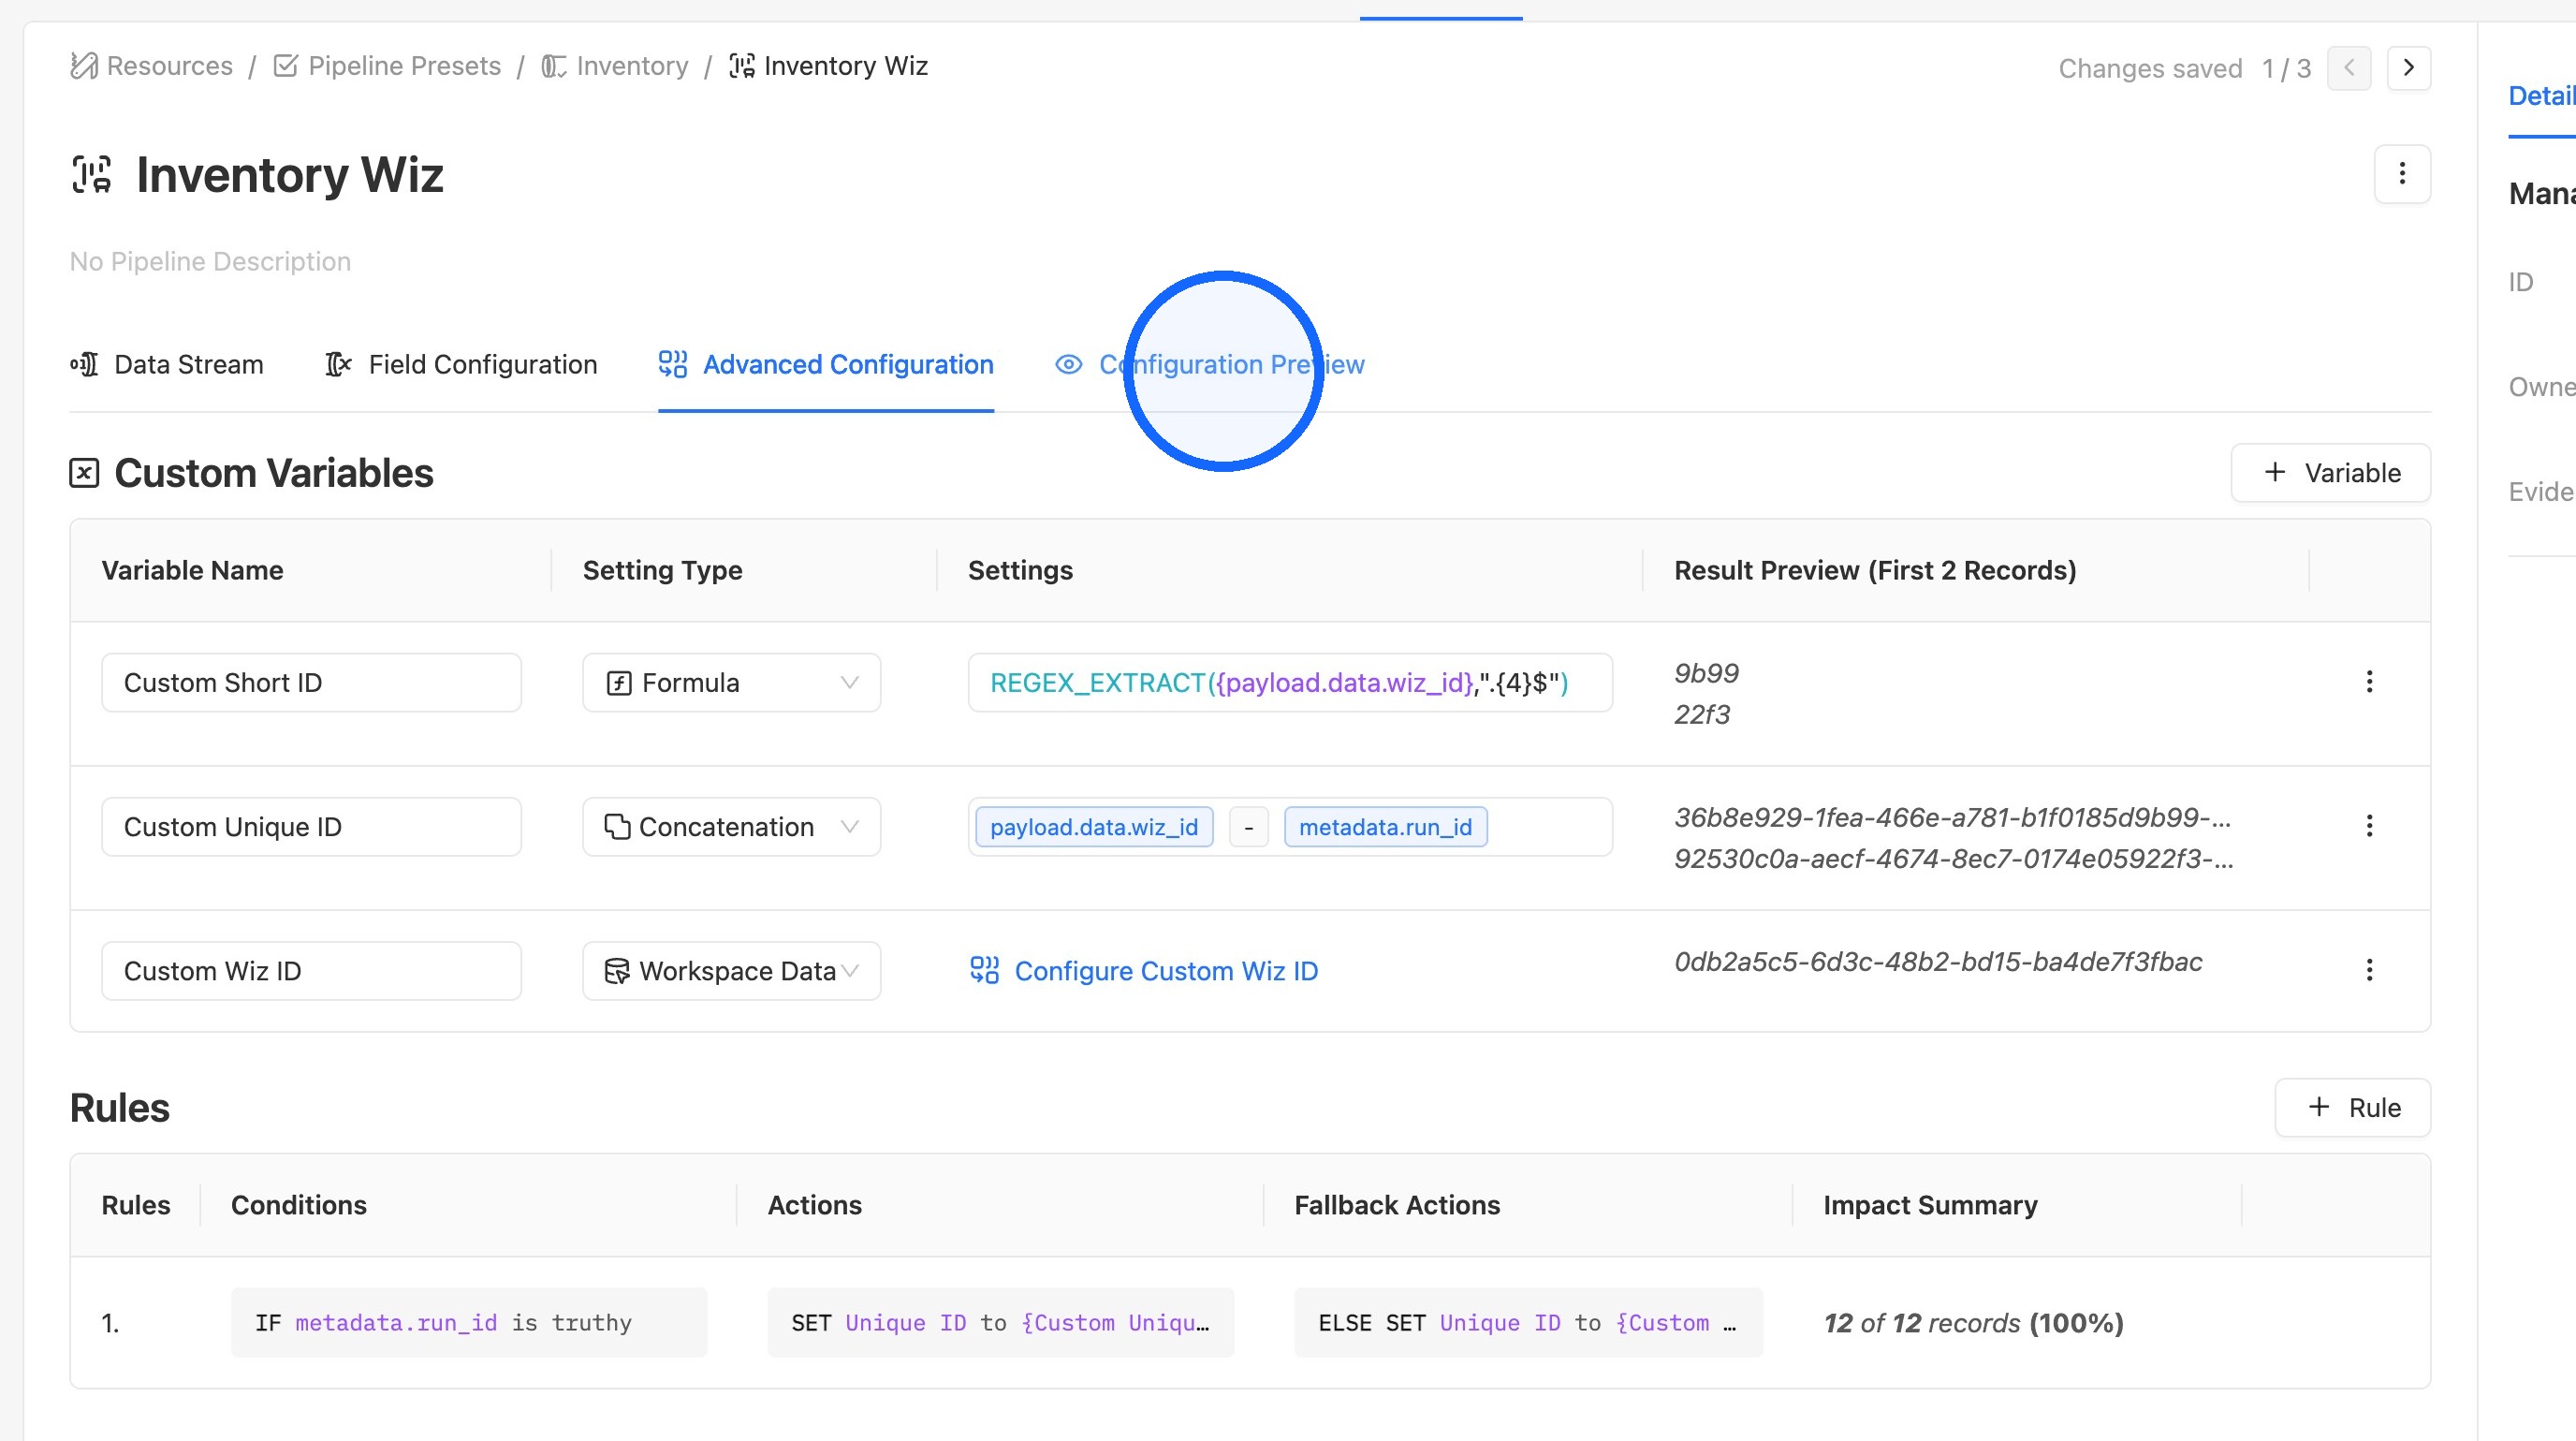
Preview Results
27. Open the Configuration Preview tab
Click the Configuration Preview tab.
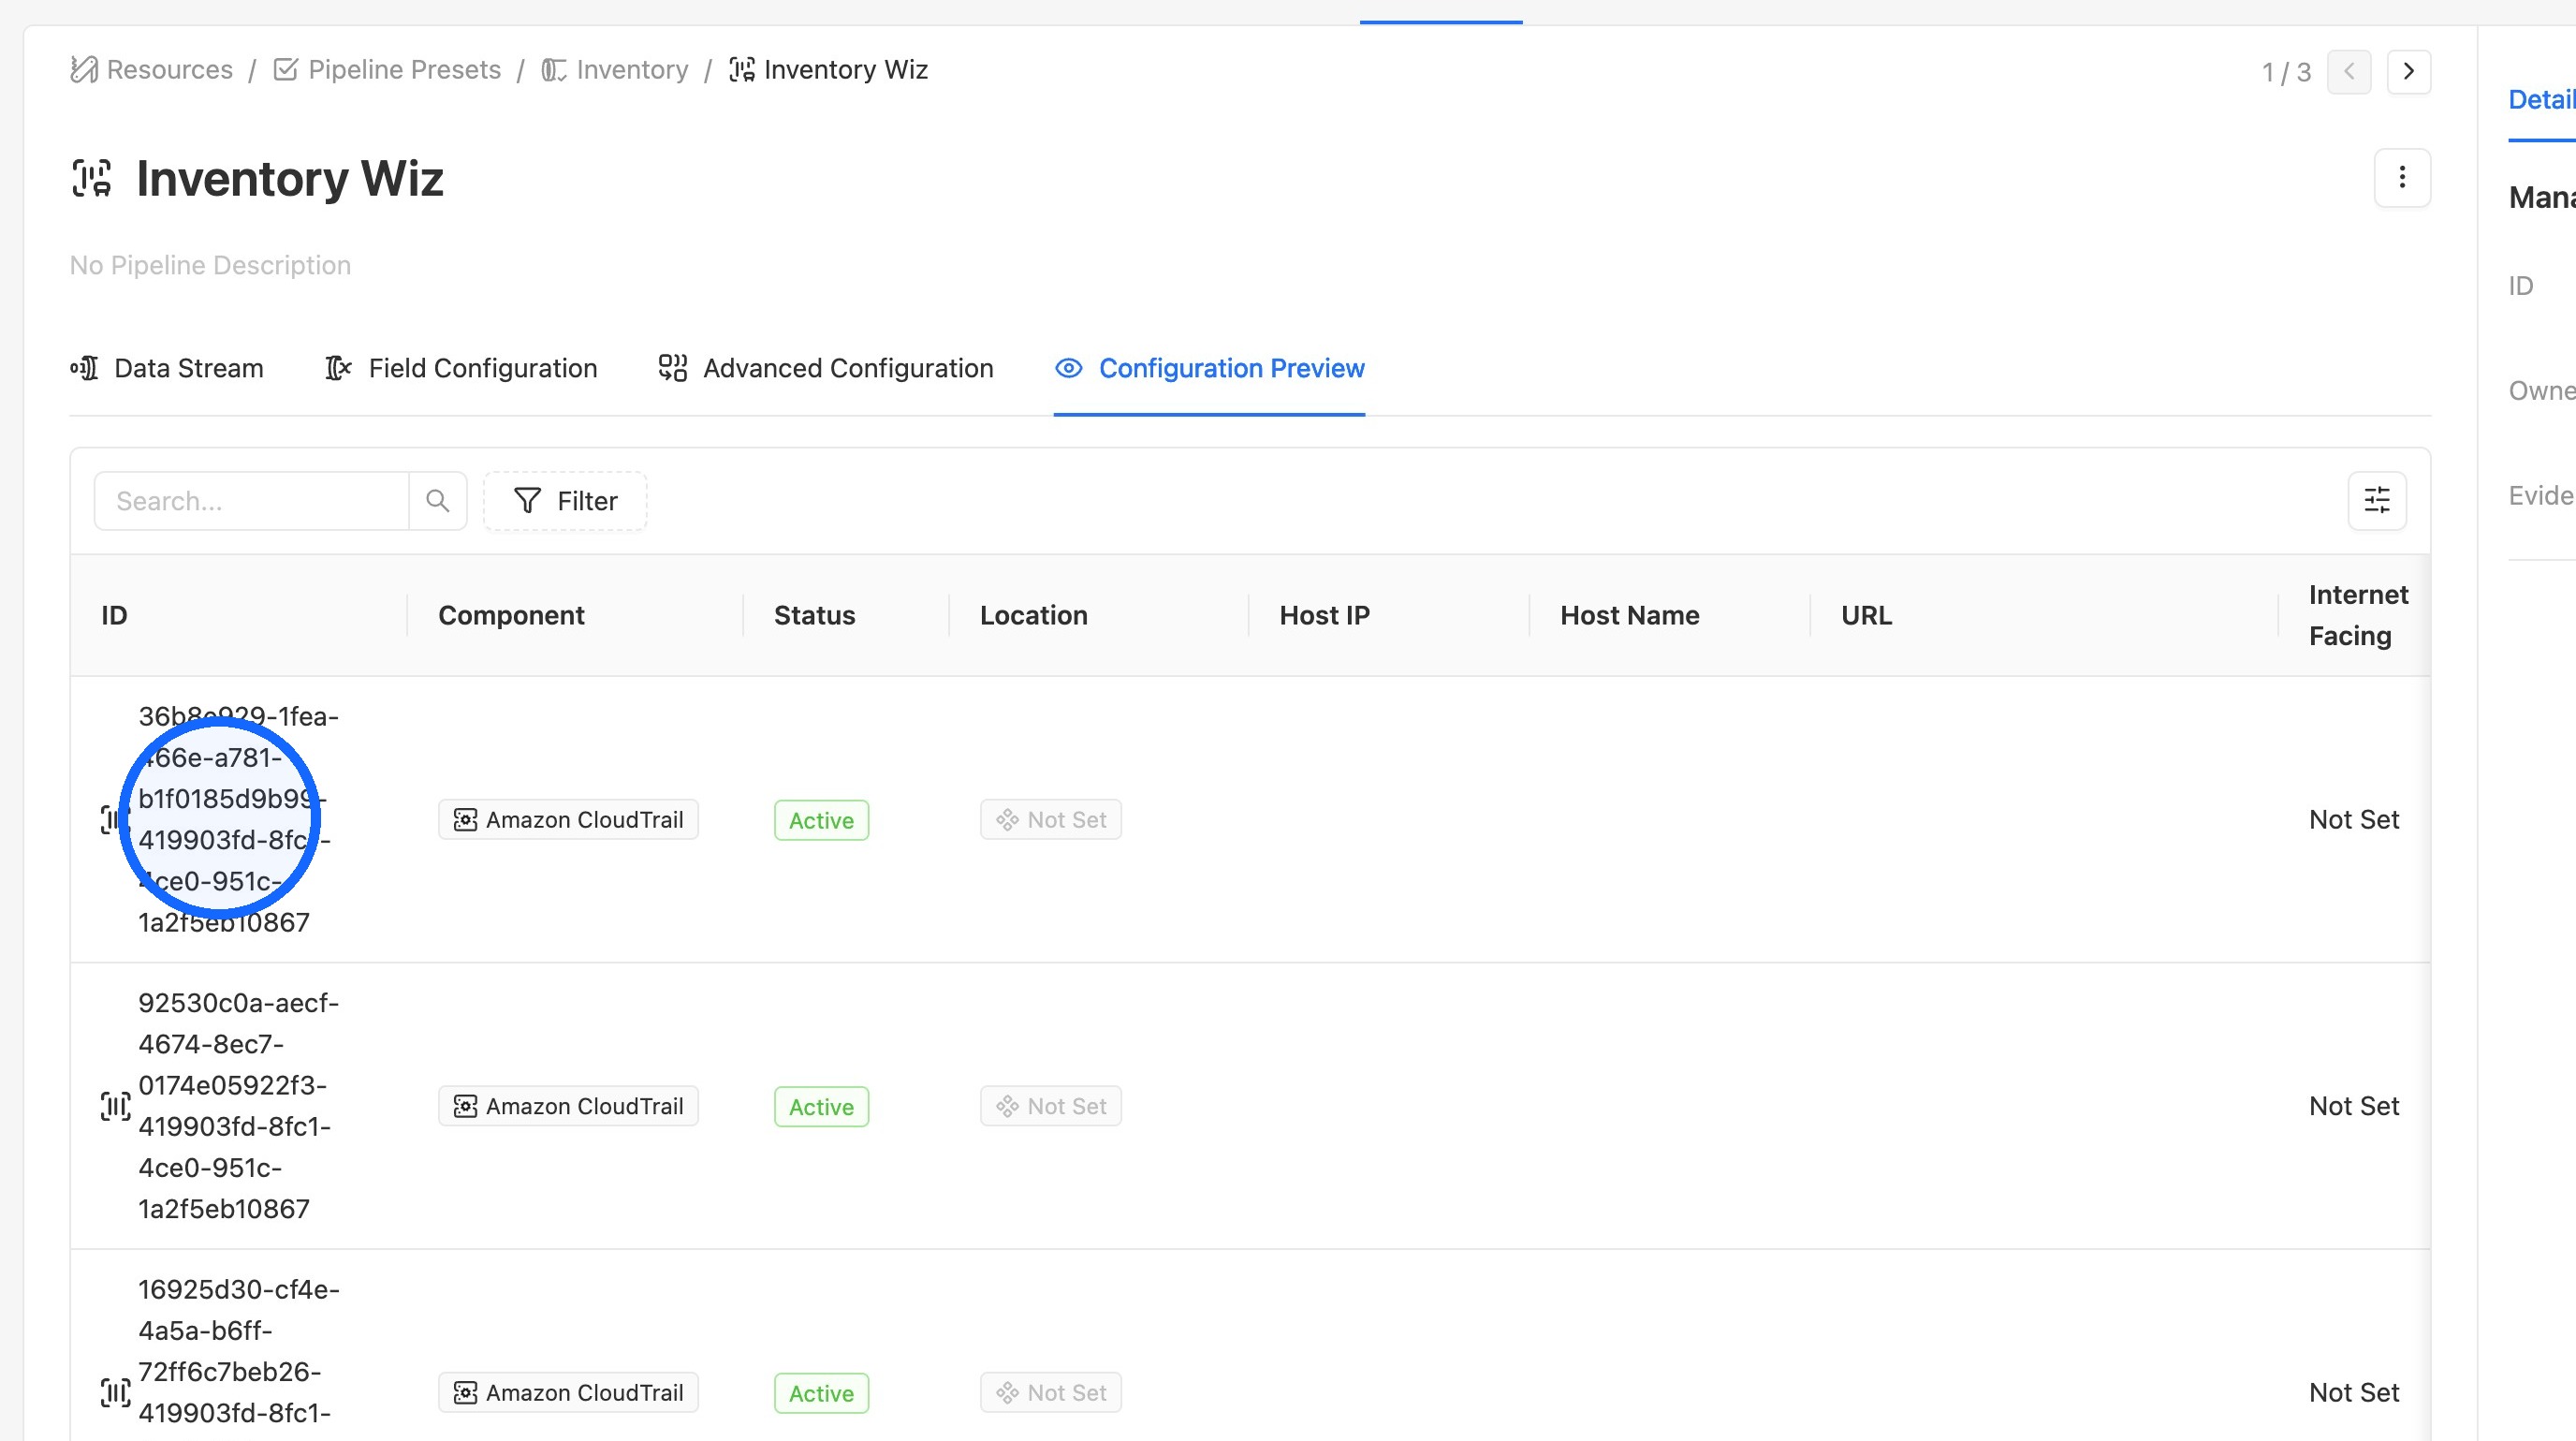
28. Review the results
Confirm that the Unique ID variable now uses the Concatenation custom variable for objects that meet the condition.
Comments
0 comments
Please sign in to leave a comment.