
Account Level Management
Account level Admins in Paramify have administrator access to the account level and below. They can manage workspace settings, user access, and use data import features. They can create, view, edit, and delete Risk Solutions, Elements, and Projects. What makes them unique compared to other roles is that they have complete control and access to the following sections in the Paramify App at the Account level.
- Manage workspace settings
- Control user access and permissions
- Create, edit, and delete users and teams
- Create, edit, and delete Controls, Evidence, Control Parameters, and Risk Profiles
- Assign roles and manage team memberships
- Use data import features
Admins have full, unrestricted access to these security-related settings, and all their activities are tracked for transparency.
These Admin settings are important because they enforce the Principle of Least Privilege and ensure centralized accountability over the system's security posture. By limiting these high-risk capabilities to a controlled group of top-level administrators, the platform prevents "privilege creep" and unauthorized access shifts, while maintaining a strict chain of custody for sensitive data entering the environment.
The account level Admin configuration page looks like the following:
Users
Account Admins can create, edit, and delete users to manage access to their account. Each user has nine different attributes that can be filtered to be viewed. Below are the nine attributes.
| Attribute | Description |
|---|---|
| User | User name |
| Job Title | The job title of the user |
| User Type | The user type that represents the user privilege levels |
| User email | |
| Account Admin | Whether the user is an Admin or not |
| Workspaces | The Workspaces that the user has access to |
| Early Access | The specific privileges the user has access to |
| Last Active | The user's last access time |
| Status | The status of the user |
Creating a New User
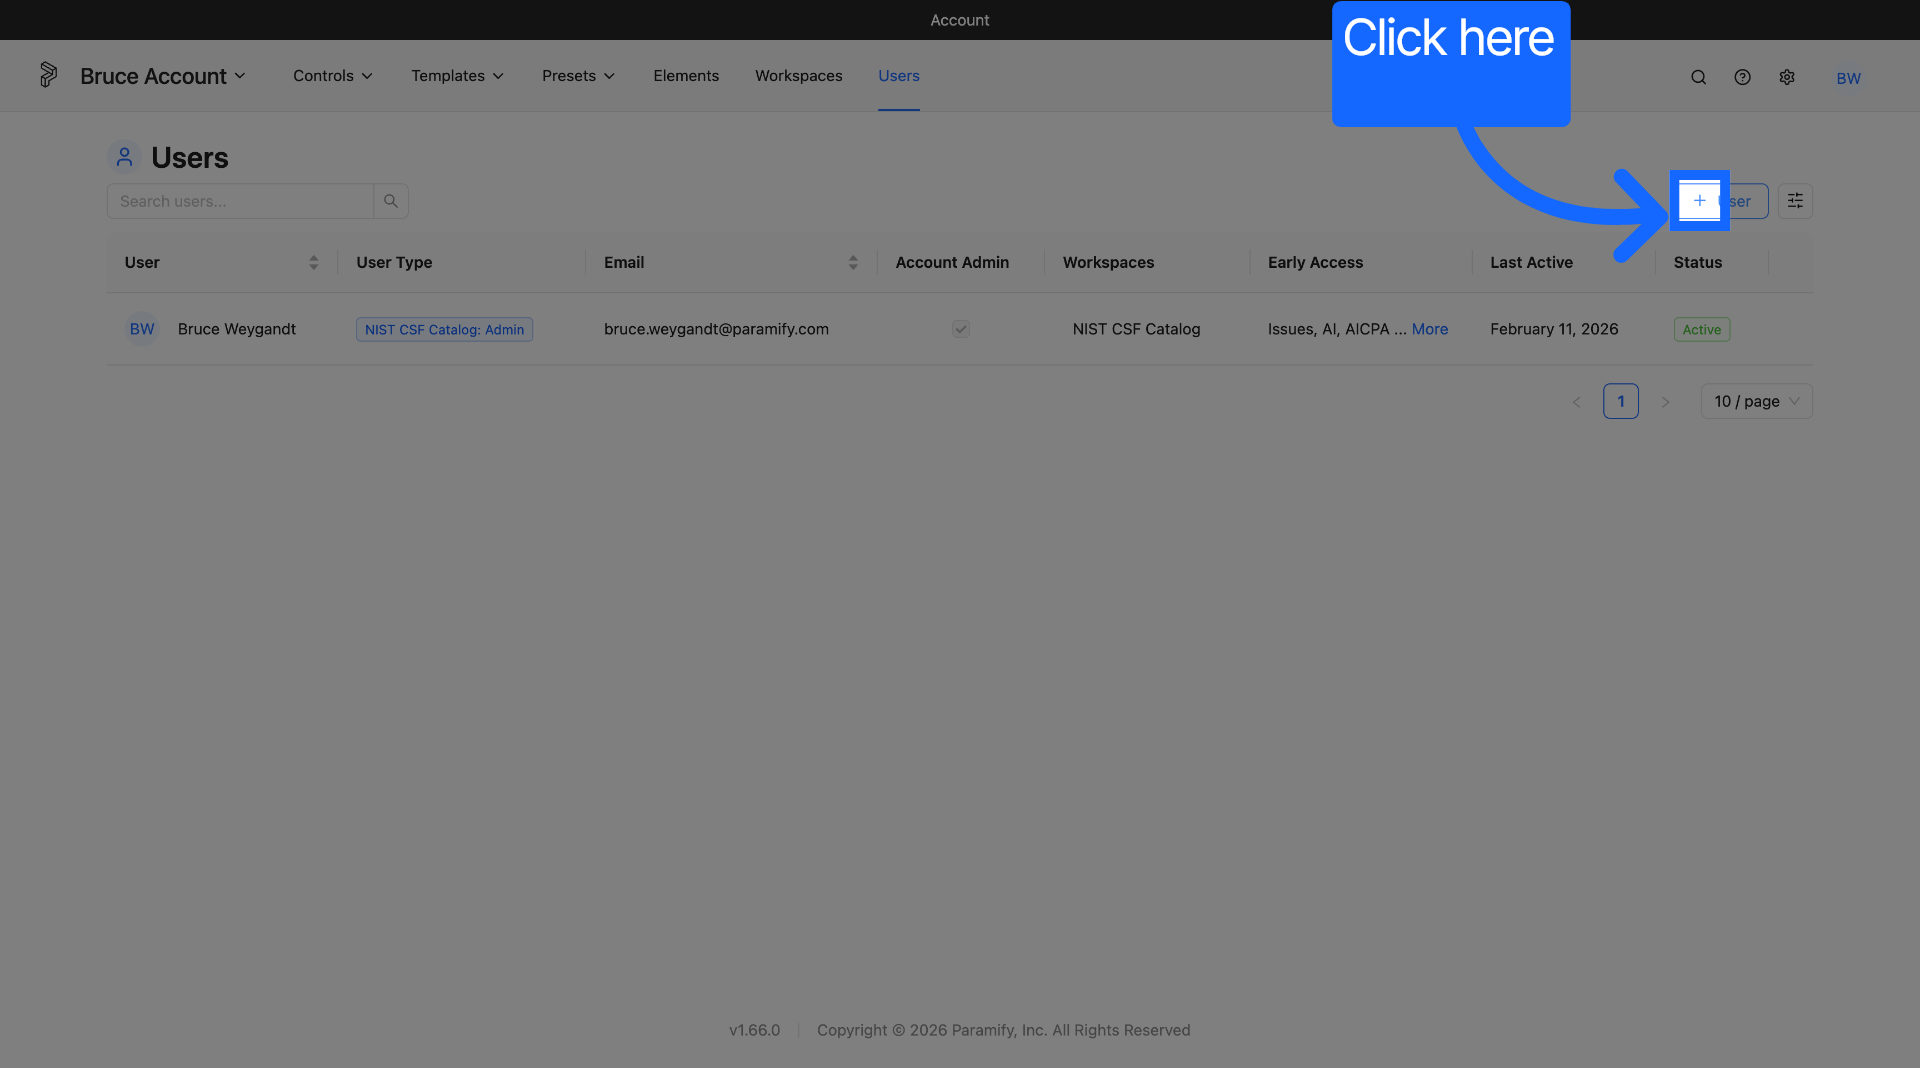
1. Start creating a user
Click "+ user" to start creating a new user.
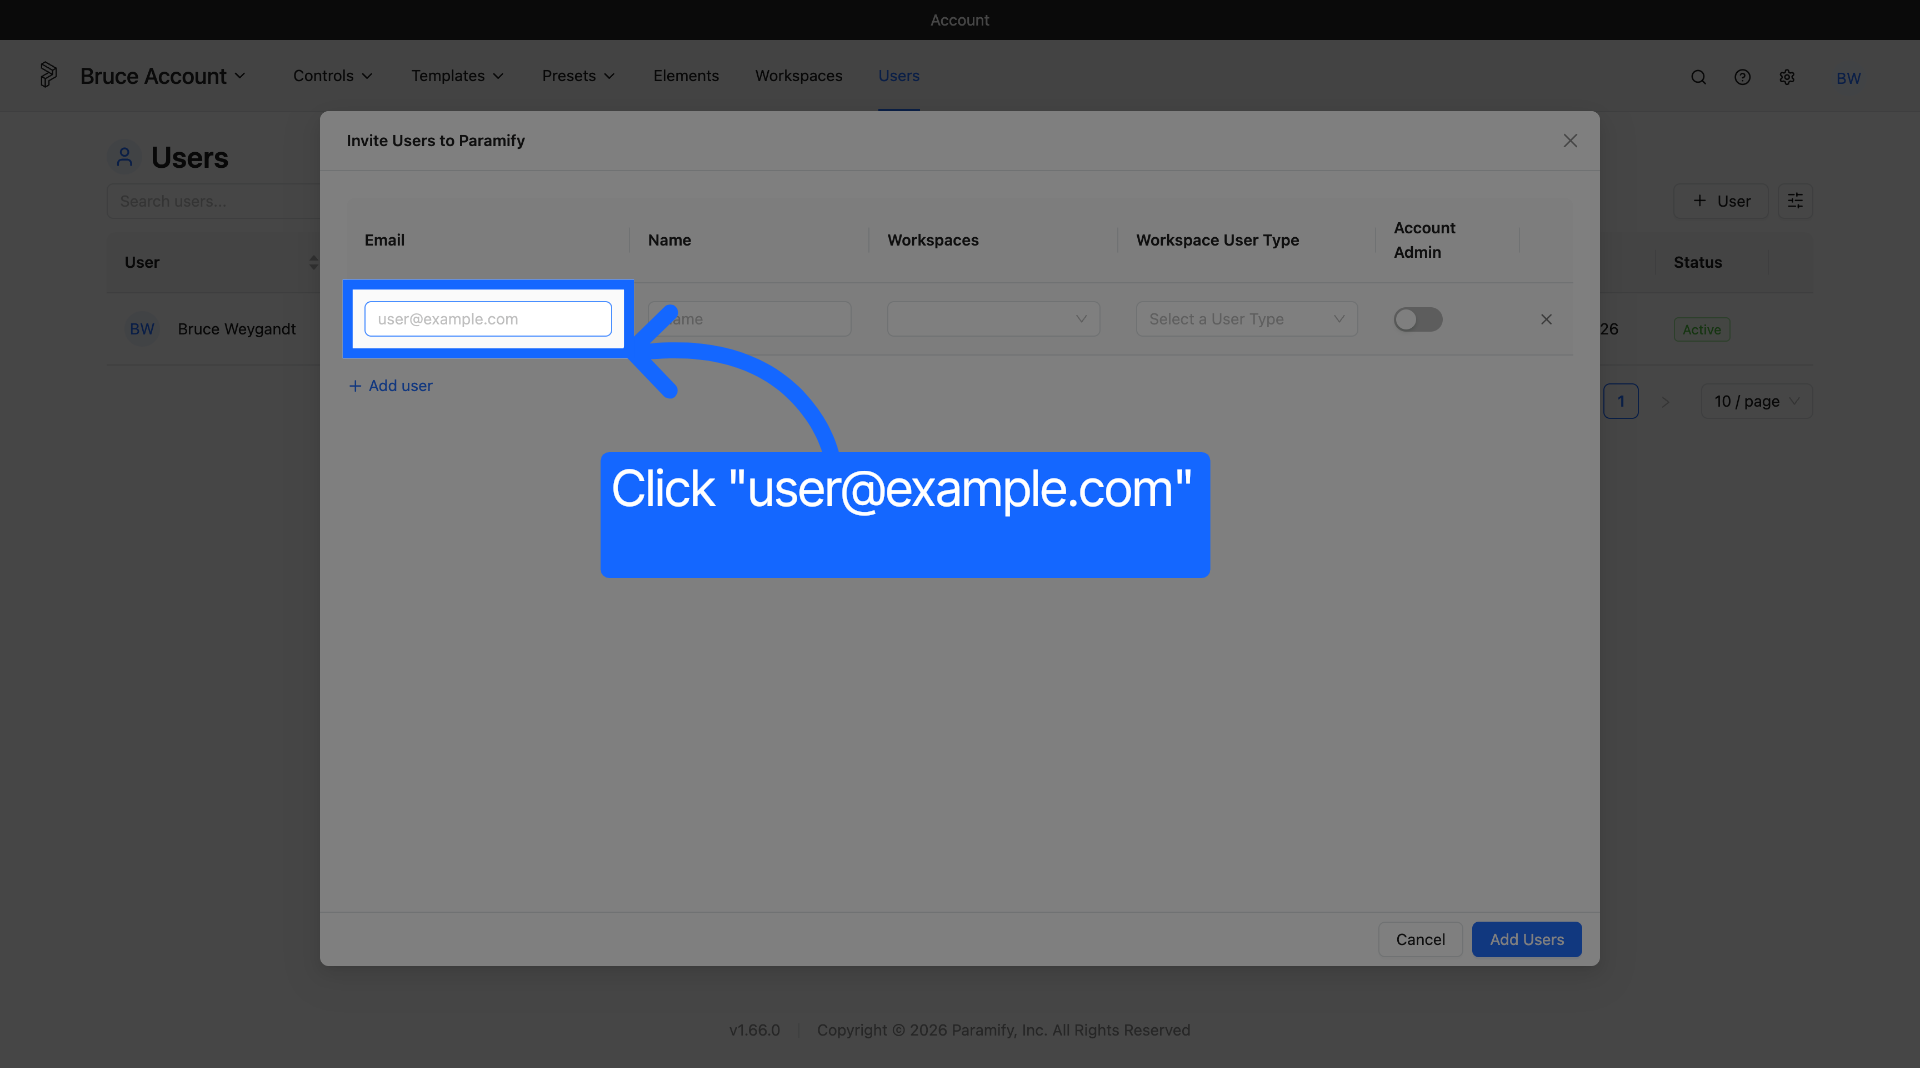
2. Enter User Email
Enter the user email address to be associated with the user.
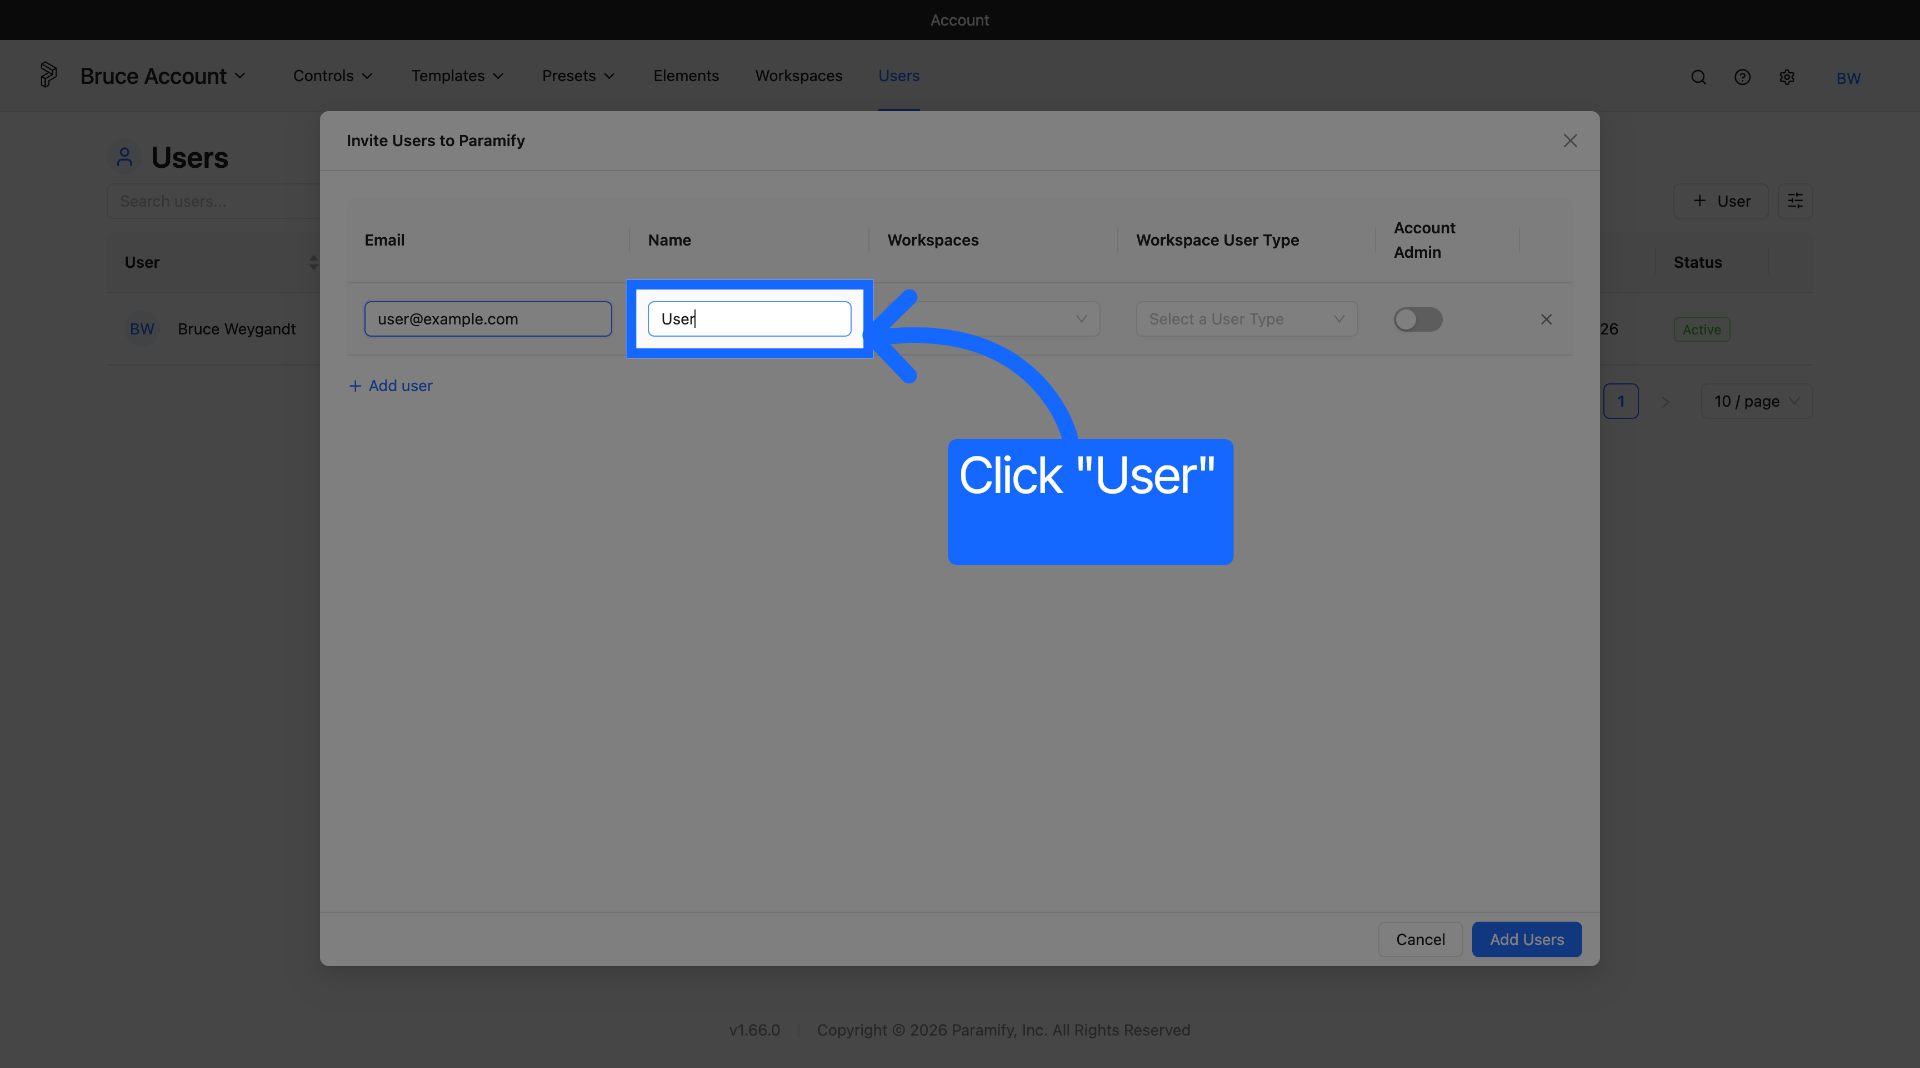
3. Enter User Name
Enter the user's name.
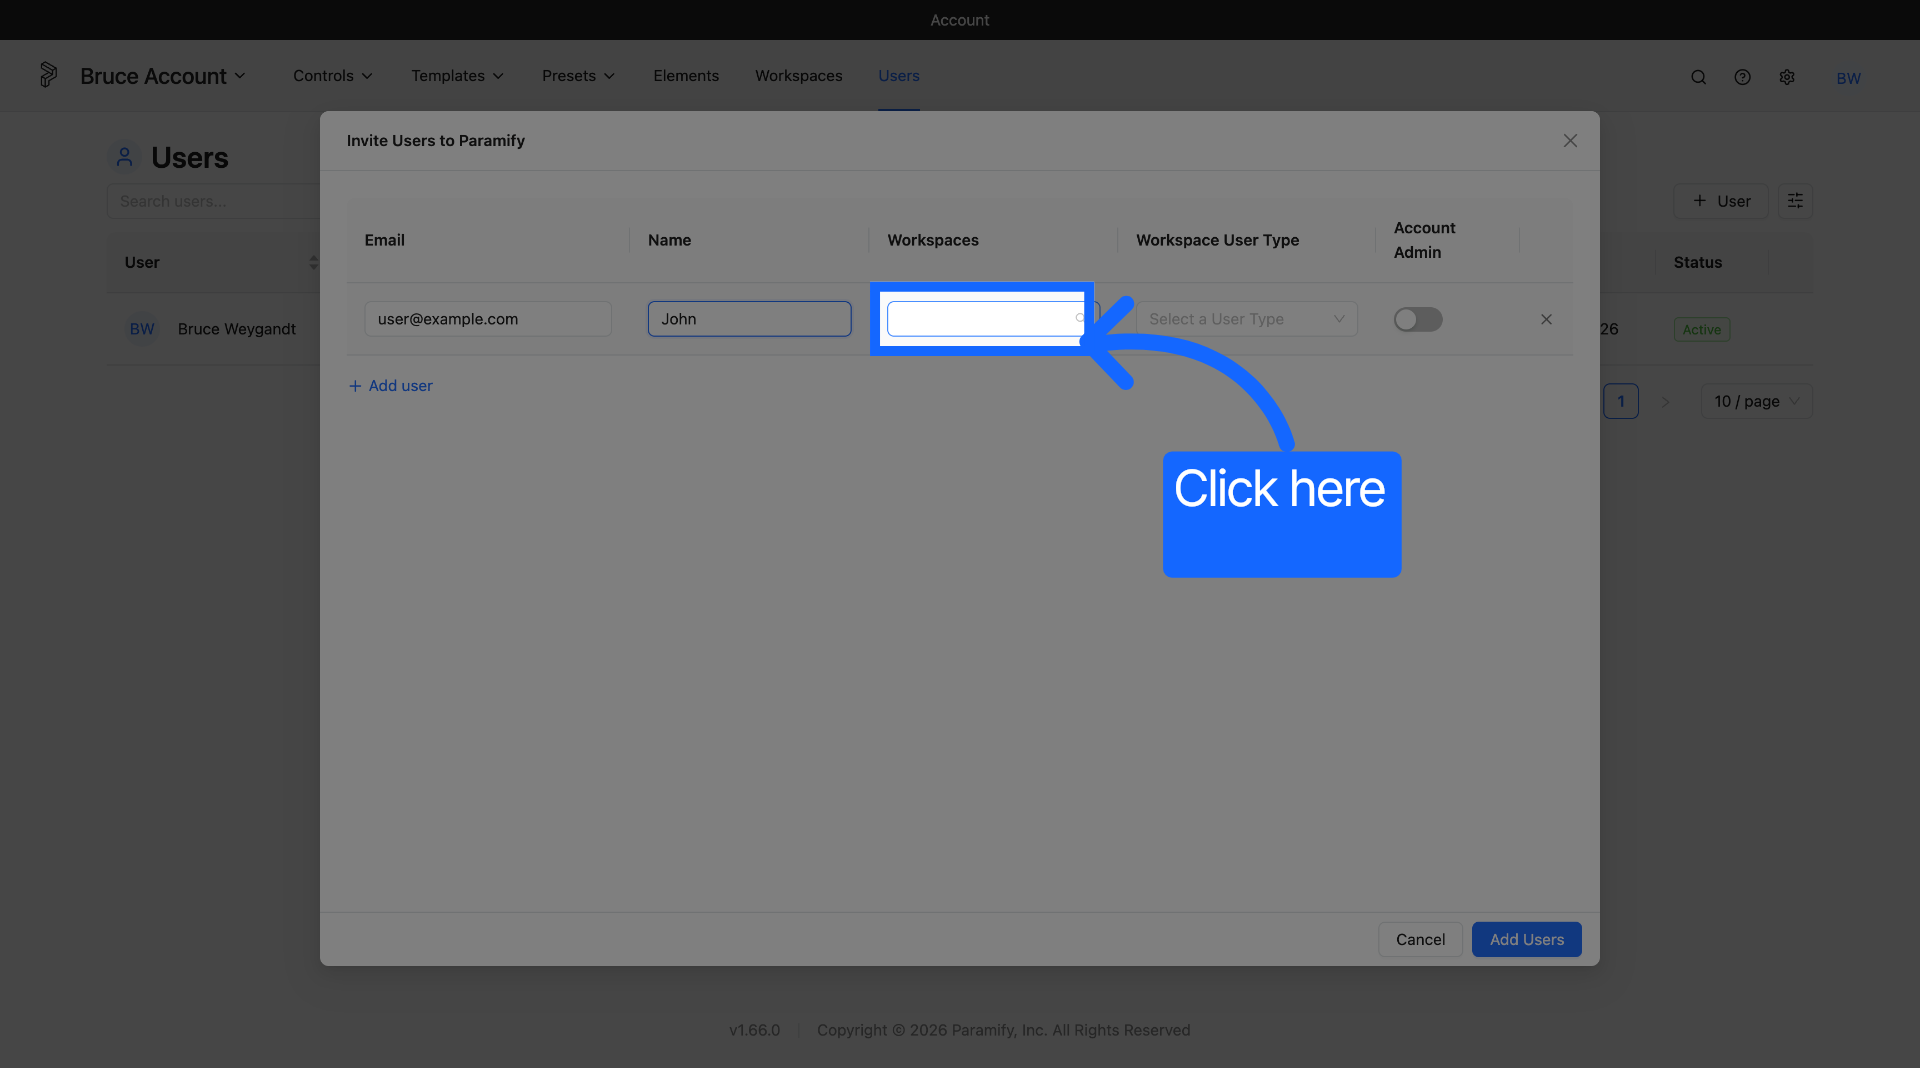
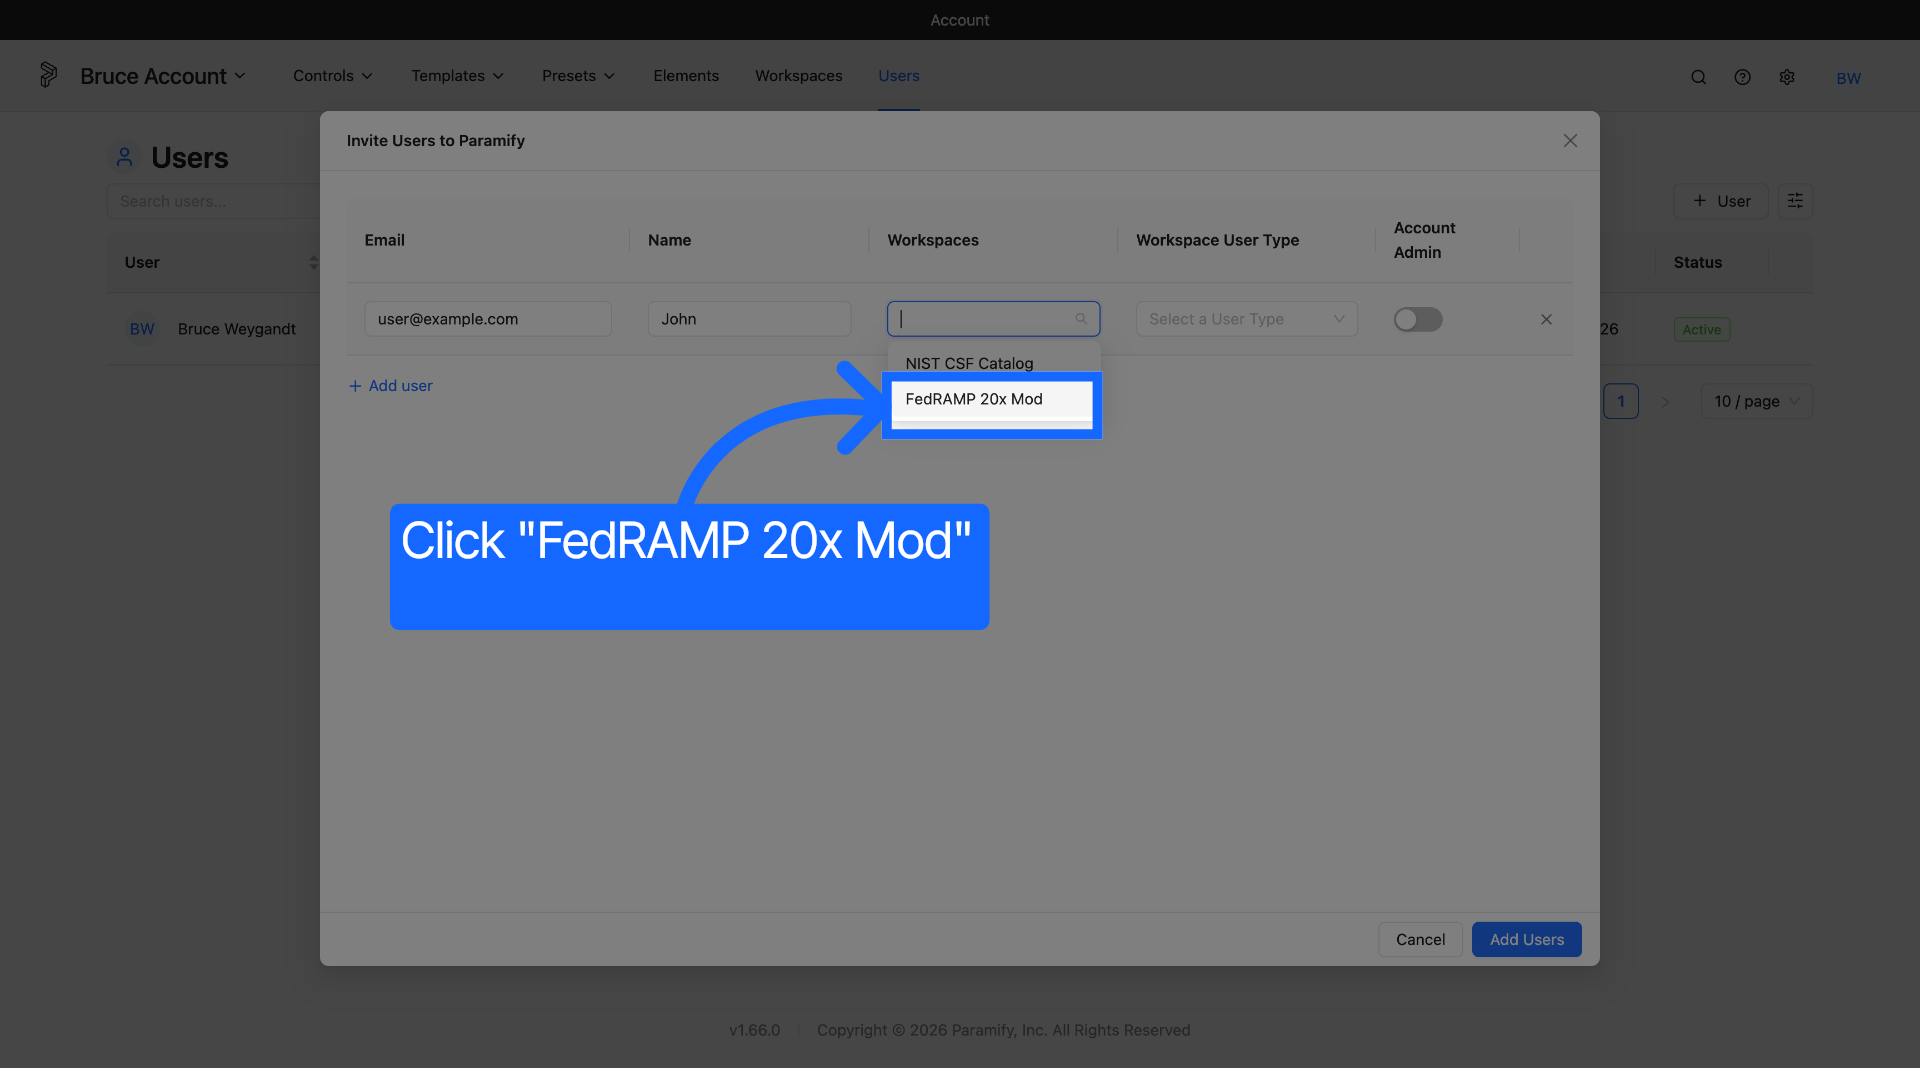
4. Select Workspaces
Select the Workspaces you want the user to have access to.
5. User Workspace Permissions
Select the type of user you want to assign from the options.
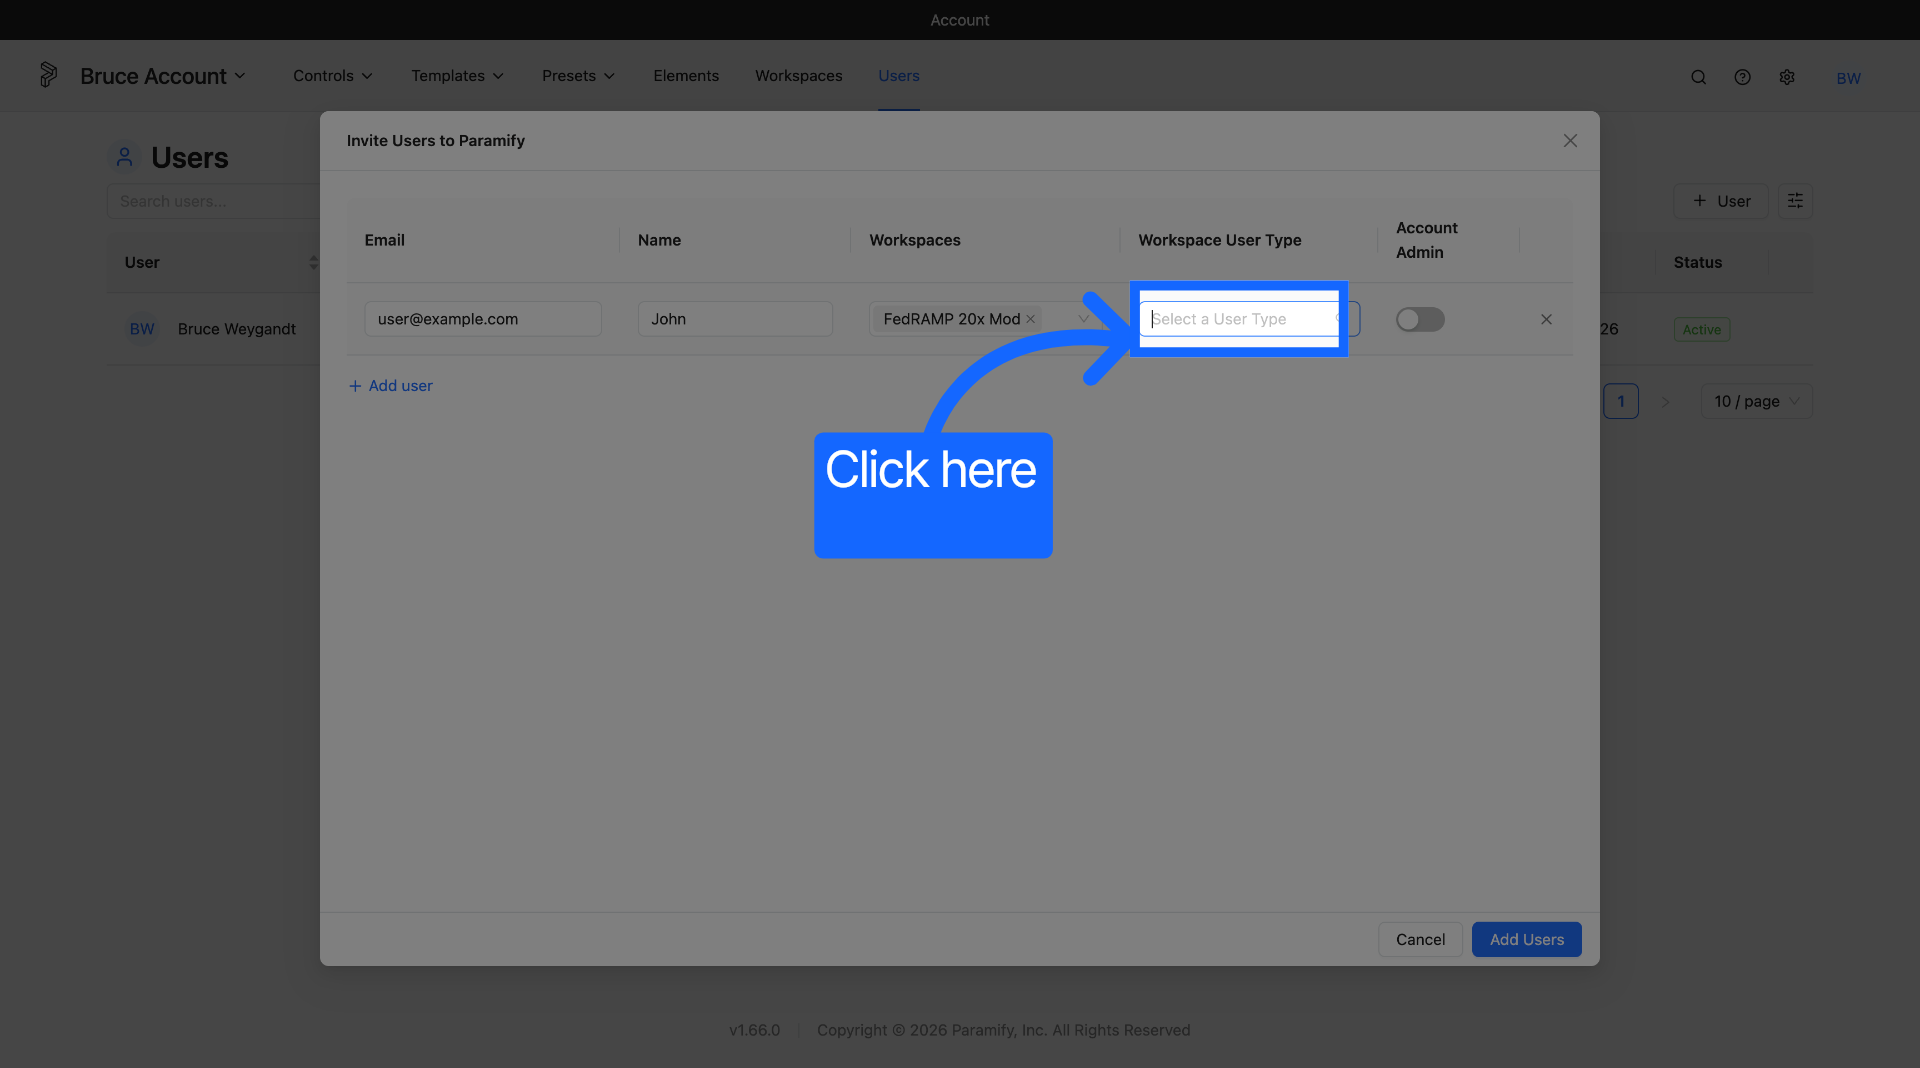
| User Type | Permissions |
|---|---|
| Admin | Create, Update, and Delete Solution Capabilities and Elements. Create, View and Manage Programs. Manage Workspace settings and user access. Use Data Import features. |
| Assessment Viewer | Can review assessments in read-only mode. |
| Assessor | View and Update assessments. |
| Collaborator | View and edit Solution Capabilities assigned to them. View and create Elements. |
| Editor | Create, Update, and Delete Solution Capabilities and Elements. Create, View and Manage Programs. |
| Viewer | Can review Elements, Solution Capabilities, Risk Solutions, Control Implementations, and Evidence. Can assign reviewers, manage reviewer comments, and add artifacts to Evidence. Can edit and answer questionnaires on artifacts and attestation questionnaires on evidence. |
6. Admin Toggle
You can click the Account Admin toggle to assign the user as an Admin as well.
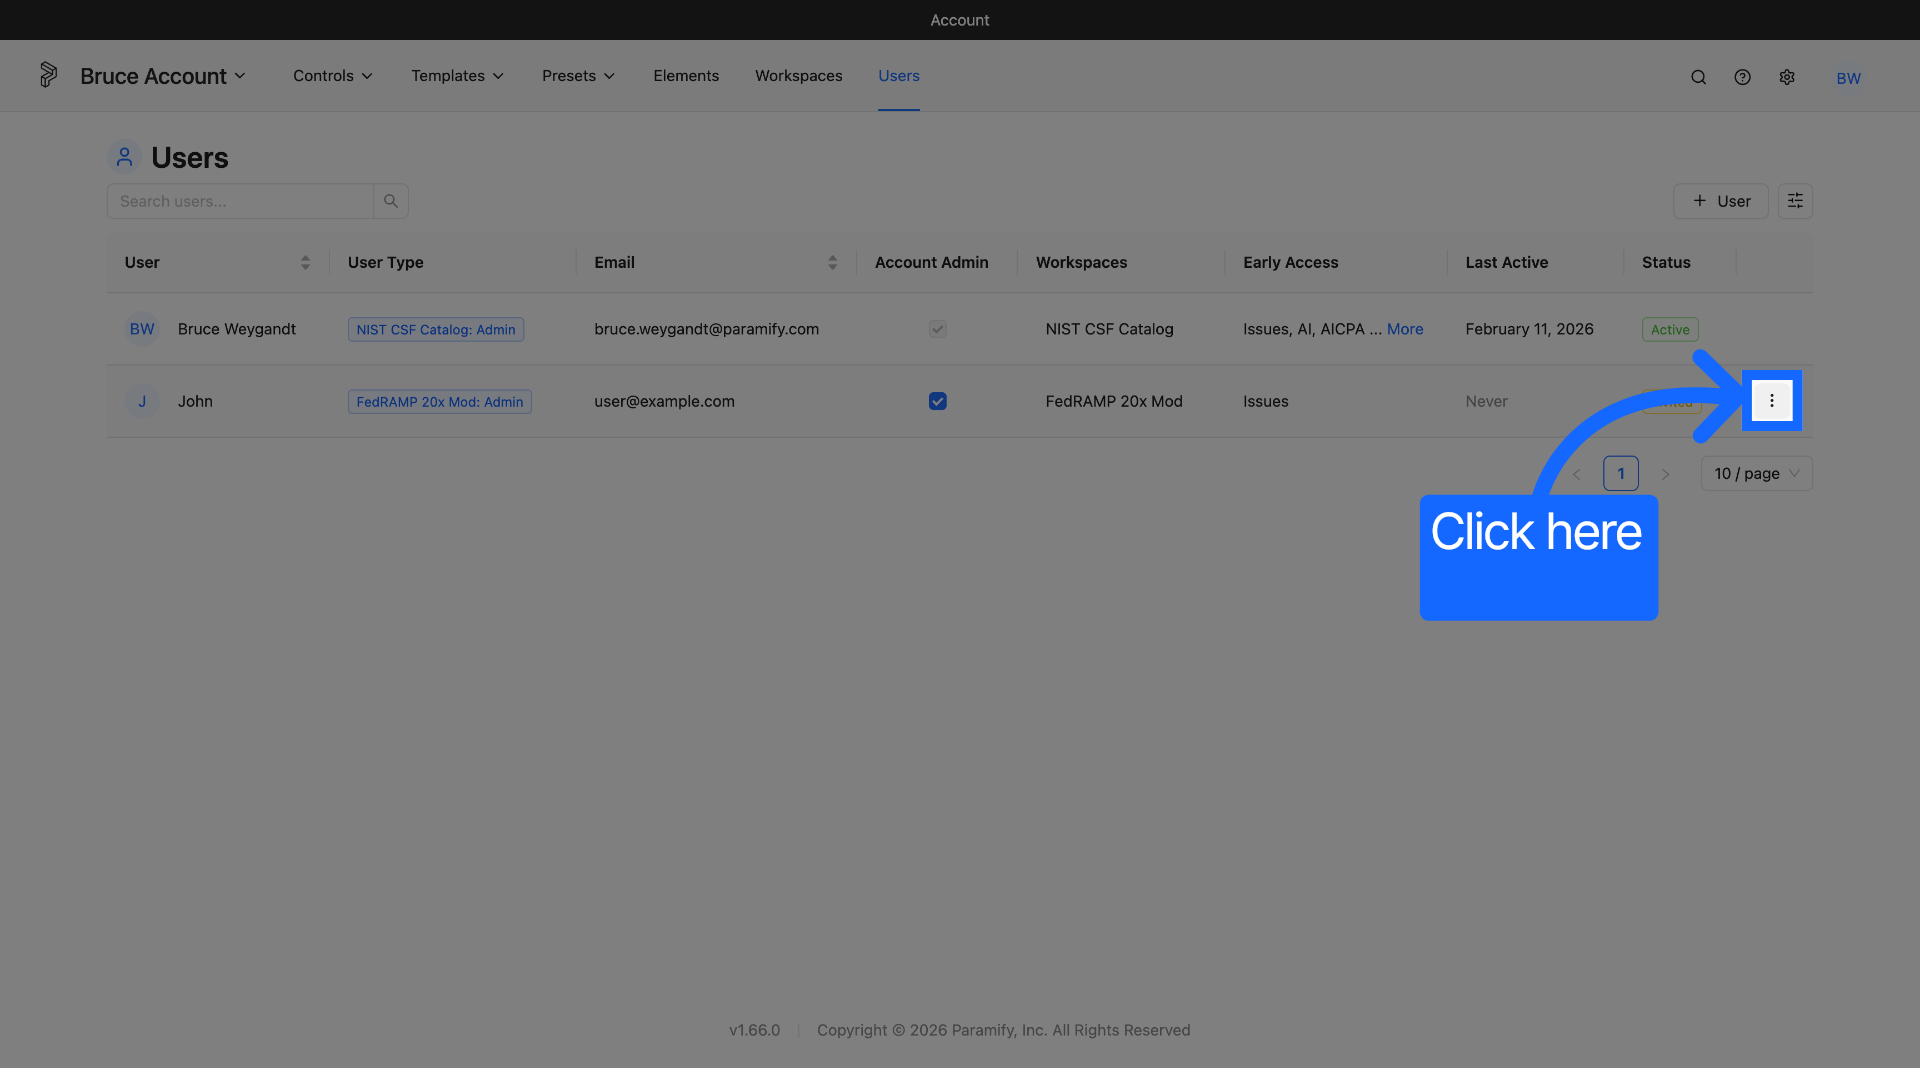
7. Add User
Click "Add User" to finish creating the user. An invite will be sent to the user via email.
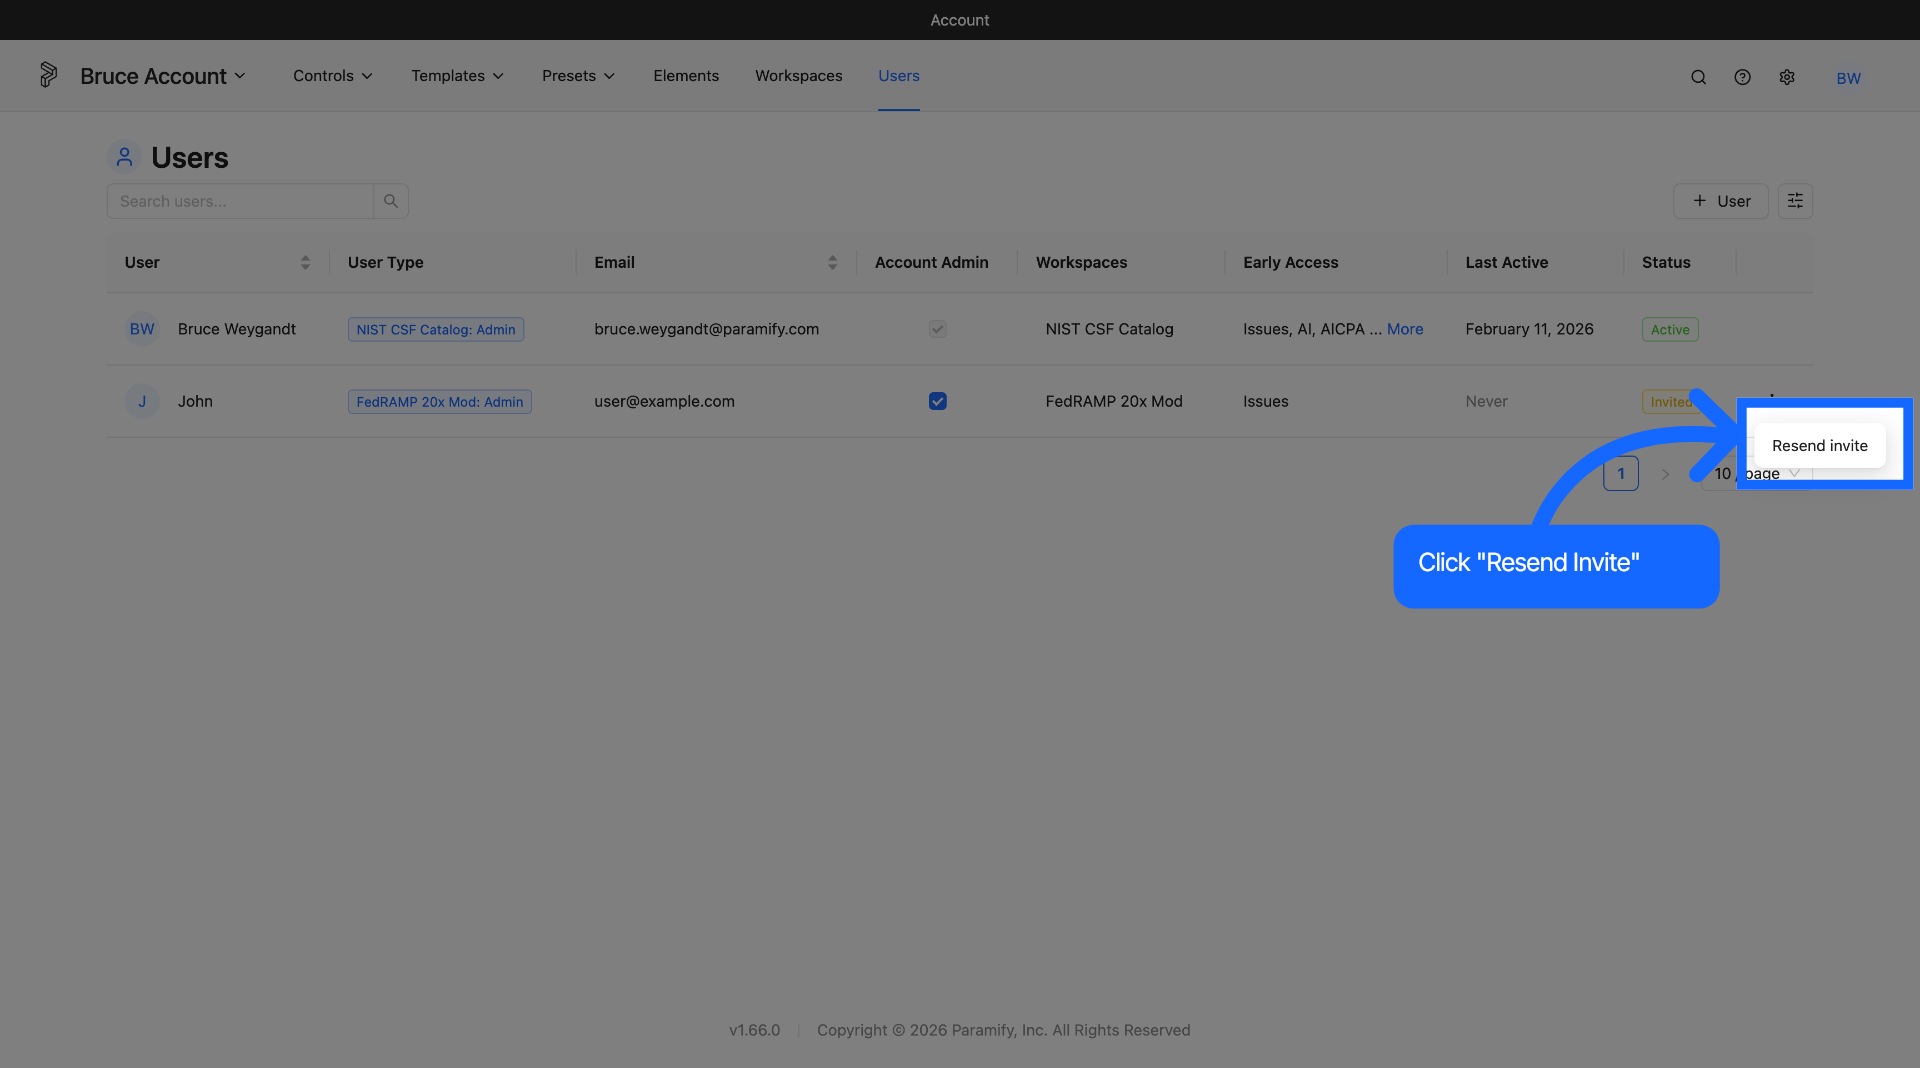
8. Resend Invite
Click the three dots to find the option to resend the invite if needed.
If you click a user, you can view and modify the details of that user anytime you desire.
Account Settings
If you navigate to the Account Settings at the top right corner of your screen, you will arrive at the following Account Settings page. You will have three settings you can modify: Account Name, Logomark, and Favicon.
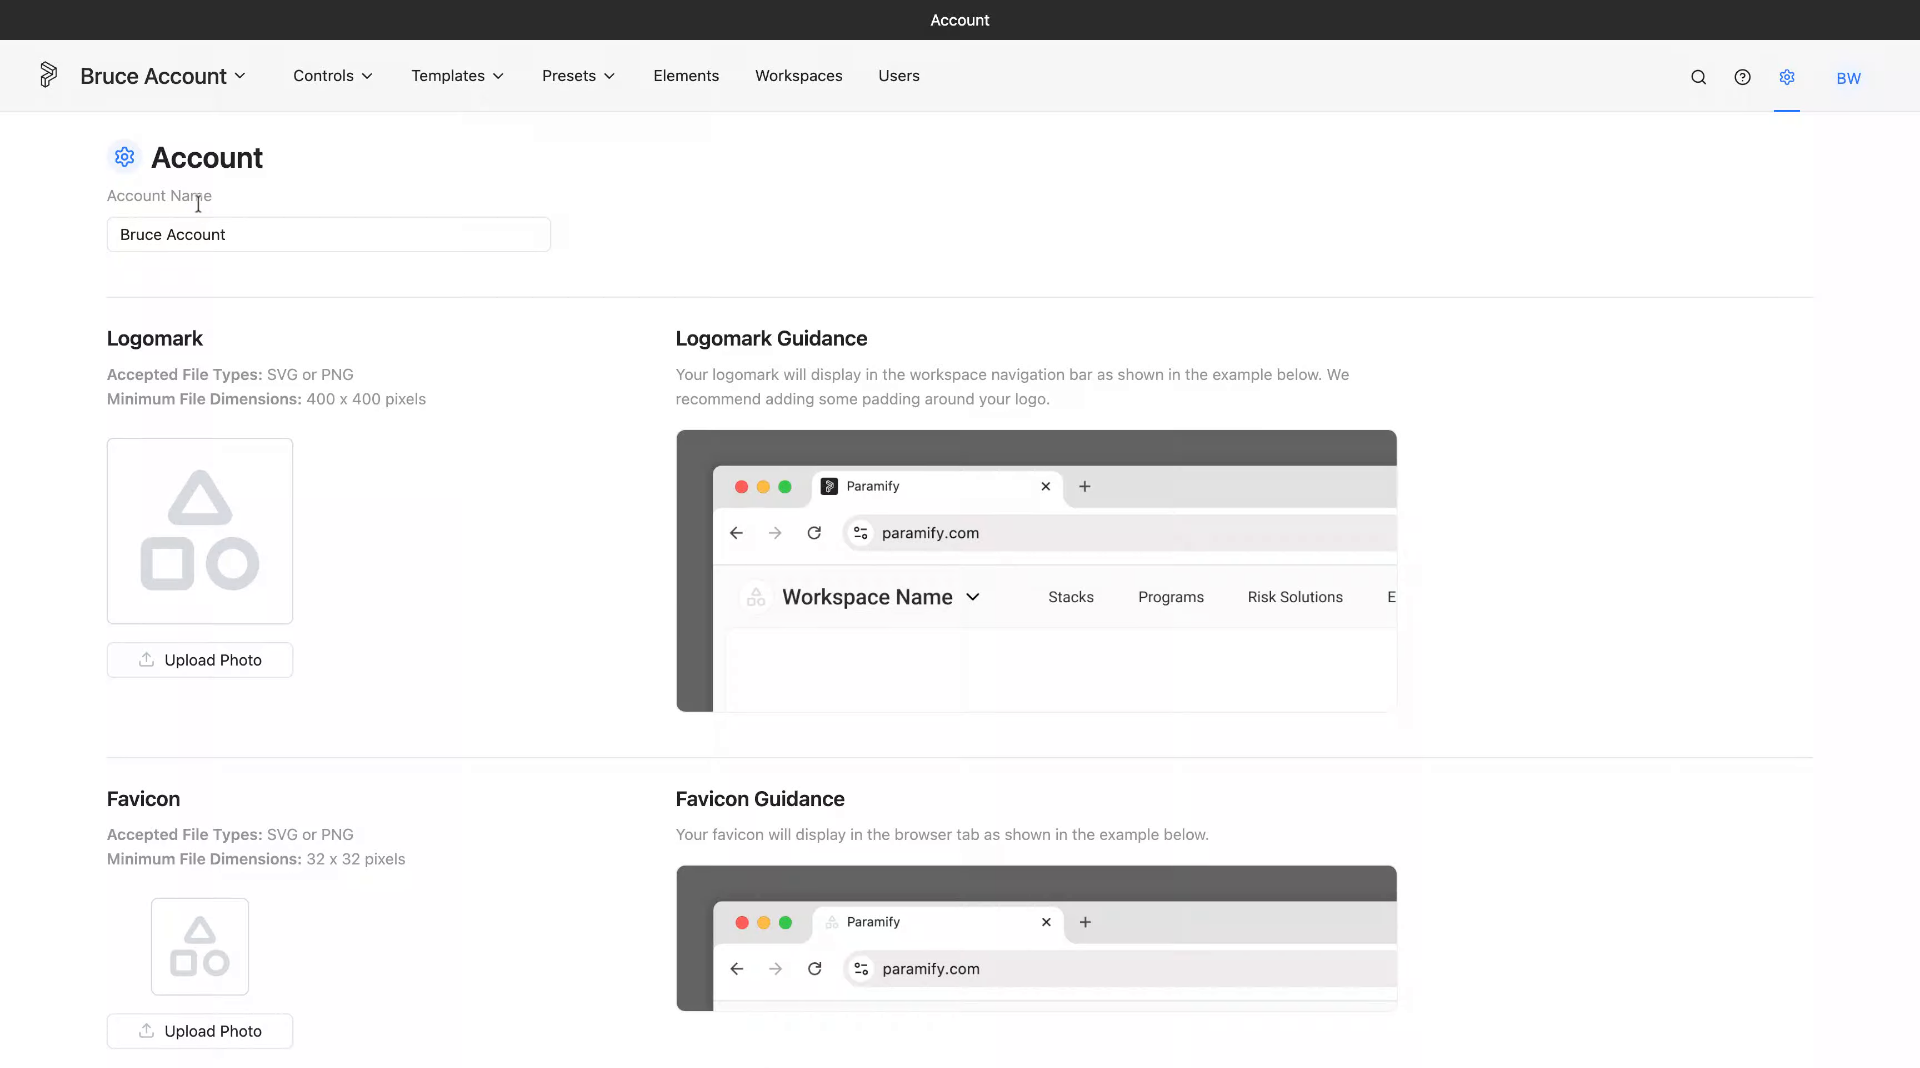
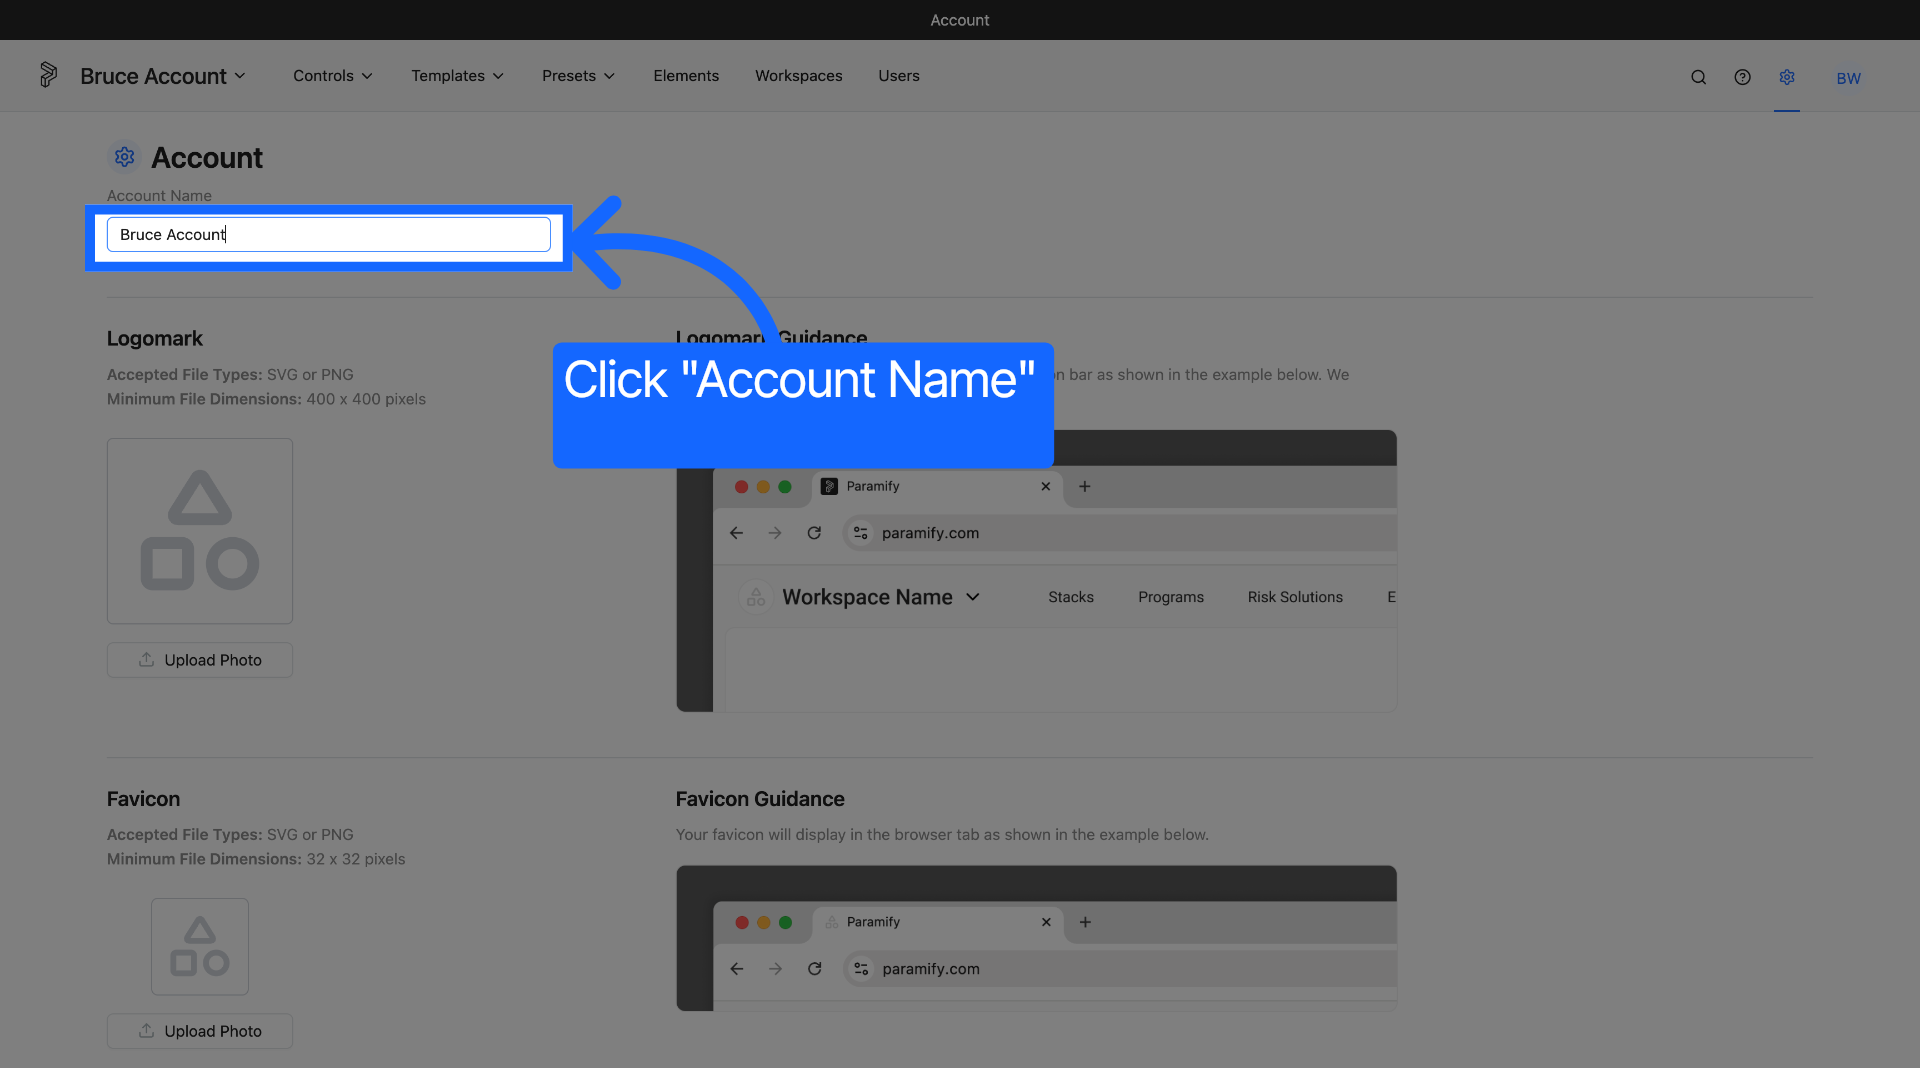
1. Account Name
Click "Account Name" to customize your Account Name.
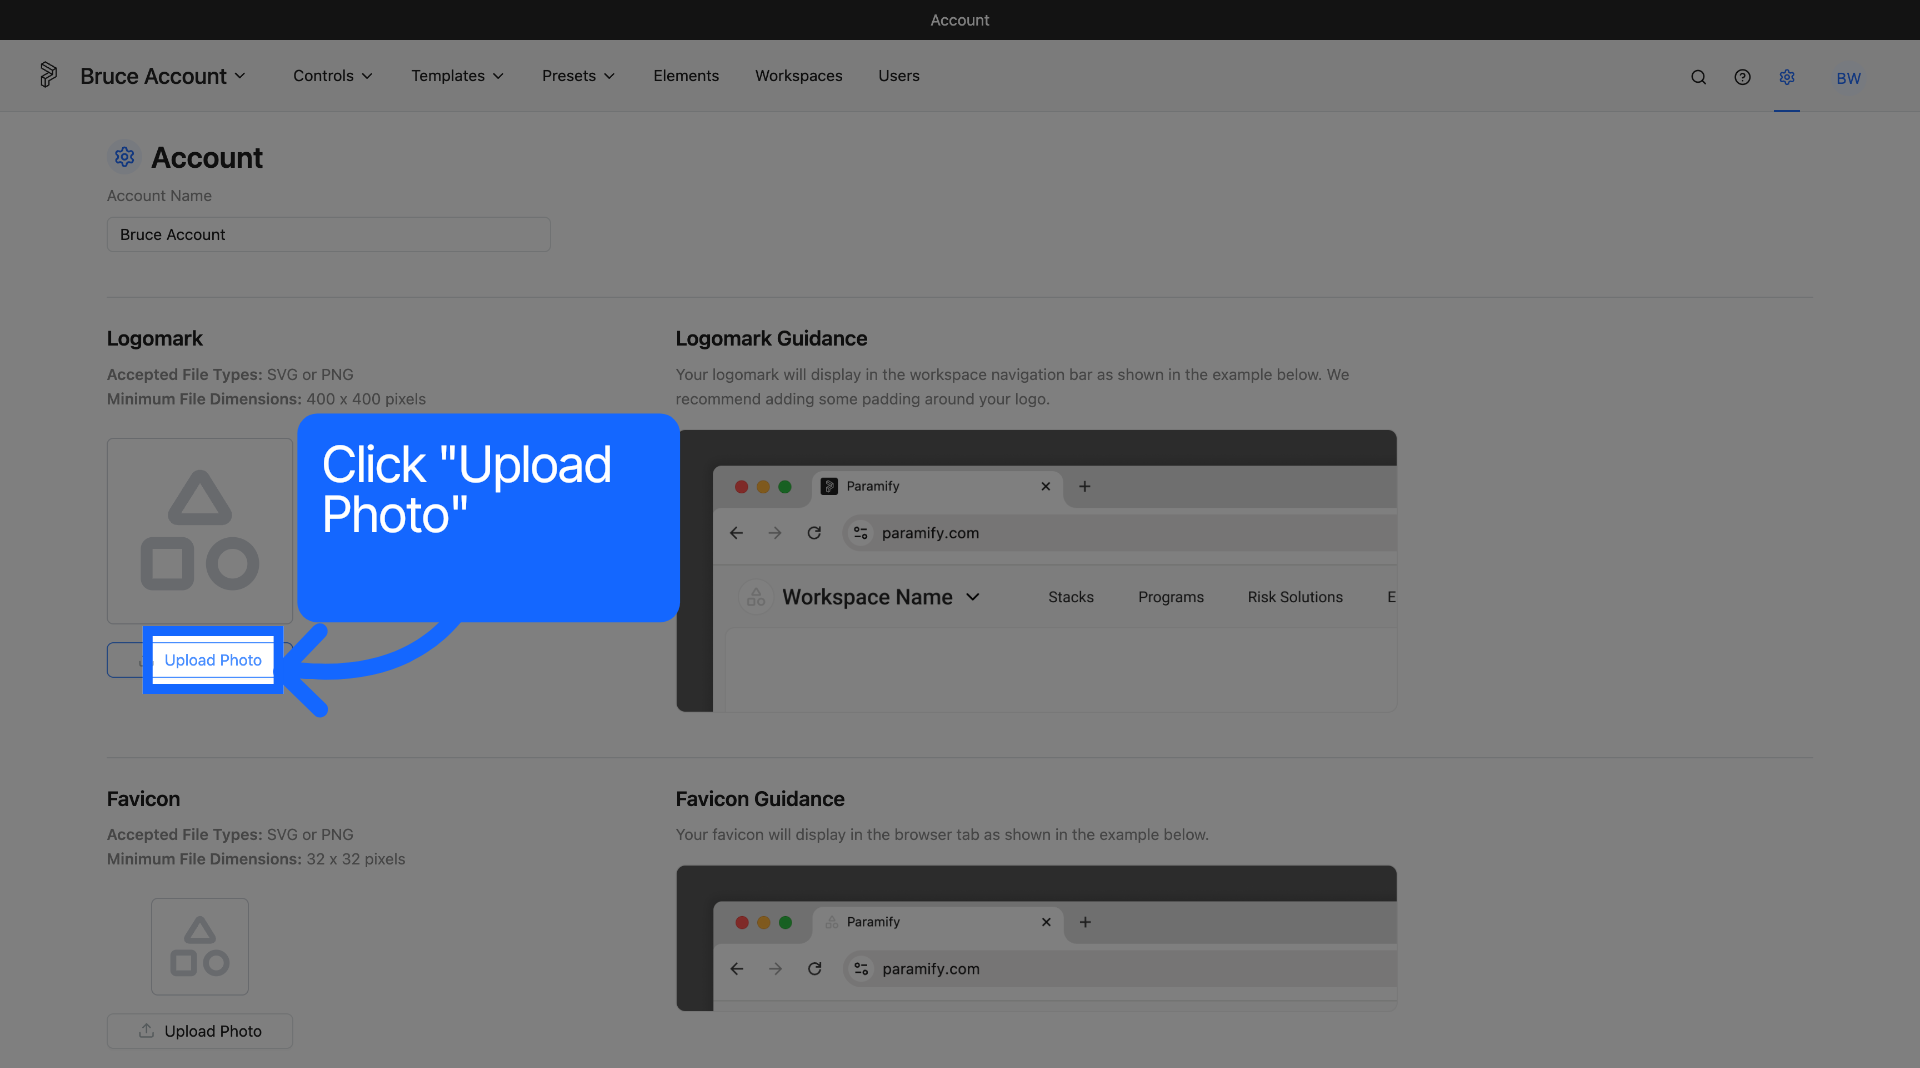
2. Logomark
Click "Upload Photo" in the Logomark section to select and upload your desired image for your Account. This will open the file picker on your computer. Your Logomark will display in the workspace navigation bar as shown in the example below. We recommend adding some padding around your logo.
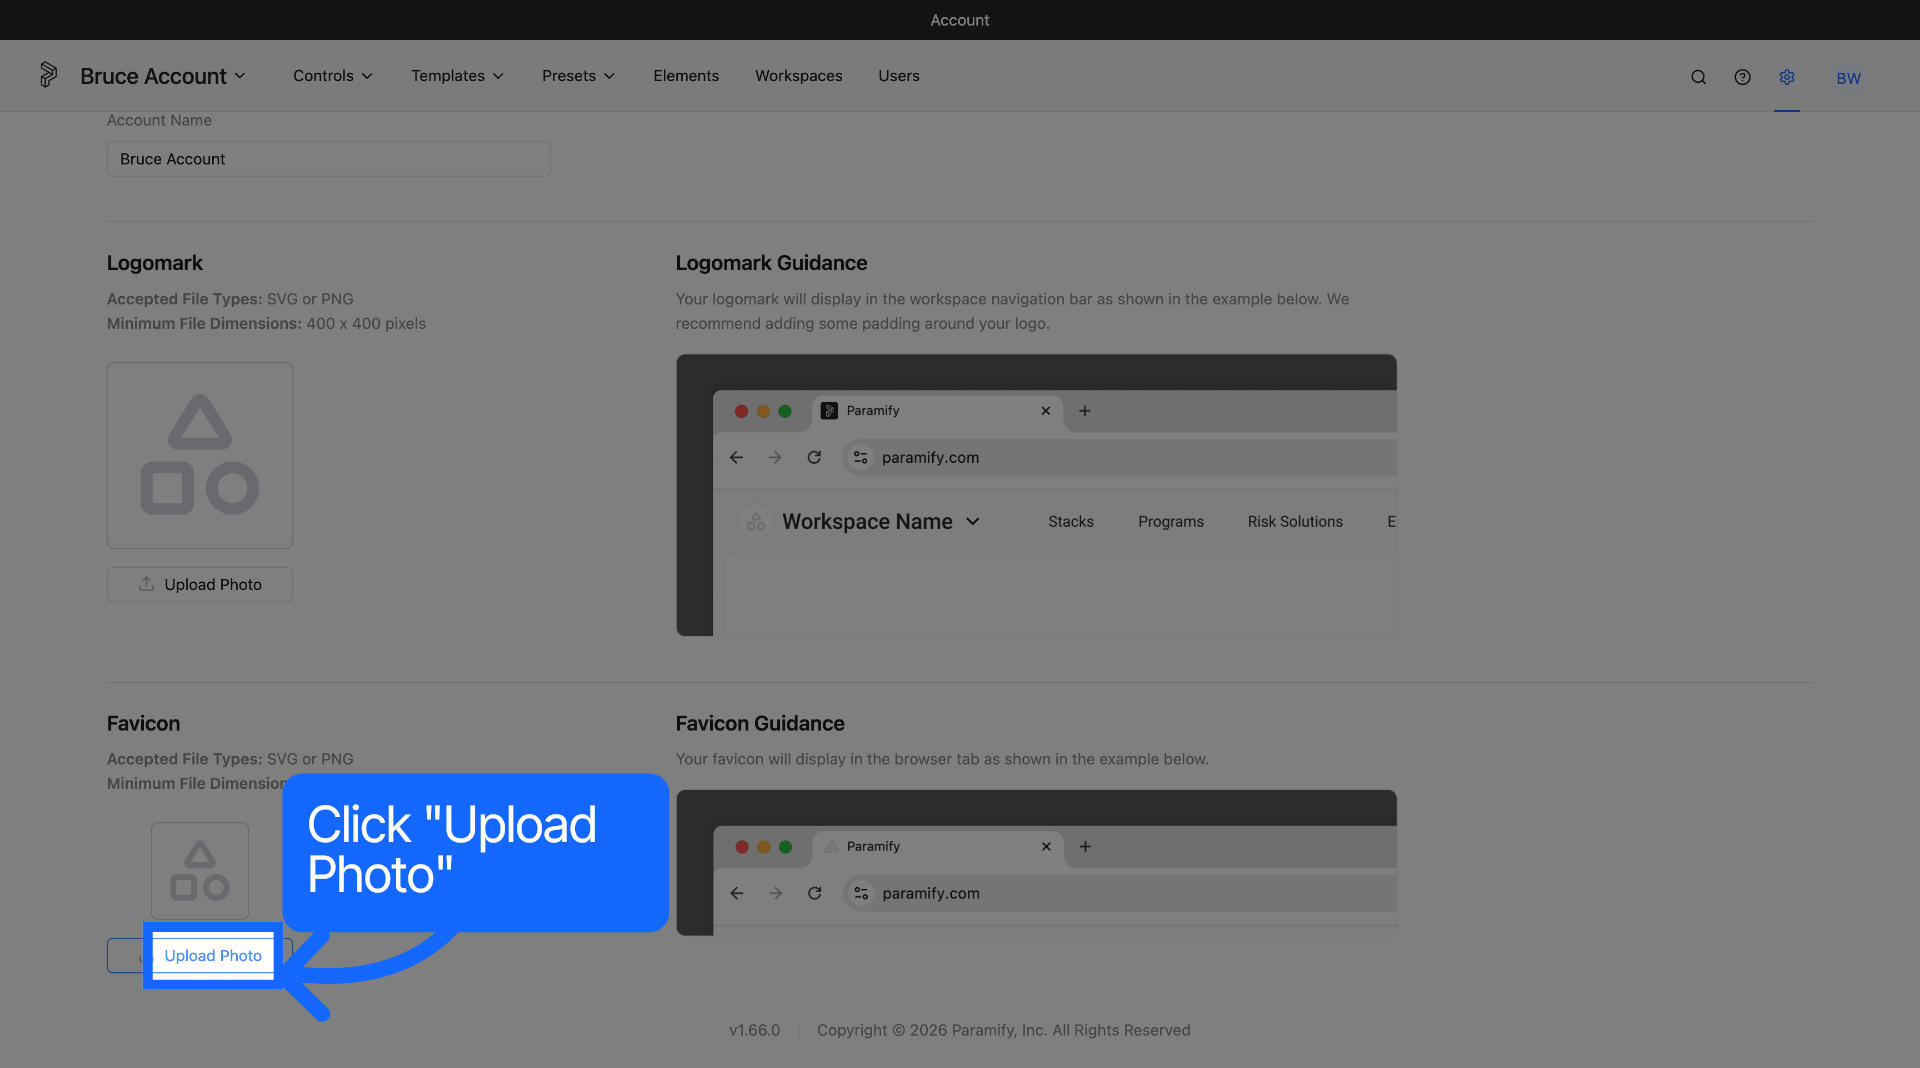
3. Favicon
Click "Upload Photo" in the Favicon section to select and upload your desired image for your profile. Your Favicon will display in the browser tab as shown in the example below.
Data Import Features
Admins in Paramify have the ability to import many types of data inside the Paramify App. Below are the types of importing data that Admins at the Workspace Level can do:
- Import POAMs from FedRAMP templates (CSV and XLSX)
- Globally import and export Inventory
- Import Elements
- Import project files
- Upload vulnerability scan files (JSON/XML/Nessus) via API
These features help streamline data management and risk tracking across compliance projects.
These capabilities are important for Admins to have so that they have control over what data goes inside the Paramify Workspace.
Comments
0 comments
Please sign in to leave a comment.